An Introduction to PLCSim Advanced

Introduction
TIA Portal includes its own PLC simulator called PLCSim that allows simulation of a large range of applications. However, not all the features of the PLC can simulated. Like Ethernet communications or web servers for example. For this case, we need to use a more powerful version of PLCSim called PLCSim Advanced.
PLCSim Advanced is a standalone software not included in TIA Portal. It needs to be downloaded separately and requires its own license. Unlike the basic PLCSim included in TIA Portal which can only simulate PLC programs locally without any possibility of communication with anything else, PLCSim Advanced tries to simulate an actual PLC as closely as possible. You can theoretically turn your PC into multiple working PLCs (up to 16 instances) using PLCSim Advanced. It can create a virtual network adapter to communicate with other devices and has a powerful API (Application Programming Interface) that allows you to access the simulations through first or third party software. However, the only downside is that we can only simulate S7-1500 CPUs (or ET200SP 1500 CPUs).
In this tutorial, we will discover how to configure and use PLCSim Advanced. Also, to demonstrate its capabilities, we will access the web server of a simulated PLC which is something that cannot be done with the basic PLCSim.
Prerequisites
To follow this tutorial, you will need an installation of TIA Portal and PLCSim Advanced. We will use TIA Portal v17 and PLCSim Advanced v4, but you can use any other versions. No additional hardware or software is required.
Overview of PLCSim Advanced
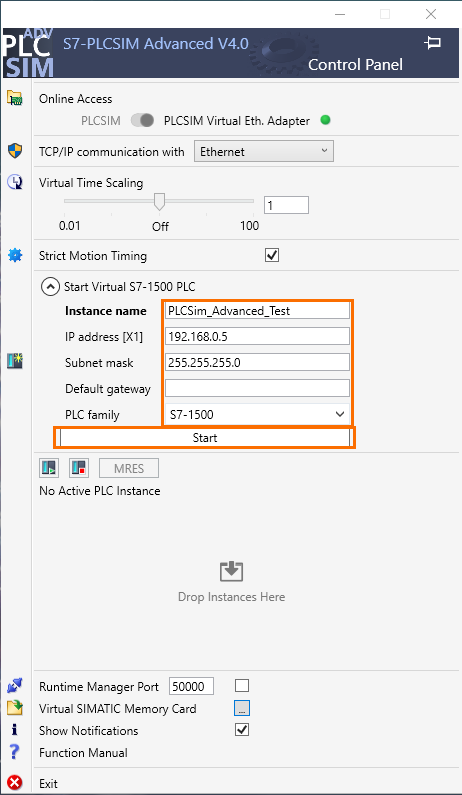
Let’s start by taking a look over the interface PLCSim Advanced. Start PLCSim Advanced in your PC. Once done, the control panel appears. This is where you can configure and create your simulated PLCs instances.

The first section, Online access, is where you can configure the network interface of the instance. By default, it is set to “PLCSim”. In this setting, PLCSim Advanced will behavior like the basic PLCSim. It won’t be able to communicate with the exterior except with TIA Portal. To activate the virtual adapter, click on the “PLCSIM Virtual Eth. Adapter”.

With the virtual adapter activated, you can configure the TCP/IP communication interface. You have two options available:
- Ethernet: Allows communication with the real Ethernet network.
- Local: Does not allow communication with the real Ethernet network.
One of the main point of using PLCSim Advanced is being able to communicate with other devices. So we will set the TCP/IP communication to Ethernet.

If you open your network connections, you’ll notice that a new Ethernet adapter has been created on your PC. It’ll have “Siemens PLCSIM Virtual Ethernet adapter” as description.

The next section, Virtual Time Scaling, allows you to modify the flow of time of the simulated PLC. When it’s set to off, the ratio of the PLC’s time over the actual values 1. It means that one second elapsed in the PLC is equivalent to one real second. You can use this to gather simulation data faster by increasing the time factor or to slow down quick happening events to observe them more easily by decreasing the time factor for example. Be aware that this feature consumes a lot of your PC’s ressources. Use it if you have a powerful enough device.

Next is the Strict Motion Timing. It’s a new feature introduced with the version 4 of PLCSim Advanced. With the old versions, if you use a motion control application in your project (MC-Servo OB91 present in your program), it can cause a “OB91 Buffer overflow” error in your CPU, specially with lesser powerful PCs. It happens when the simulated PLC’s execution is out of sync with OB91 cycle time. By activating the Strict Motion Timing option, you force the execution of OB91 to be synchronized with the simulated PLC preventing the error to occure.

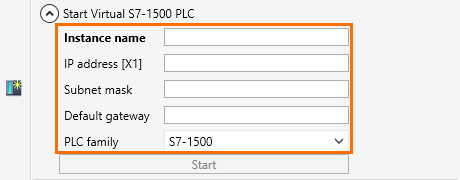
Now we come to the most important section. The Start Virtual PLC Section. As it name shows, this is where you configure and create your instances. By default, if we were using the PLCSIM mode in the Online access, there would be only two settings available: the instance name and the PLC family (S7-1500 or ET200SP). But since we’re using the virtual Ethernet adapter, we have also have to specify the IP address and subnet mask. Please note that the specified IP address and subnet mask must be the same as the one configured in the hardware configuration in TIA Portal. Once all settings are done, we only have to click on “Start” to create an instance.
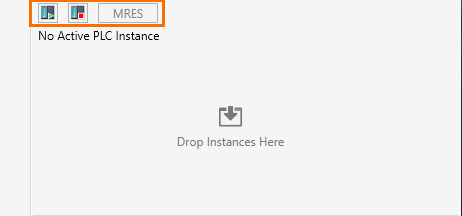
The next section is where you can manage your created instances. You can notice the presence of the PLC control buttons (Run, Stop and MRES). When an instance is created, it will appear in the box below.
Then we have additional settings, like the Runtime Manager Port that allows you to open a port for direct communication between different Runtime managers (Different PLCSim Advanced API’s).

And the virtual SIMATIC Memory Card that allows you to define a folder as the content of the memory card of the simulated PLC.

In the last section, you can check the Show notifications checkbox to allow PLCSim Advanced display Windows notifications when an event happens. You can also access the official documentation of PLCSim Advanced by clicking on Function manual. It’ll open the Function manual PDF where you can find more details about each functionality of PLCSim Advanced.

Simulating a web server in PLCSim advanced
To demonstrate how to use PLCSim Advanced, we will activate and display the web server page of the PLC. Accessing the web server is a feature exclusive to PLCSim Advanced since it is able to use TCP/IP communication.
Let’s start by creating an instance. Give a name to the instance and define an IP Address and a subnet mask. For this example, I’m using {192.168.0.5 / 255.255.255.0} address. Select the PLC family you want to simulate. we’re using an S7-1500 CPU. Be sure to be in PLCSIM Virtual Eth. Adapter mode using Ethernet as TCP/IP communication meaning. Once done, click on “Start”.
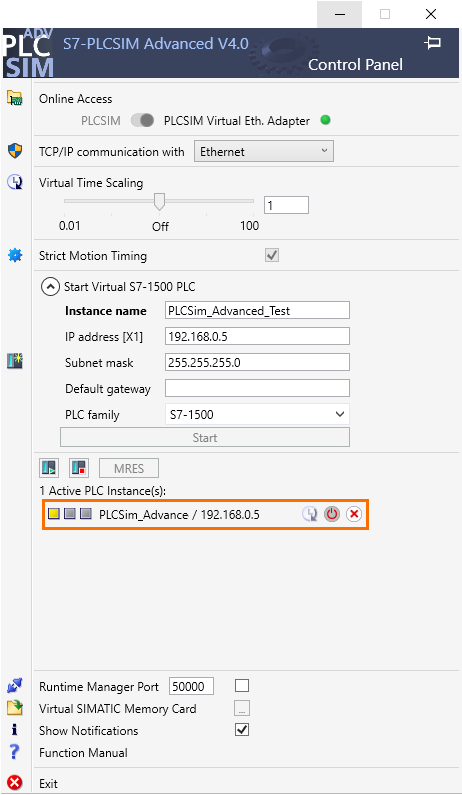
After a certain amount of time, the instance will be created. You can see it appear in the instance control section. Since no program is loaded yet, the CPU is in STOP mode (Yellow square). You can delete the instance by clicking the red “X” button on the right.
Be also sure to define the static IP address of the PLCSim virtual adapter in the same subnetwork as the simulated PLC. This will allow your PC web browser to access the PLC.

Now let’s go to TIA Portal. Create a new project and add an S7-1500 CPU. This is mandatory since we selected the S7-1500 family in the PLCSim advanced.
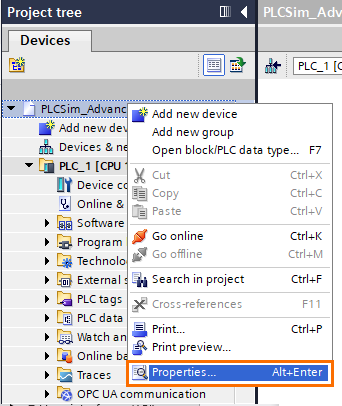
Next, we need to activate the simulation for this project. If we were using the basic PLCSim, this would be done automatically. Right click on the project section in the project tree, then click on “Properties”.
Once the properties’ window appears, open the “Protection” tab and check the “Support simulation during block compilation” checkbox.

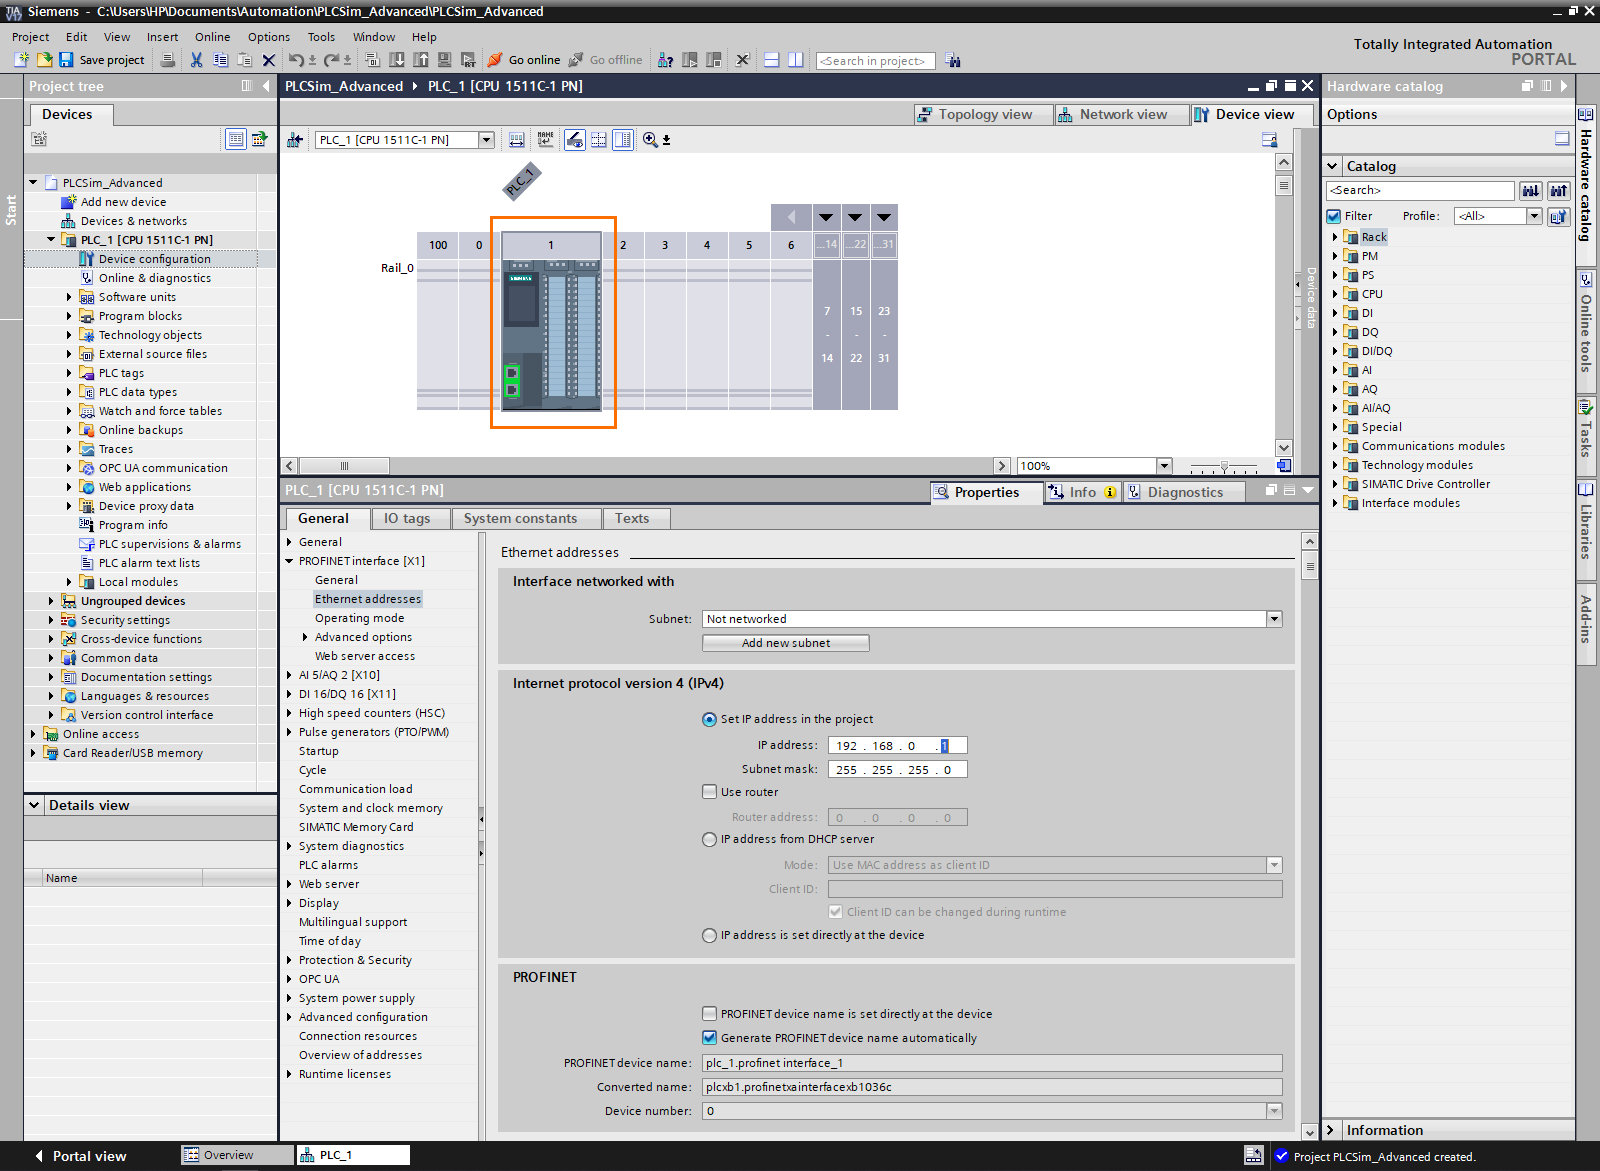
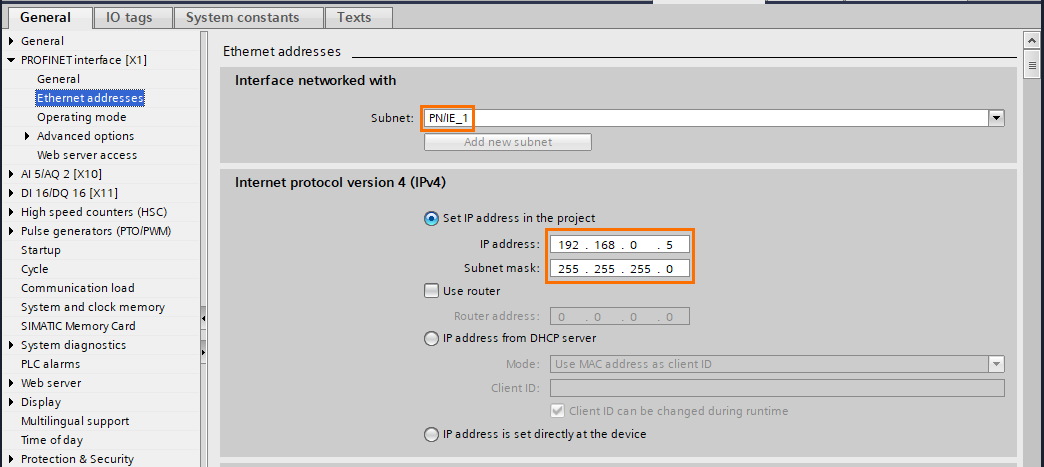
Now go back to the PLC’s properties, go to the “Ethernet addresses” section. Add a new subnet and define the same IP address as the one we defined in PLCSim Advanced.
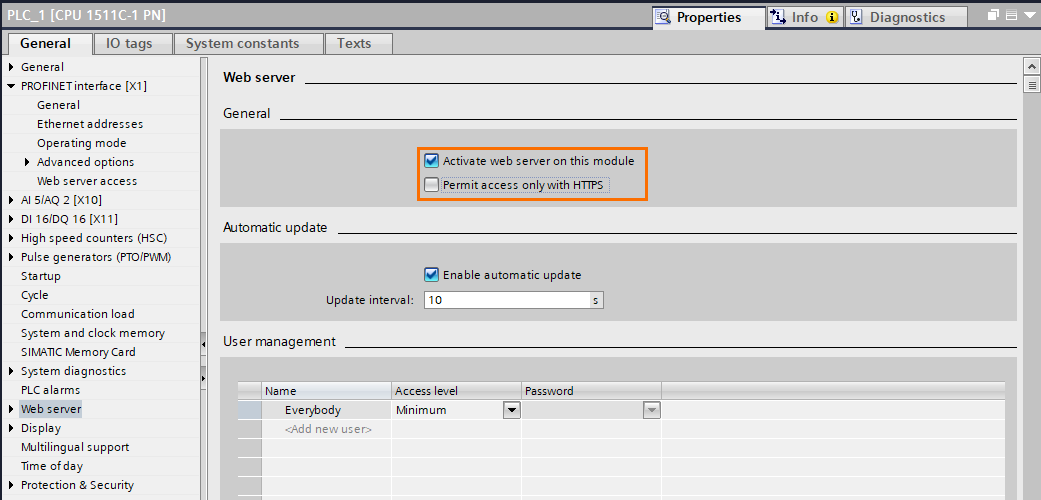
Next, still in the properties, go to the “Web server” section and Check the “Activate web server on this module” checkbox. You can also uncheck the “Permit access only with HTTPS” checkbox to prevent the warning when trying the web server page since we’re only doing tests.
The configuration is done, we can load the program into the simulated PLC. Click on the “Download to device” button.
In the loading window, select PN/IE in the “type of the PG/PC interface” section and “Siemens PLCSIM Virtual Ethernet Adapter” in the “PG/PC interface” section.

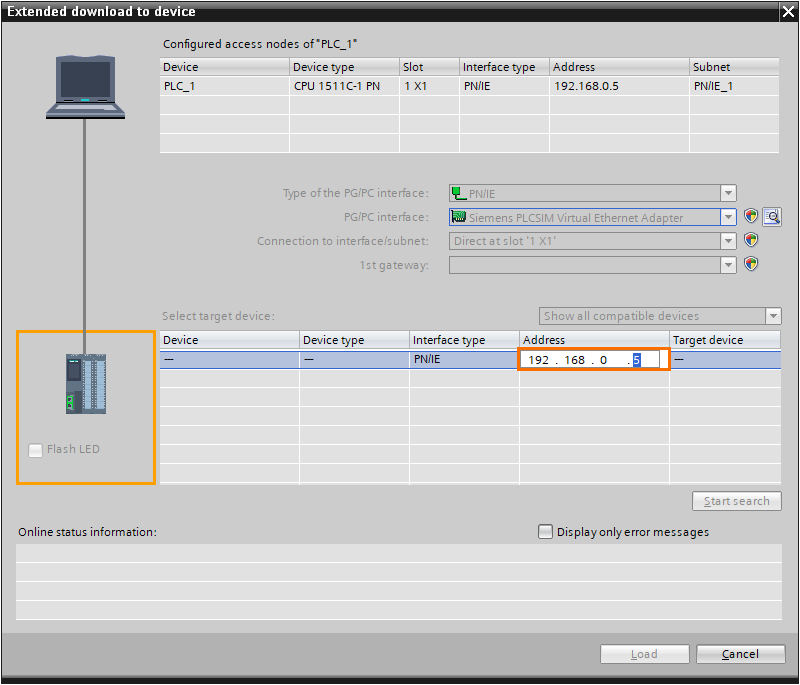
Then, for TIA Portal to detect the simulated PLC, we need to specify the address IP of the target PLC. In the “Select target device” section, click on the IP address and enter the IP address of the PLC (192.168.0.5) then press enter.
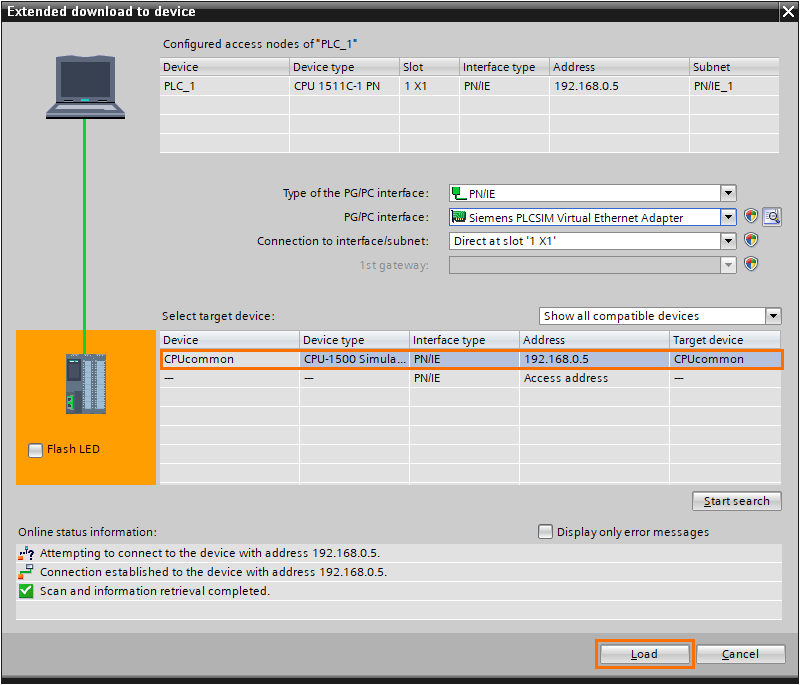
After the detection is done, select the found CPU and click on “Load”.
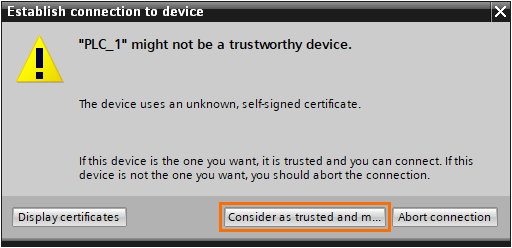
A security warning will appear telling you that the target device is unknown. This is a normal warning added in the v17 of TIA Portal. Click on “Consider as trusted”.
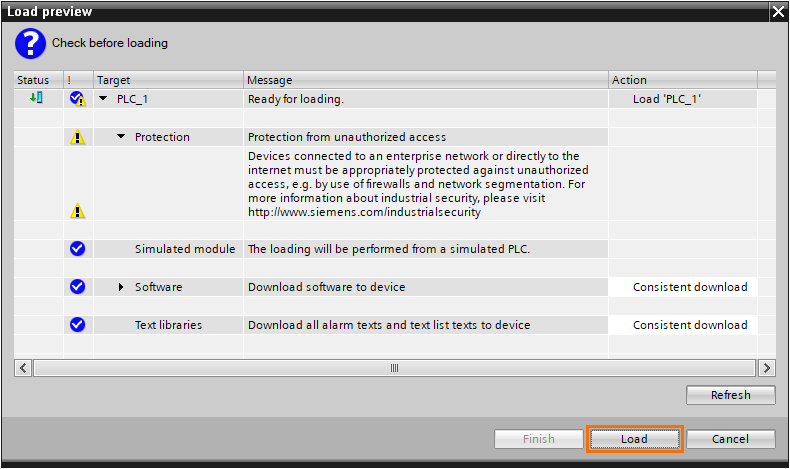
A load preview window appears containing the last details to check before loading. Click on “Load”.
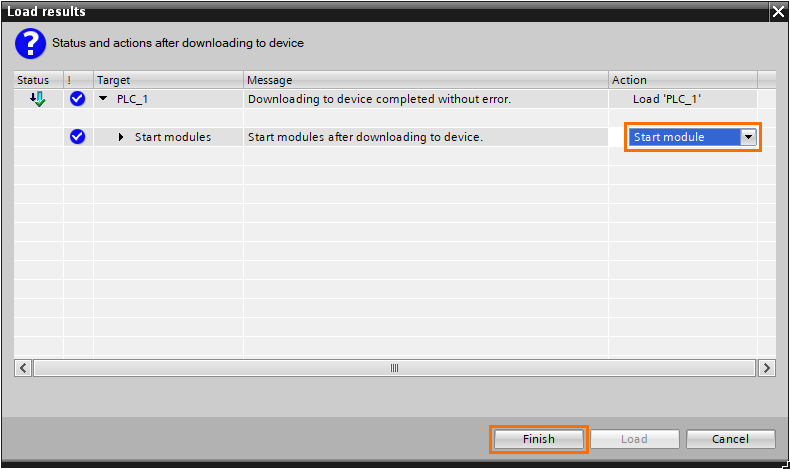
Once the loading is done, select “Start module” in the action column to put the PLC in Run mode. Then, click on “Finish”.
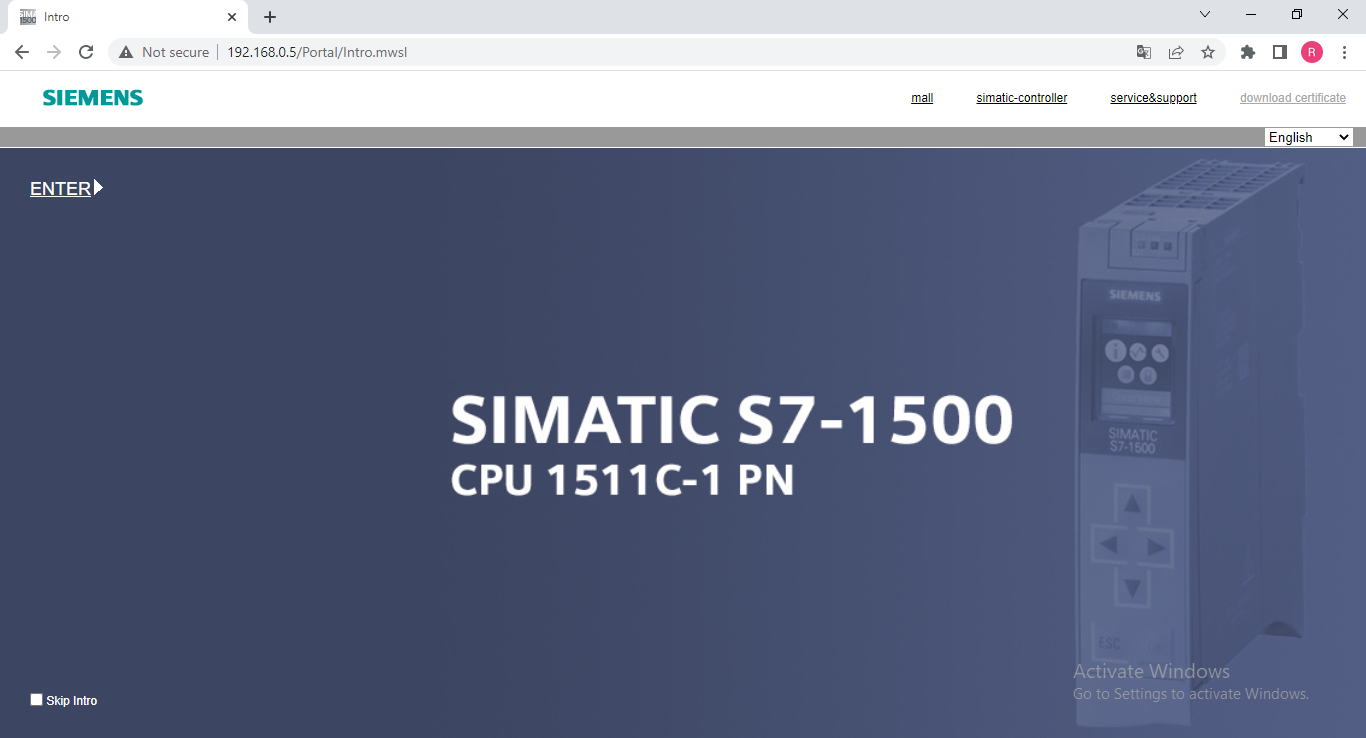
With the program loaded, the web server is now active. Open your web browser and type the IP address of the simulated PLC in the URL bar.

You now have access to the web server page. You can use this to test the possibilities default page or to test your own user-defined page.
Conclusion
In this tutorial, you learned how to configure and create a PLC instance in PLCSim Advanced.
Simulation is a major part of an industrial automation project. Allowing you to test your applications and interfaces without relying on actual hardware. PLCSim offers all the tools to realize complete simulations of your applications regardless their nature. It can be used to communicate with external devices (TCP/IP communications) or software (Via the API) for more optimization of your process and reproduces the behavior of actual PLCs as closely as possible.
