Securing your Projects and Programs in Siemens TIA Portal

Introduction
There are several types of threats that can affect an industrial system. For a long time, efforts were focused on the functional aspect of the system. However, with the rise of computer technologies and industry 4.0, industrial systems are more prone to software issues and cyber attacks.
To protect the system against different types of cyber failures, we use several levels or "layers" of protection.
In this tutorial, you will learn how to use the most basic layer of protection within the TIA Portal environment; The project and program protections.
Prerequisites
To follow this tutorial, you will need an installation of TIA Portal. We will use TIA Portal v17, but you can use any other version. No additional hardware or software is required.
Securing your project in TIA Portal
The first layer of protection is project protection. Access to your system's original project will grant you full access to your project's content, including critical process data and control.Securing it must always be your first step in securing your programs. Let’s start by creating a TIA Portal project.
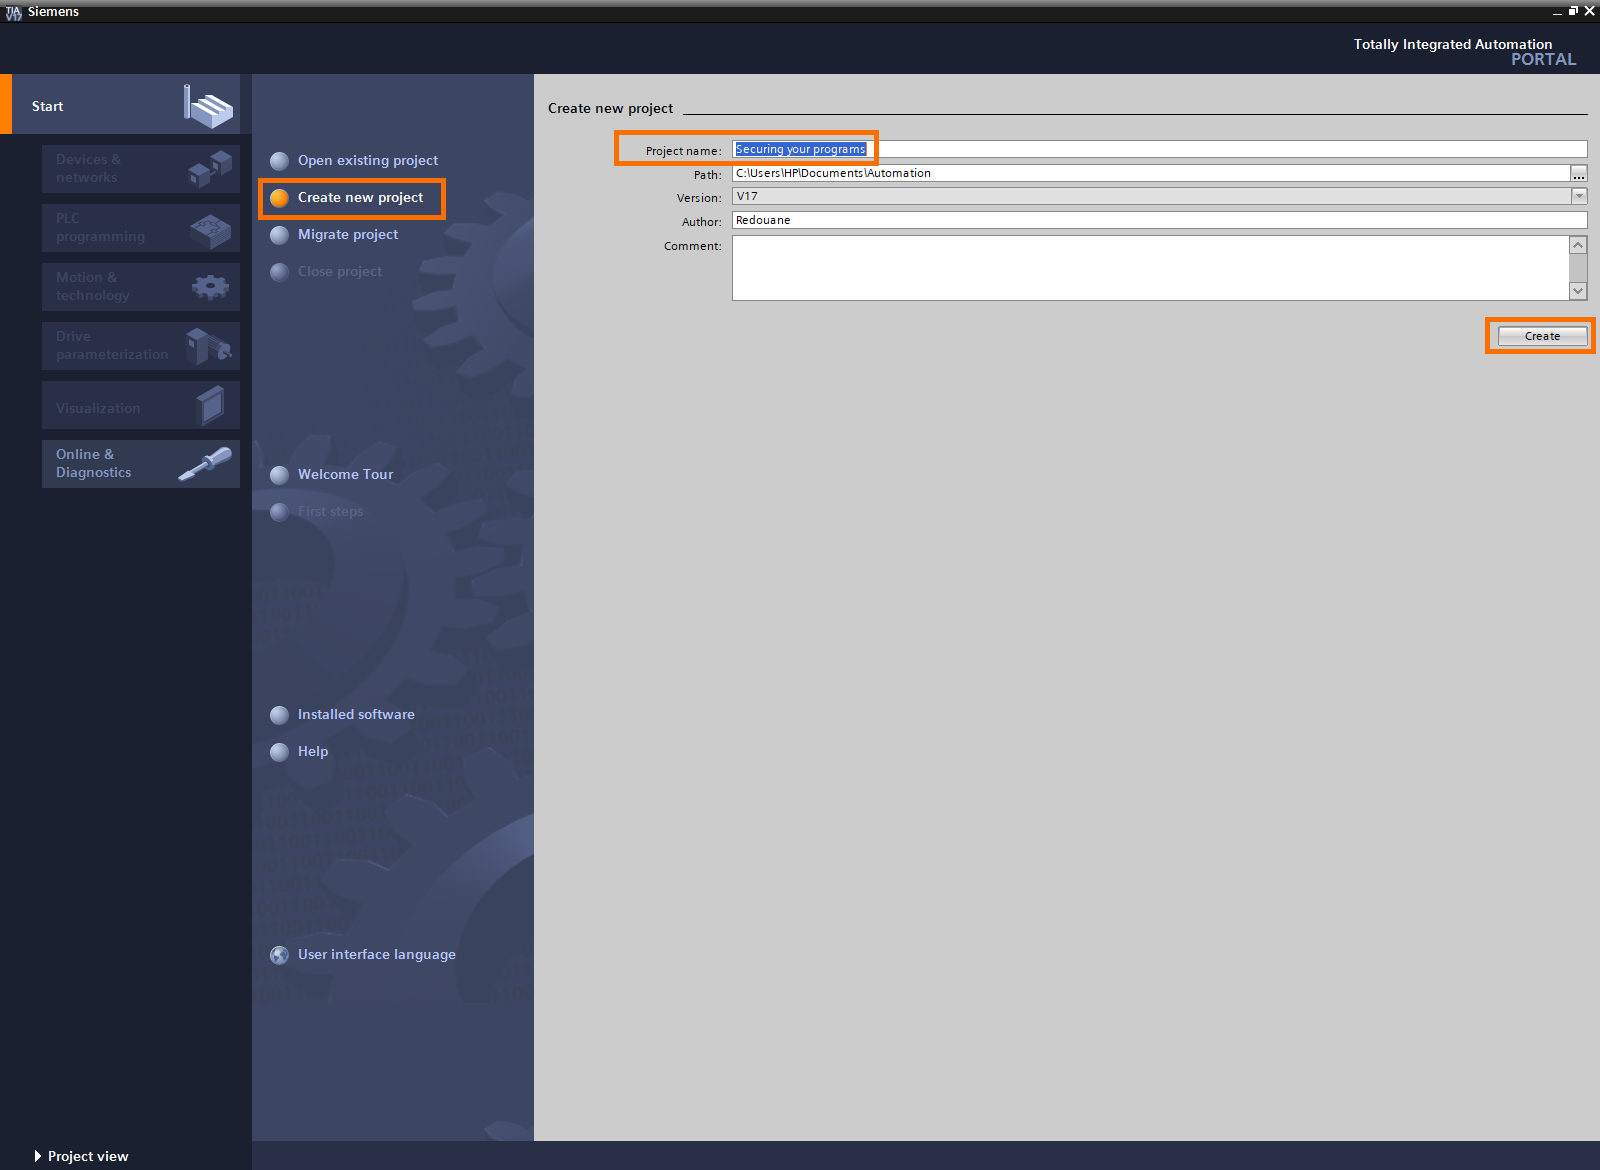
Open TIA Portal and click on “Create new project”, then give it a name and click on “Create”.
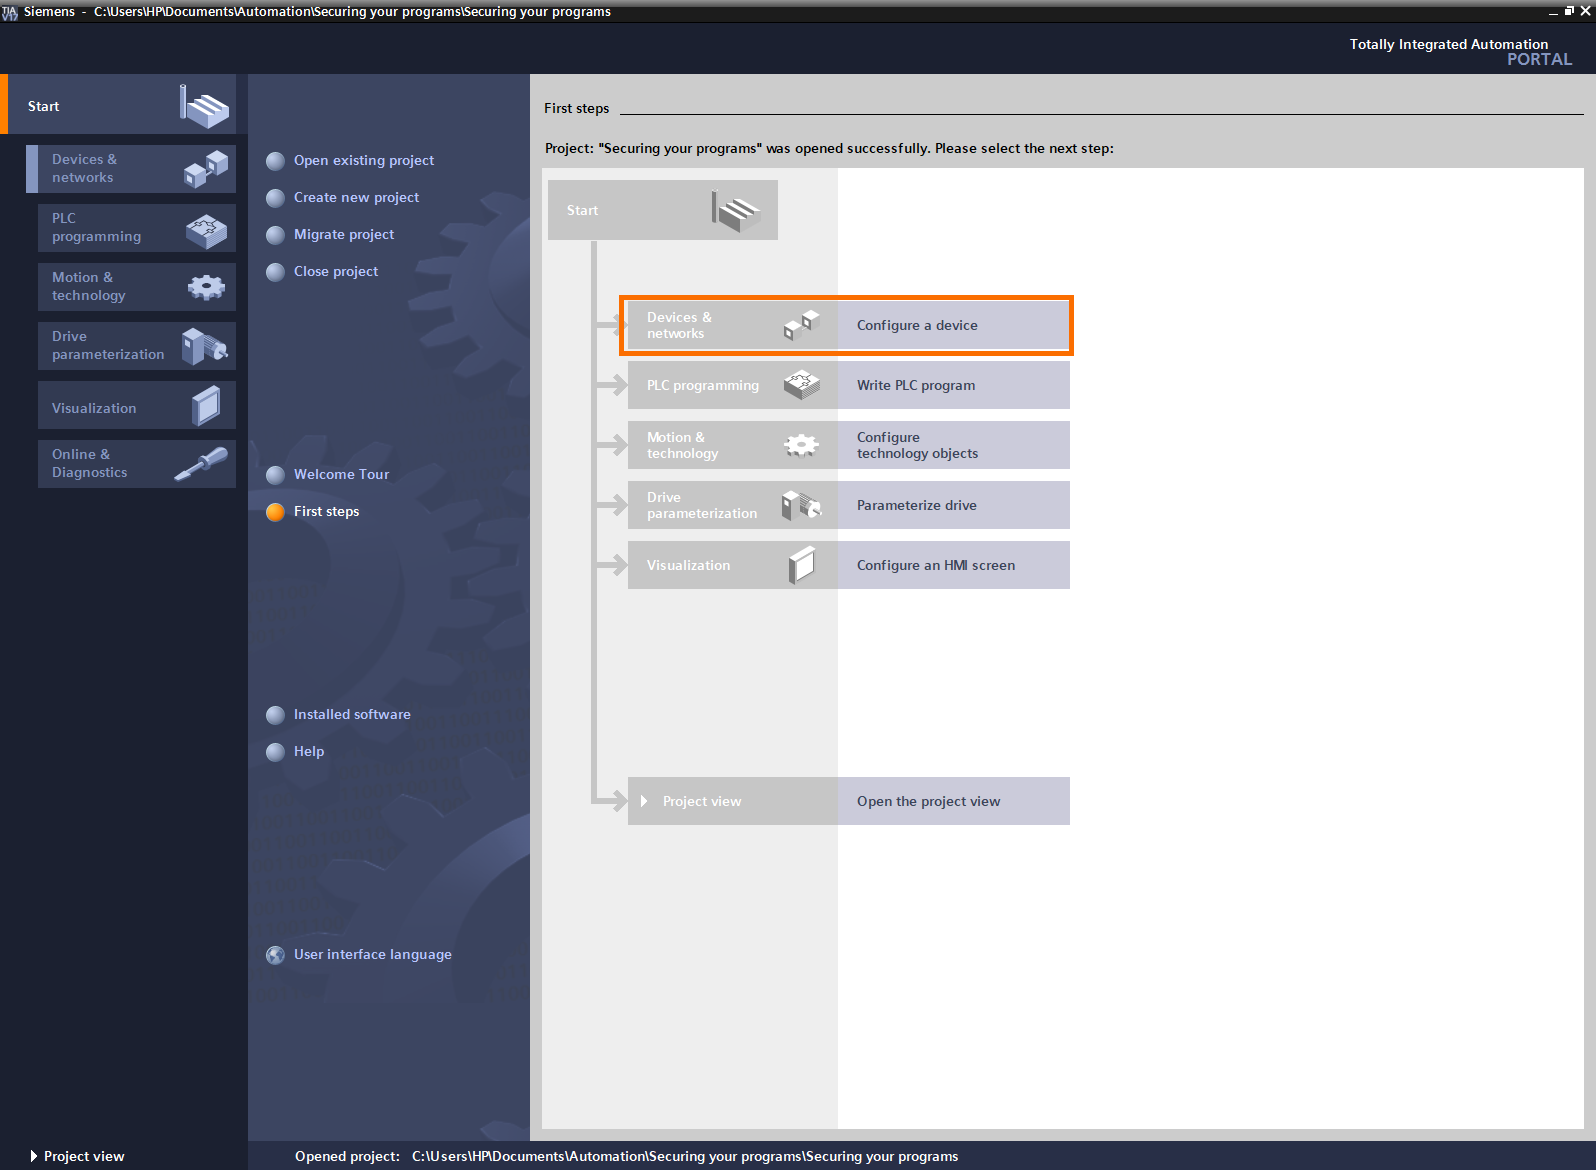
Then, click on “Configure a device” to add a CPU to the project.
Next, select the CPU you want. You can choose any model that meets your requirements. Here, we’re going to use a simple S7-1200C model. Once the CPU is selected, click on “Add.”

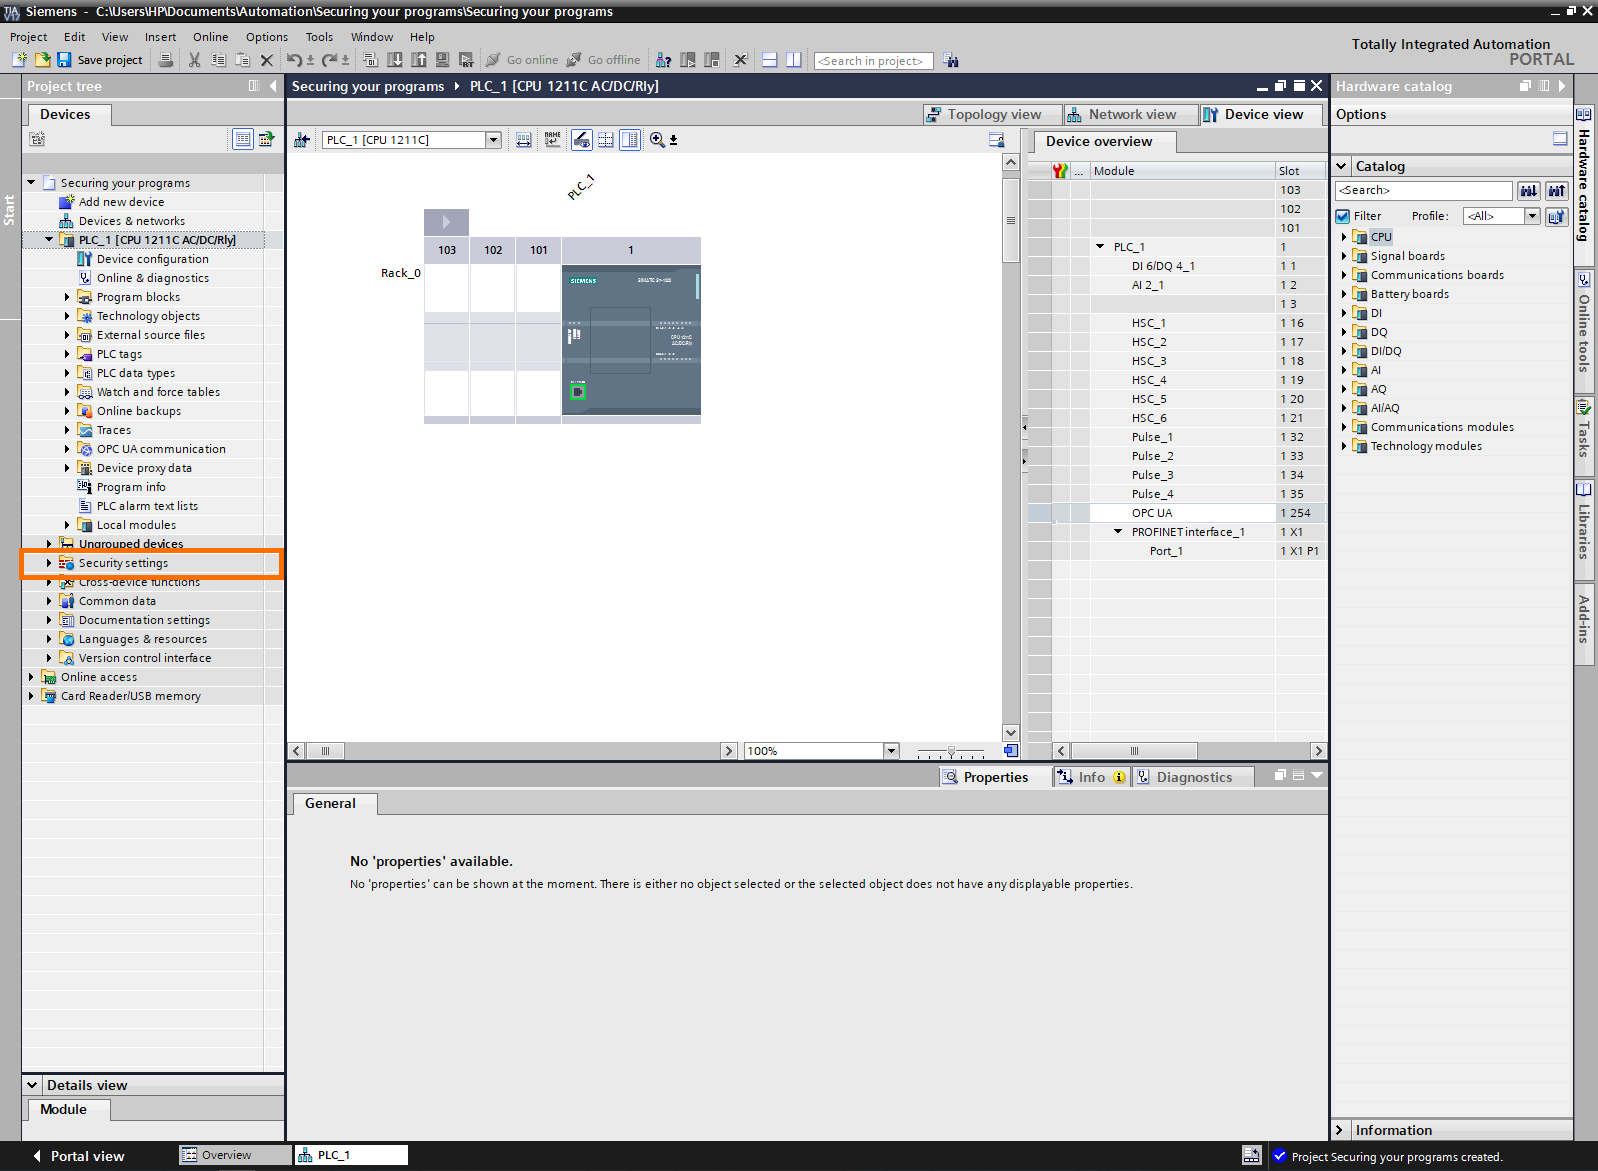
We are now on the project view. On the left side of the screen is the “Project tree.” It shows the content of the project. To access the security options, open the “Security settings” folder.
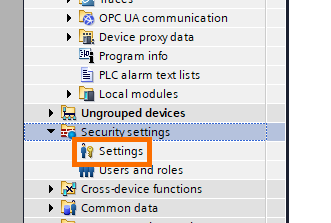
Next, click on “Settings.
Now we are in the security settings of the project. It contains two tabs:
- The project protection tab allows you to define an administrator password for the entire project.
- The password policies contain a set of rules the passwords must respect.
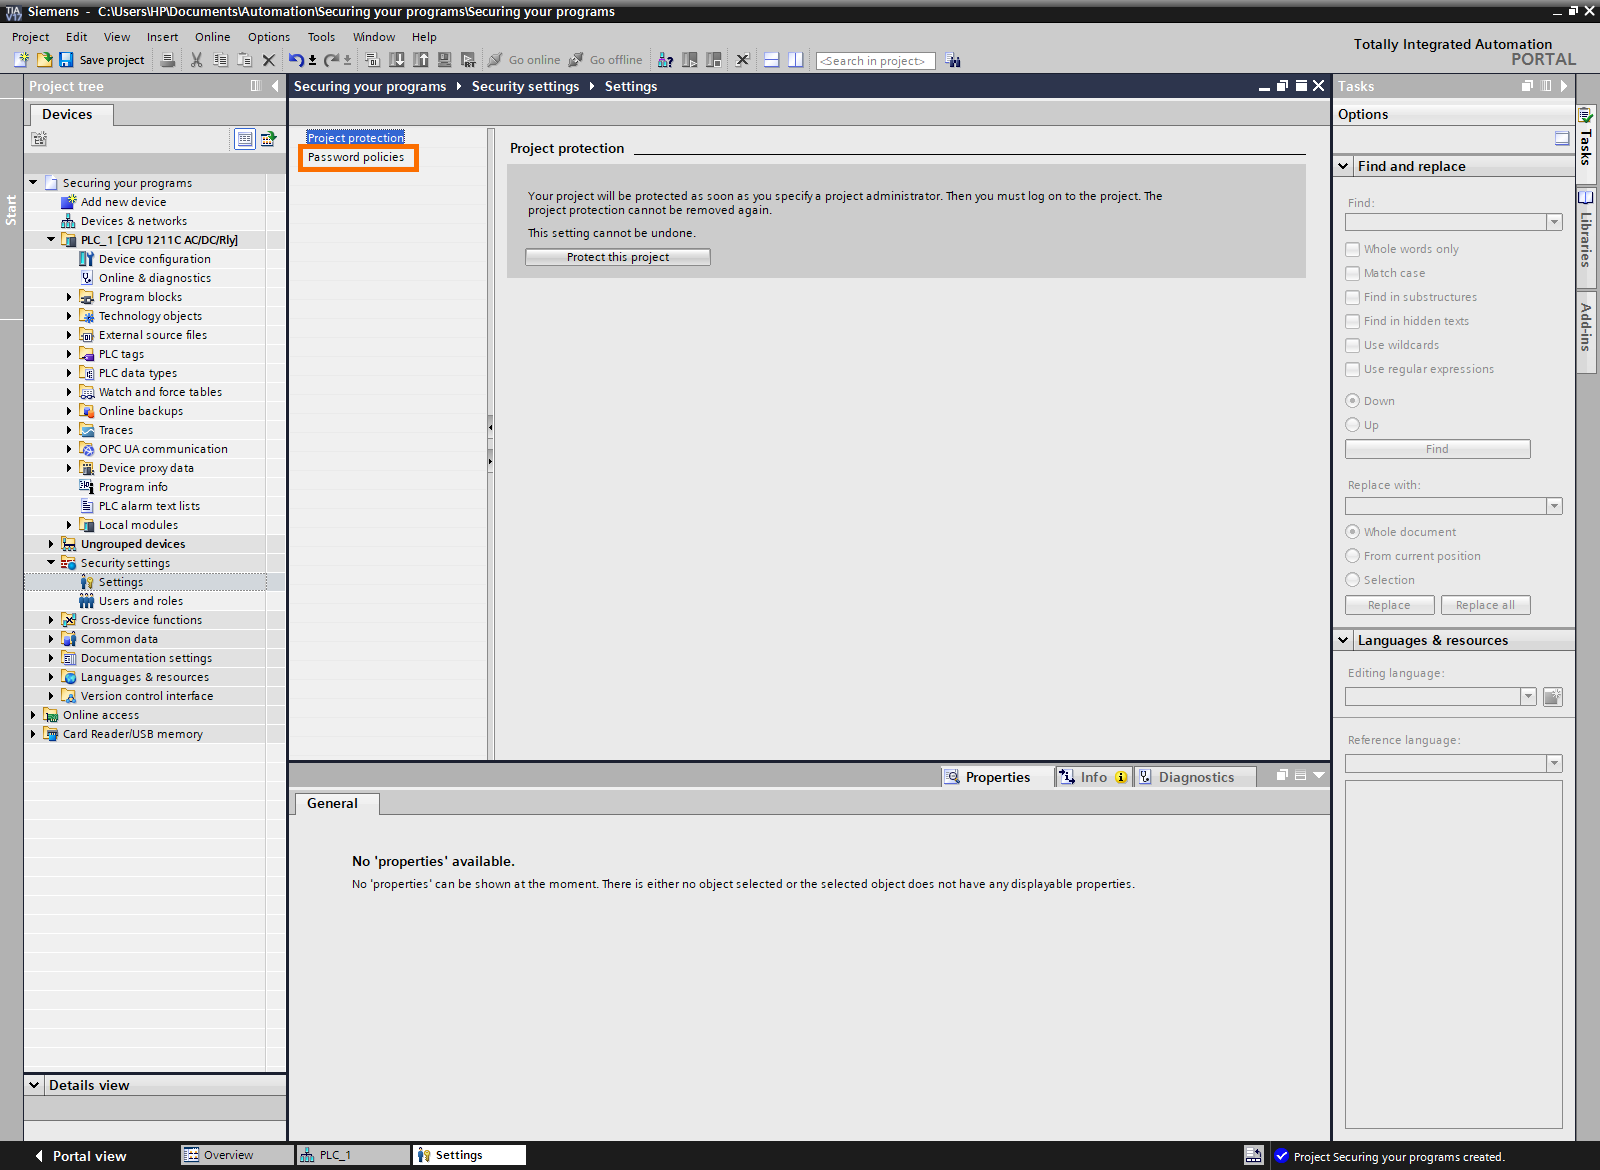
Click on “Password policies.”
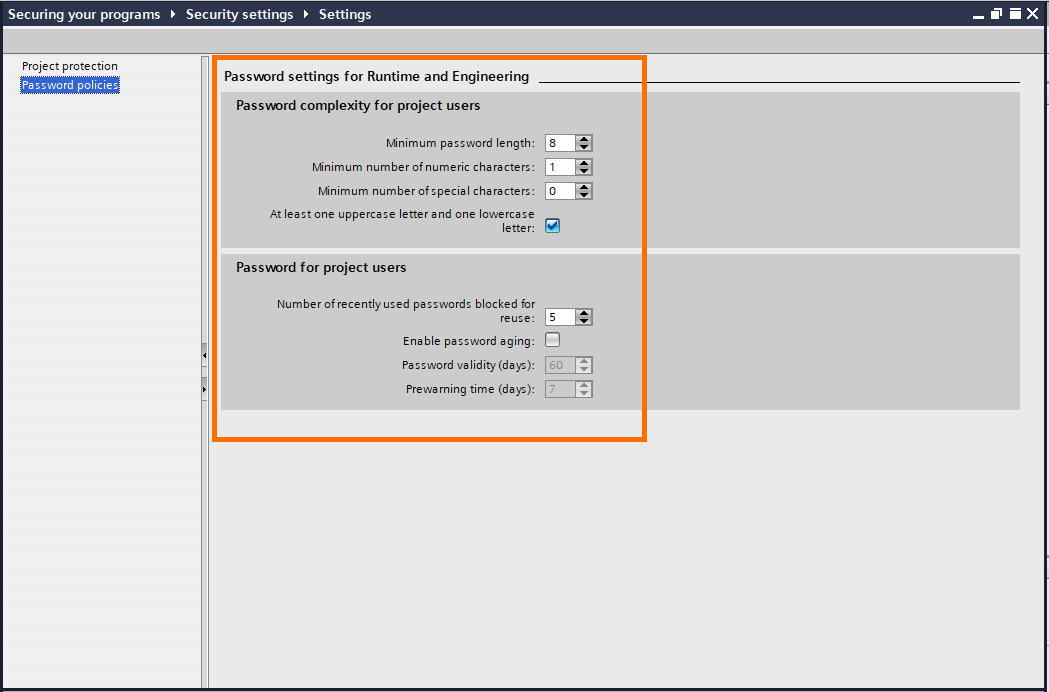
Here, you can define the level of complexity the password must have (Ex: password length, mandatory numeric/special characters…etc.) and password conditions (Ex: number of reuse, password time validity ….etc.
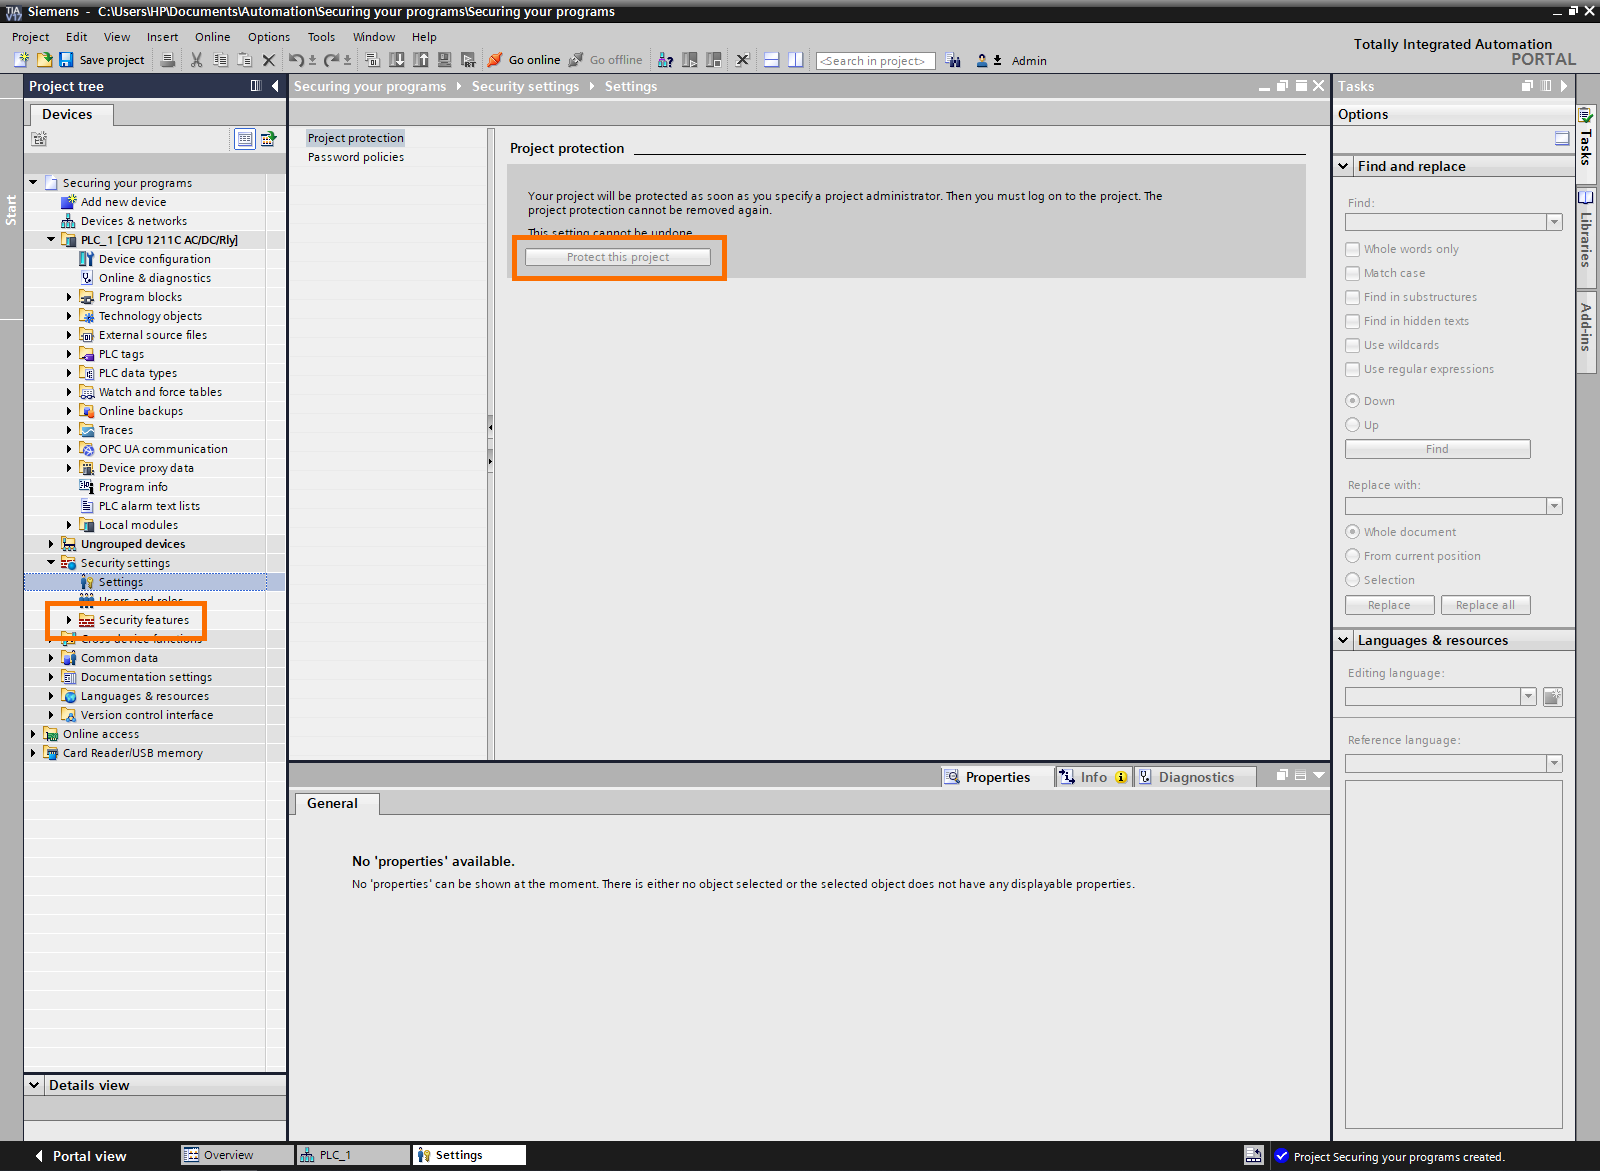
Go to the “Project protection” tab and click “Protect this project.”
A small window will open asking you to define a username and password.

Keep in mind that this will be the administrator account. This means that logging in with these identifiers will grant you full access to the project. Make sure to define the user name and the password correctly and keep them in a safe place (you can, for example, use a password manager). Once done, click on “OK”.

As you can see, the “protect this project” button became grey, meaning the project has been properly protected.
Please bring your attention to the “Security settings” folder in the Project tree.
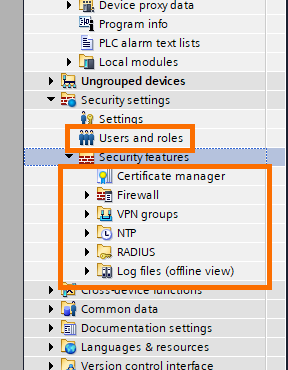
You’ll notice that a new folder appeared inside named “Security features”.
This folder contains further security options like defining a firewall or a VPN. These features will be treated in other upcoming tutorials. For now, just be aware that protecting your project gives you access to further security options.
Now that we created an administrator user for the project. You can now create more users for this project. There may be multiple people working on the same project. Assigning a user to each one with the proper privileges is essential to prevent undesired modifications.
Click on “Users and roles.”
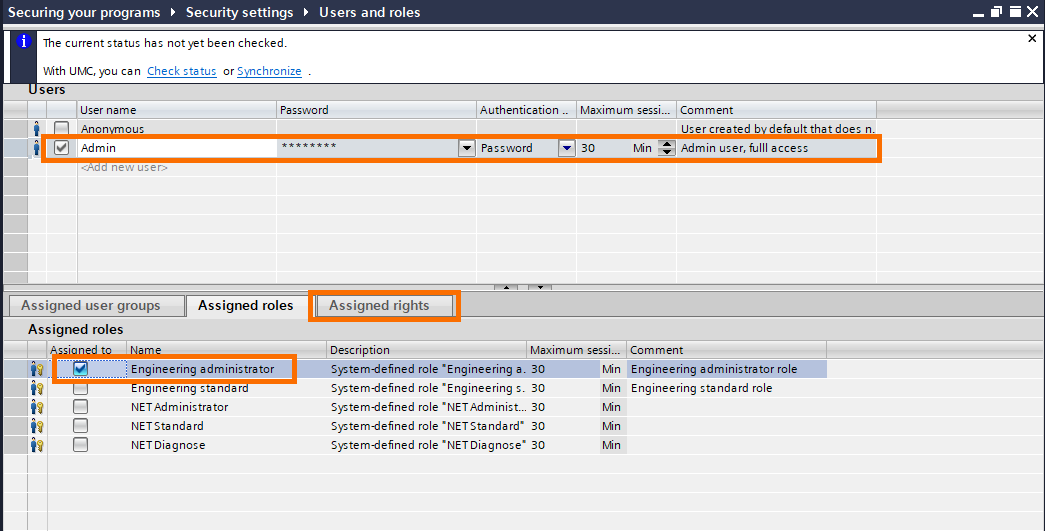
You can notice that the admin user we created before is already here and has the “Engineering administrator” role. This setting gives the user total access to the project.
Click on “Assigned rights” to see all privileges this user has.

Let’s add a new user. Click on “<add new user>”, then click on “add new local user”.
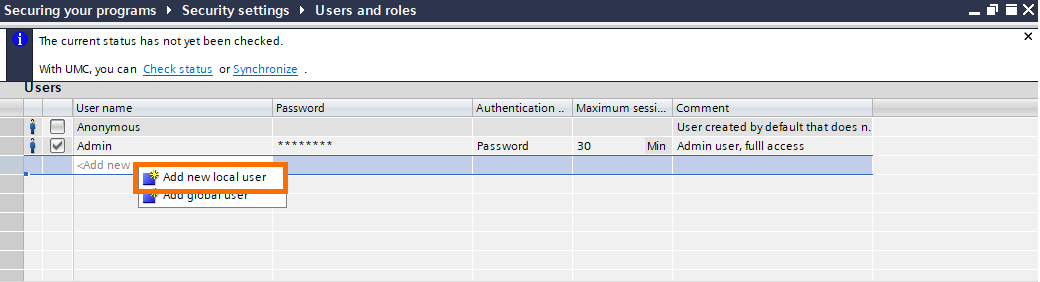
There are two types of users you can create:
- Local users: These users are local to the TIA project.
- Global users: These are centralized users you can synchronize with a UMC server (User Management Component).
Define a new local user, give it a name (for example Programmer) and a password, then in the “assigned roles” tab below select “Engineering standard’.
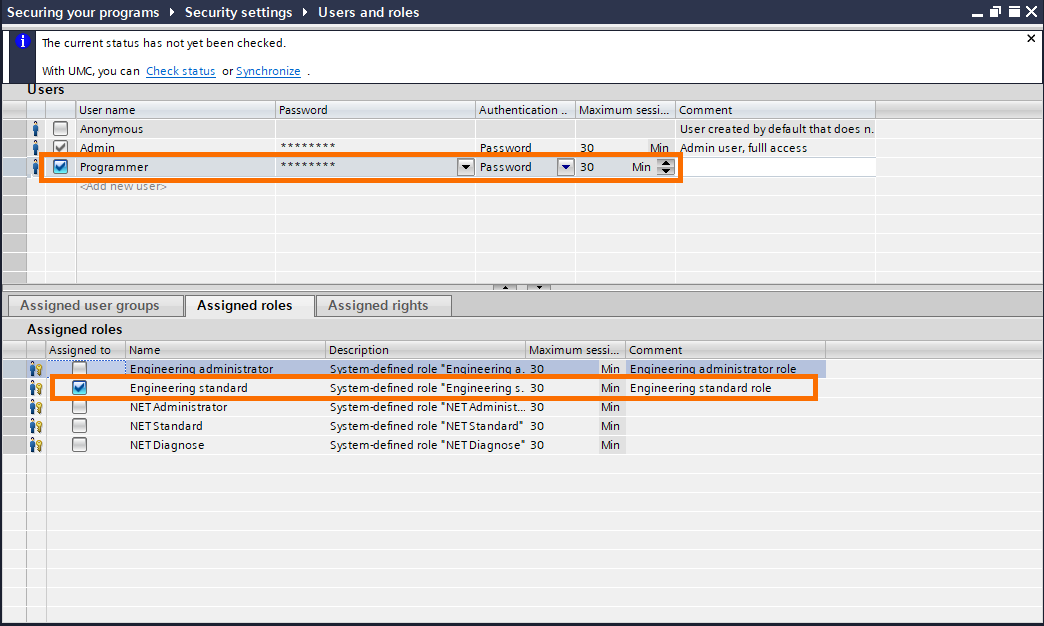
Go to the “Assigned rights” tab, you’ll notice that the “engineering standard” role has fewer rights than the administrator. Be sure to always assign the right role to the right user to prevent unwanted modifications.

Securing your programs in TIA Portal
Securing the project was the first layer of protection we added. However, this protection only prevents accessing or modifying the project itself. For example, It’s still possible for someone to connect to the PLC and download the program blocks inside. Hence, giving him access to your programs without the original project.
In that case, we want to protect the program blocks, especially the most critical ones. For this, we will use the second layer of protection: the program block protections.
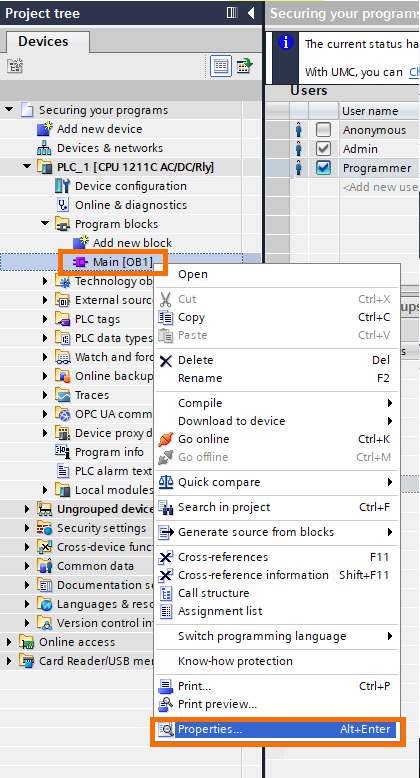
Open the “Program blocks” folder in the project tree and right-click on “Main [OB1]”. Then, click on properties.
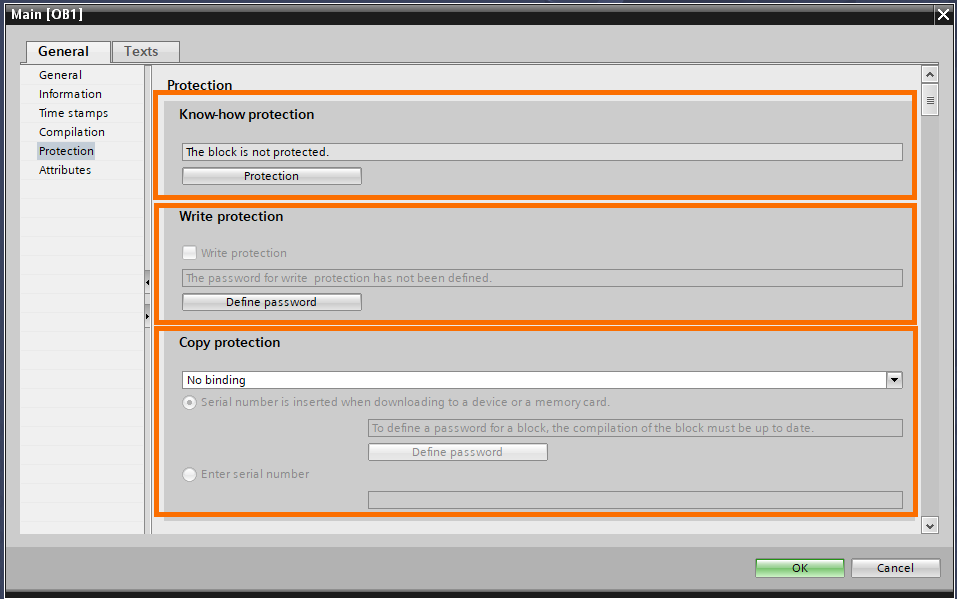
In the properties window, click on the “Protection” tab.

You will notice three types of protection:
- The know-how protection: allows you to protect any OB, FC, FB, or global DB with a password. Opening the block or modifying its properties would require you to have the right password. (Note please that the know-how protection on FBs also applies to their associated DB)
- Write protection: The know-how protection prevents accessing the block but does not prevent any unwanted modification. The write protection allows you to define a password for writing in the block. You can read the block but you can’t modify it without the “writing protection” password.
- Copy protection: This allows you to bind your program block to a specific memory card or CPU using a password or their serial number, which means these programs can be read or executed only in the bound memory card/CPU. This will prevent copying the program to another memory load.
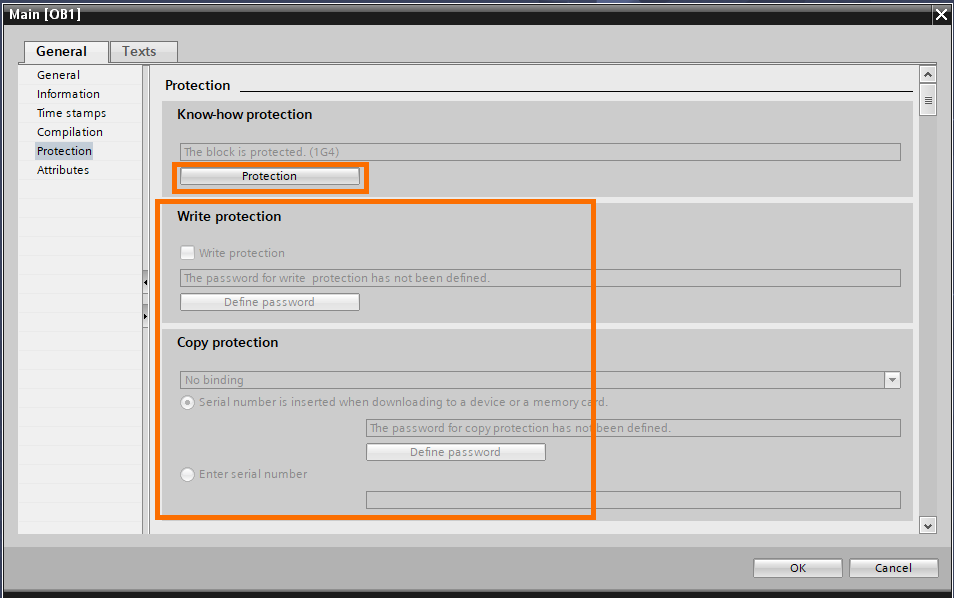
Let’s start with the know-how protection. Click on “Protection”.

A small window will open asking you to define a password. Once done, click on “OK”.

With the know-how protection activated, you’ll notice that it will become impossible to modify any block parameter, and opening block would require you to have the password.
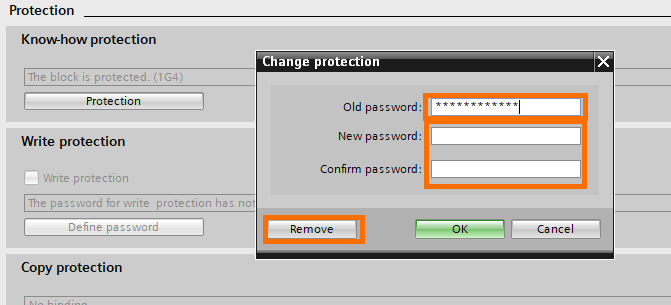
You can remove the know-how protection or change the password by clicking on “Protection”. However, it will require you to have the actual password to do so.
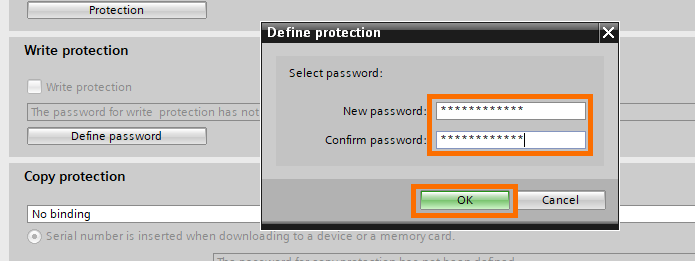
Next, the write protection. Click on “Define password”.

As for the know-how protection, a window will ask you to define a password.
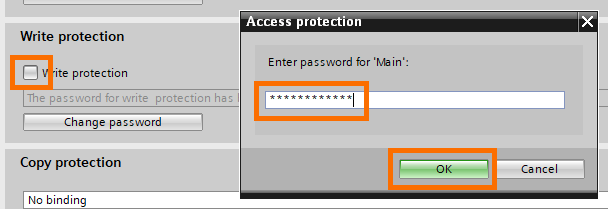
Now with the writing password defined, click on the “Write protection” check box to activate the protection. It will ask you to enter the password to do so.
Now the write protection is live. You can change the password or remove it the same way for know-how protection.

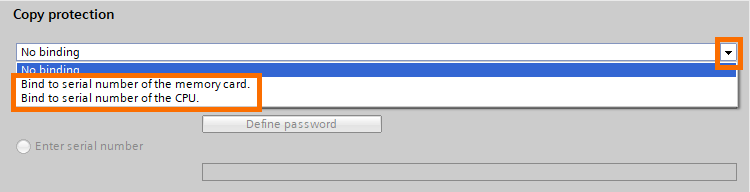
Now to the last type of protection, the copy protection. First, define the type of biding you want to use by opening the scroll.
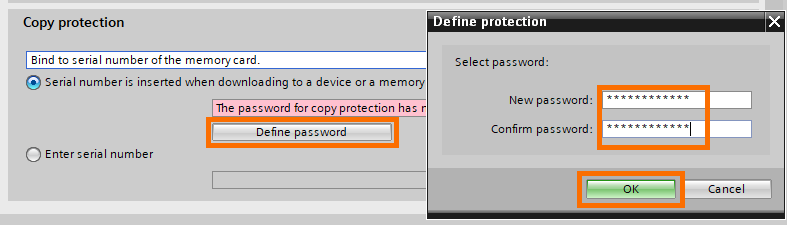
Whether you choose to bind to the memory card or the CPU, you’ll have to either define a password or manually insert the serial number.
To use the password, click on “Define password” and proceed as we have done before.
If you use this method, the binding will automatically occur when loading the program into the memory load (memory card or CPU).
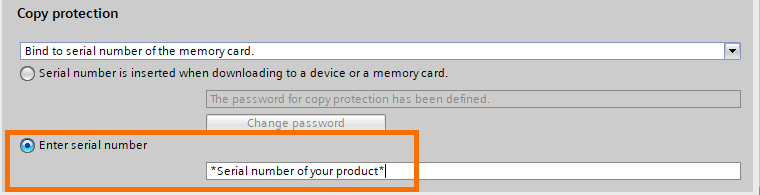
Or you can also insert manually the serial number of the product you will use.
Conclusion
In this tutorial, you learned the basics of securing your TIA projects and programs.
These are the first layers of protection you must use to ensure system integrity and reliability.
Continuity of service is the most important aspect of the industry. Having your project and programs protected is the most basic way to assure avoiding malfunctions and machine breakdowns due to unwanted access or modifications.
However, these methods alone are not sufficient. There many still many weak points that can be exploited that can affect your system’s reliability. The more layers of security you add, the more you decrease the probability of a failure.
We will treat other types of protection in the upcoming tutorials.
