An Introduction to Basic Simulations with TIA Portal’s PLCSim

Introduction
Simulation is a crucial part of the development of a PLC program. It allows you to test every possible behavior of your program without having to rely on physical hardware.
Siemens’ TIA Portal includes a PLC simulator called PLCSim. Once launched, TIA Portal recognizes it as an actual connected PLC and allows you to load your program. PLCSim includes almost every feature to simulate any program. The only downside is that it can only interact with TIA Portal, which means it can’t communicate with anything except TIA.
In this tutorial, you will learn about PLCSim's most important features and how to use them to simulate your programs. You can perform quick simulations using the program monitoring or more elaborate simulations using PLCSim’s project view.
Prerequisites
To follow this tutorial, you will need an installation of TIA Portal. We will use TIA Portal v17, but you can use any other version. No additional hardware or software is required.
PLCSim’s Compact view and program monitoring
For this tutorial, we will use this simple program as an example.
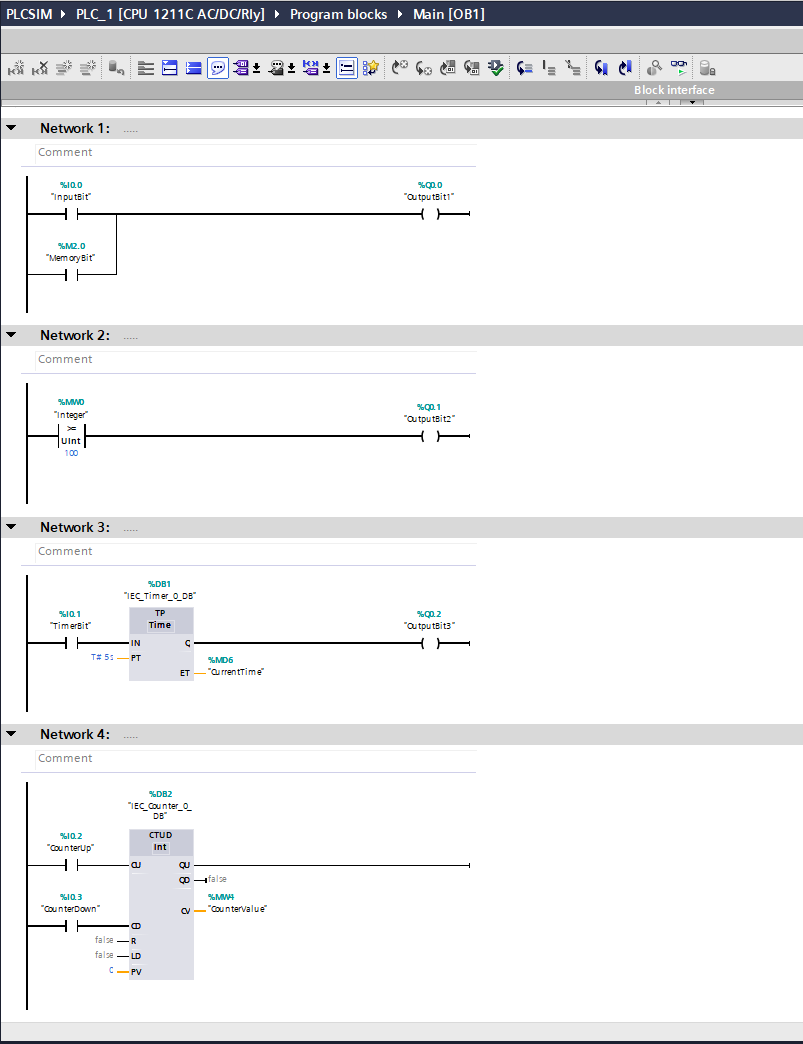
Figure 1.1: Small test program for the simulation.
- Network 1 contains some logic operations leading to a bit assignment.
- Network 2 contains an integer comparison.
- Network 3 contains a 5s timer controlled by an input.
- Network 4 contains an Up/Down counter controlled by two inputs.
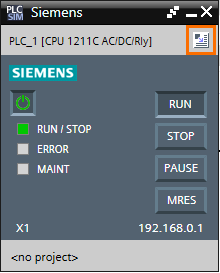
Let’s start by opening the simulator by clicking on the “Start simulation” button.
PLCSim will start in its Compact view. It’s a small window containing the PLC simulator's basic interface (control buttons, state LEDs, PLC’s IP address, and loaded project). Then, click on the “Download to device” button to load your program.

Once the program is loaded and the PLC is in RUN mode, the program is being executed in PLCSim. Therefore, you can watch the program's current state using online monitoring as if it was an actual PLC connected to TIA Portal. To do this, click on the “Monitor On/Off” button.
Then, you can modify the state of any tag by right-clicking on it and selecting “Modify.”
You can notice that modifying to 1 the “Memorybit” tag works perfectly, but when it comes to “InputBit” it doesn’t. This happens because “Inputbit” is defined as an Input memory (I0.0). Input memories cannot be modified manually during simulations. They can only be affected by the state of their physical inputs. To simulate the state of physical inputs, we need to use the project view of PLCSim.
PLCSim’s Project view and SIM tables
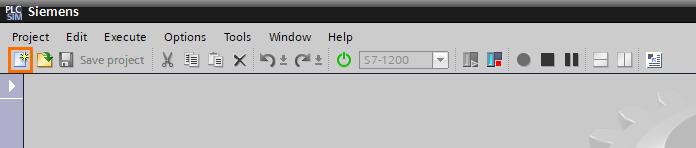
To access PLCSim’s Project view, click on the “Switch to project view button” in the PLCSim window.
The Project view opens. To access the features, you must first create a project. Click on the “New project” button.
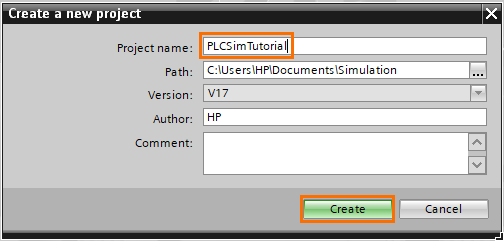
Give a name to the project and click on “Create”.
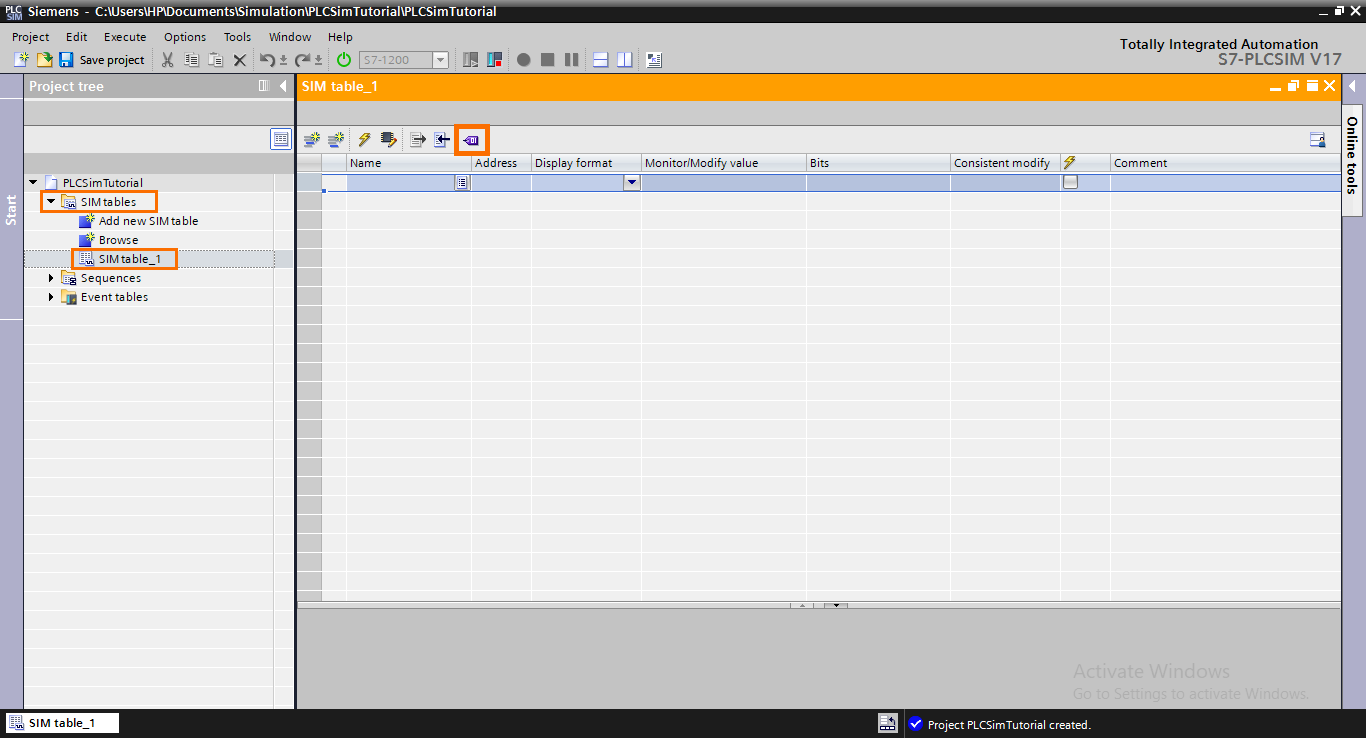
Now that the project has been created, you have access to the project’s features. There are three main features in the project tree:
- SIM tables: these are tables where you can import your project tags and modify them manually.
- Sequences: Allows to program sequences that automatically modify the state/value of your tags.
- Event tables: Allows simulating hardware events like module failures, disconnections, etc.
Open the SIM tables folder in the Project tree and open the default SIM table. Then, click on the “Import project tags” button.
Your project tags should appear in the table where you can modify their state/value during the execution of the program. By default, the SIM table allows you to modify inputs only. To modify any memory type, click on the “Enable modification of non-inputs” button.
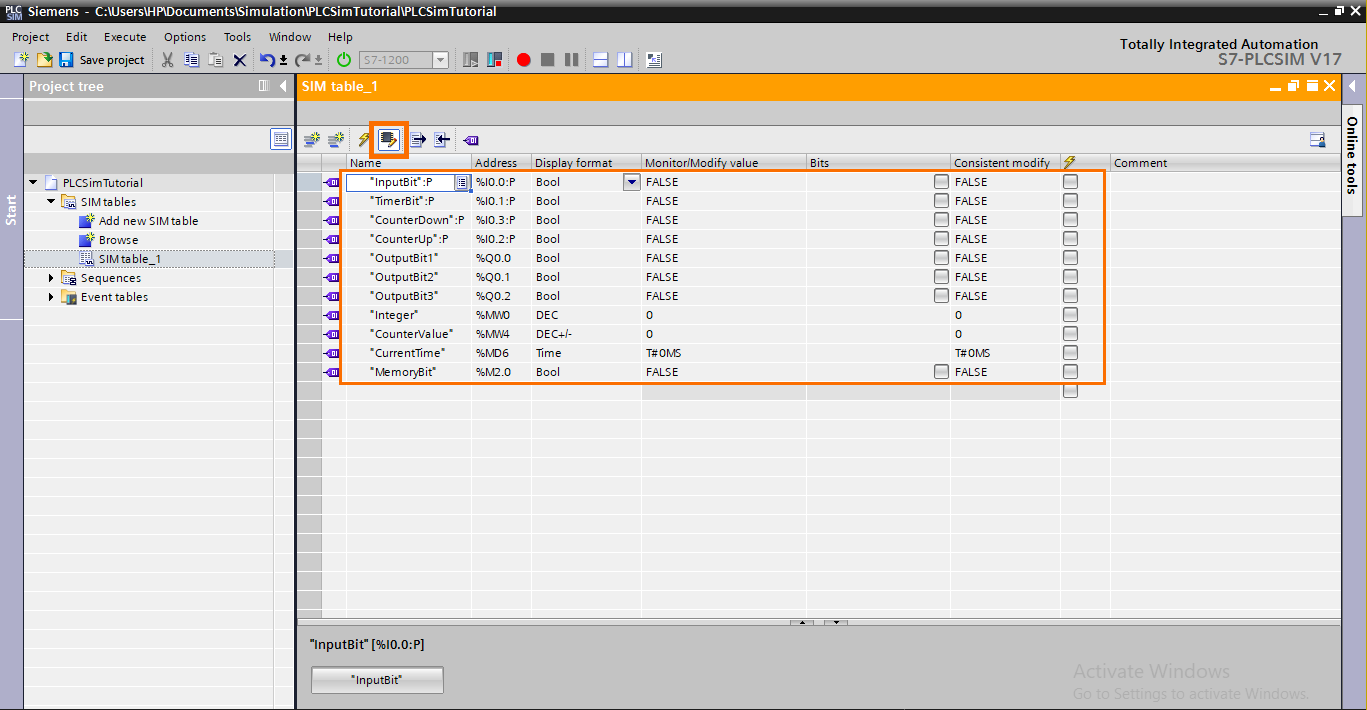
Now you can simulate your program by altering your variables as you want, as shown below.

Sequences in PLCSim’s project view
Sequences are used to program automatic tag modifications. You can organize a series of events that edit the state/values following the timings you want. It simulates real-time events like input state variations or program behaviors.
First, open the default sequence in the “Sequences” folder of the project tree.
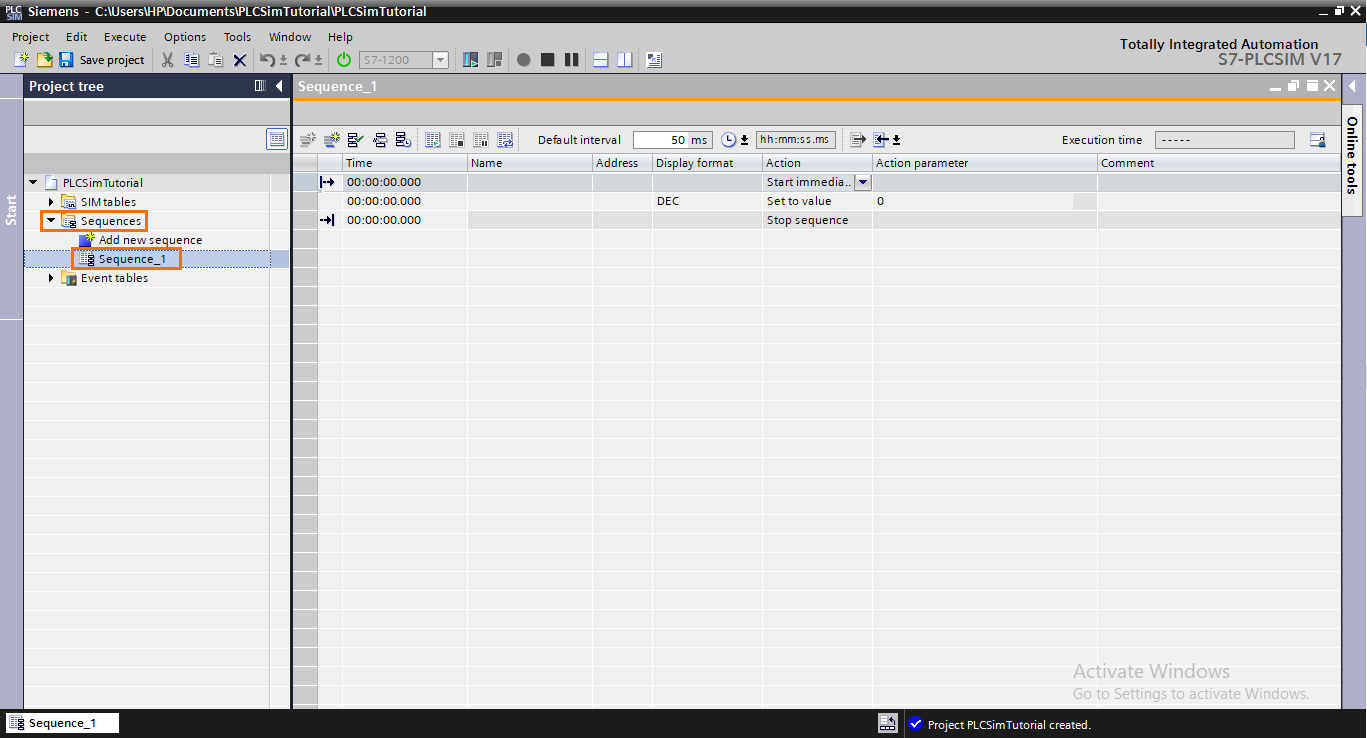
Each row of the table is an event that will be executed at the specified timing in the "Time" column. After that, you can define the tag to modify in the "Name" column. Then, you can specify the type of modification in the "Action" column.
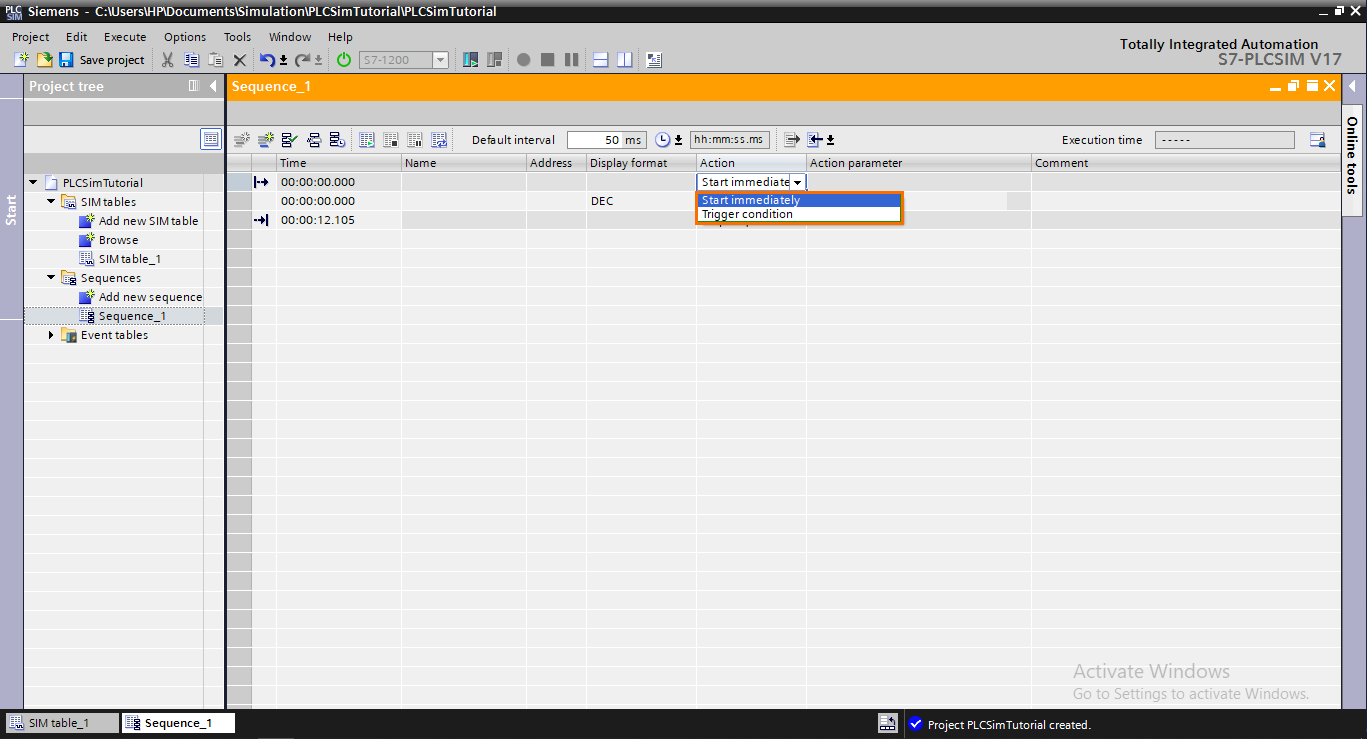
The first row of the table is dedicated to the sequence's starting condition. Next, you can define when the sequence must be executed: immediately upon starting it or triggered by a condition.
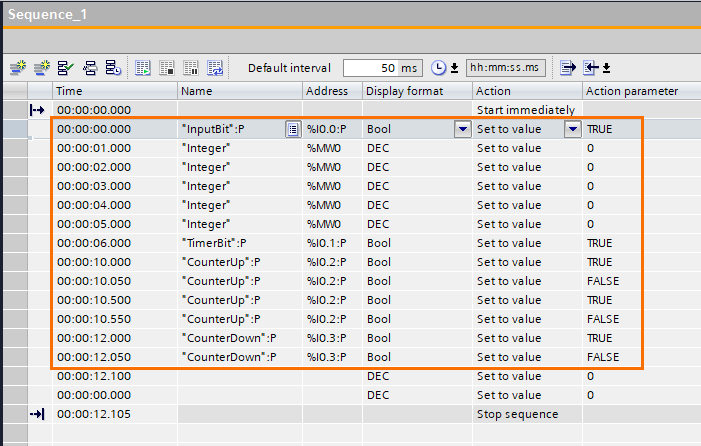
After this, let’s consider this series of events:
- T=0s: “Inputbit” is set to 1.
- From T=1s to T=5s: “Integer” is increased by 20 every second.
- T=6s: “Timerbit” is set to 1.
- T=10s: “CounterUp” is set to 1 twice (two impulsions with an interval of 500ms)
- T=12s: “CounterDown” is set to 1 once.
To program this sequence, fill in the table as shown below.
Once the sequence is filled, you can start it by clicking on the “Start sequence” button.
Conclusion
In this tutorial, you learned how to simulate programs using TIA Portal’s PLCSim.
Depending on your situation, being able to do different levels of simulations (Compact or Project views) is very handy when it comes to testing specific parts of your program—saving a lot of time when simulating small sections.
Sequences are a handy and powerful tool for simulating large-scale events while observing the program's evolution. Allowing you to have a better overview of what happens during your program’s execution and to make sure that everything works as it should.
