Understanding the SCL Programming Interface in TIA Portal

Introduction
Being familiar with the programming interface of the SCL (Structure Control Language) block is essential for anyone who wants to write a PLC program in the SCL language.
Since this is one of the advanced programming languages, its application code should meet a certain standards as to avoid confusion when being reviewed by other engineers.
Prerequisites
To follow along with this tutorial, you will need the following:
- An installation of TIA Portal software on your computer. Although we will be using TIA Portal version 16, other TIA Portal versions are equally appropriate.
- An understanding of how to create an SCL block in the TIA Portal. We will be using the “Function” for simplicity.
- An understanding of SCL Elements.
Formatting SCL code
You may manually indent or outdent programming lines or format code blocks to improve the PLC program readability. However only, code portions that follow syntax rules can be formatted, and the formatting is determined by the overall indentation settings, although the line or section is always indented.
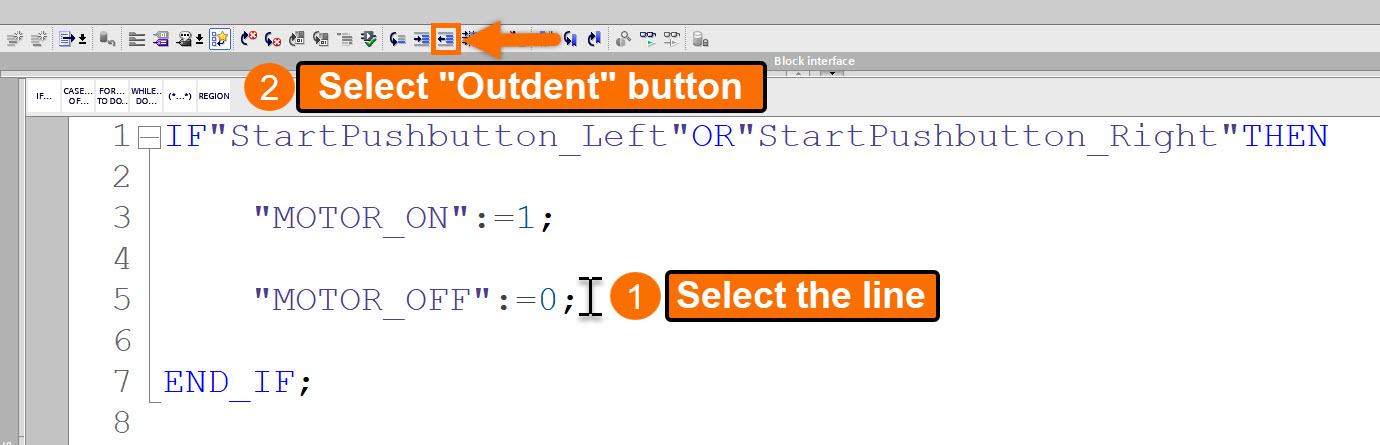
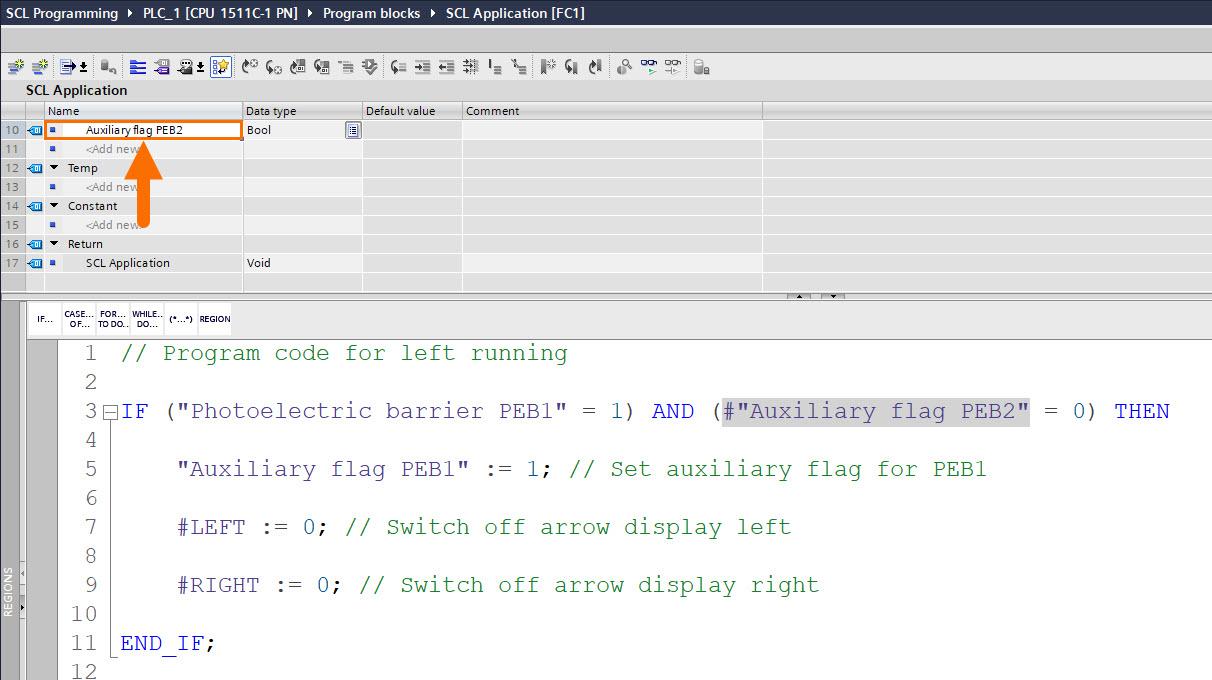
In figure 1.1, there is an IF statement, and lines 3 and 5 are not aligned, which may confuse an engineer who reads this program.

To indent or outdent programming lines, left-click on the line you wish to indent or outdent and then select the “Indent text” or “Outdent text” button on the programming editor’s toolbar. Figure 1.2 displays that line 5 is outdented.
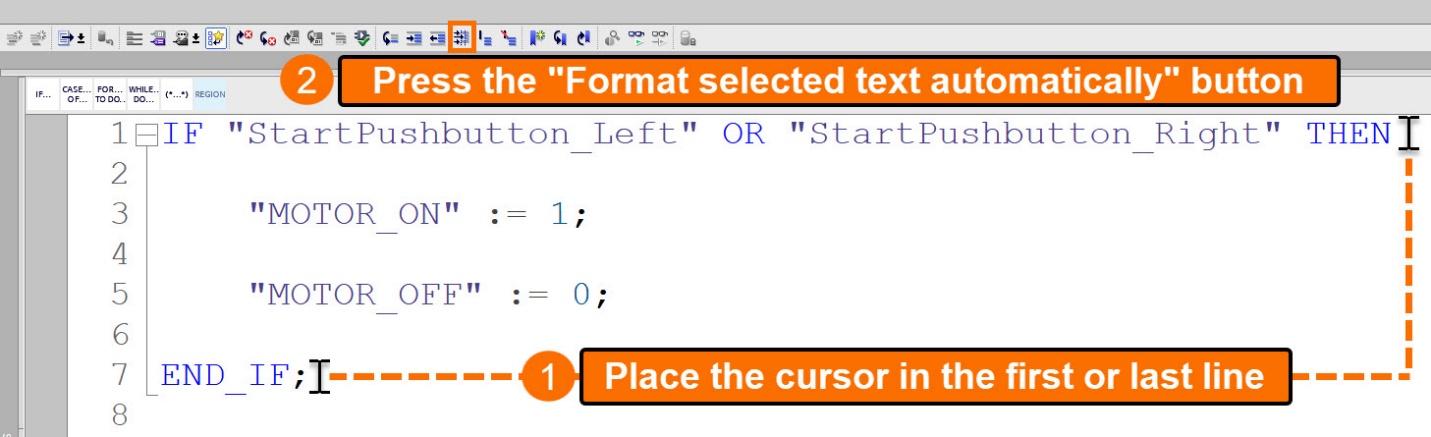
In figure 1.2, the codes are written tightly alongside each other, making the code reading difficult. Since there is a programming control here, you can place the mouse cursor in the first or last line of instruction and then press the “Format selected text automatically” button on the programming editor’s toolbar.
You can apply this setting for selected texts so that only the specific code lines are formatted. For example, in figure 1.3, the entire IF statement is formatted.
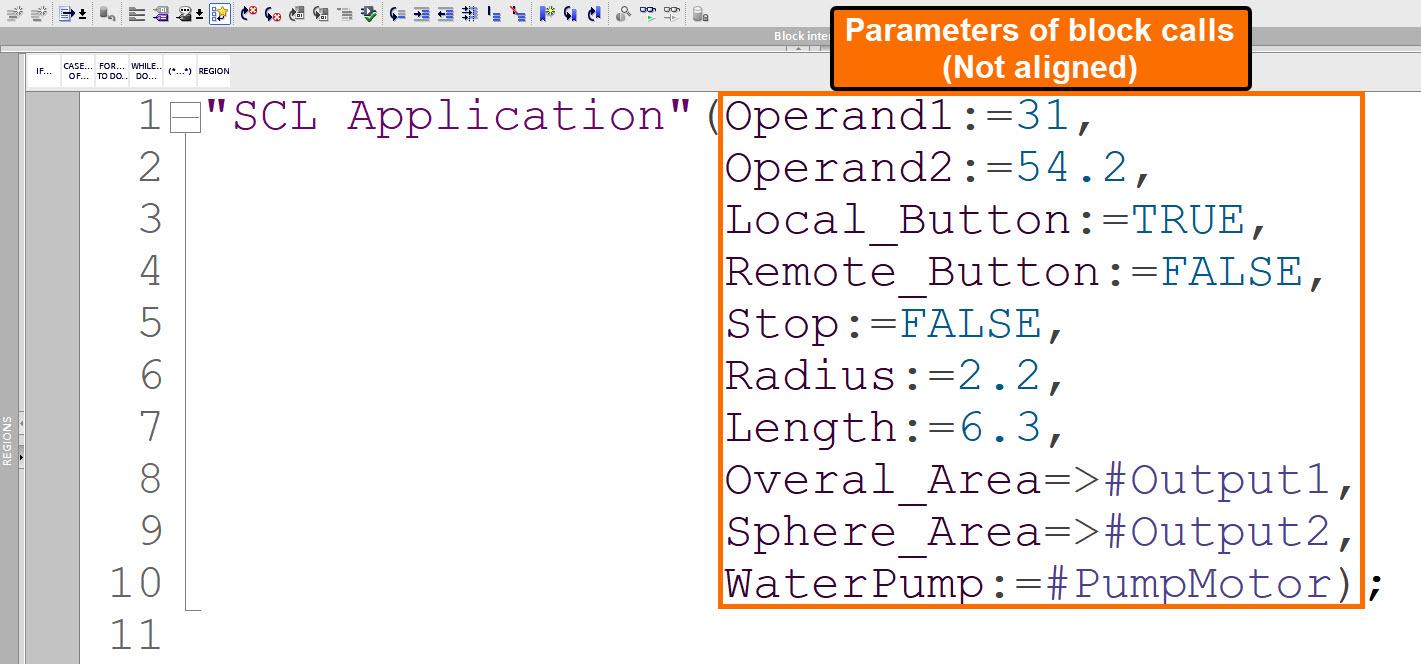
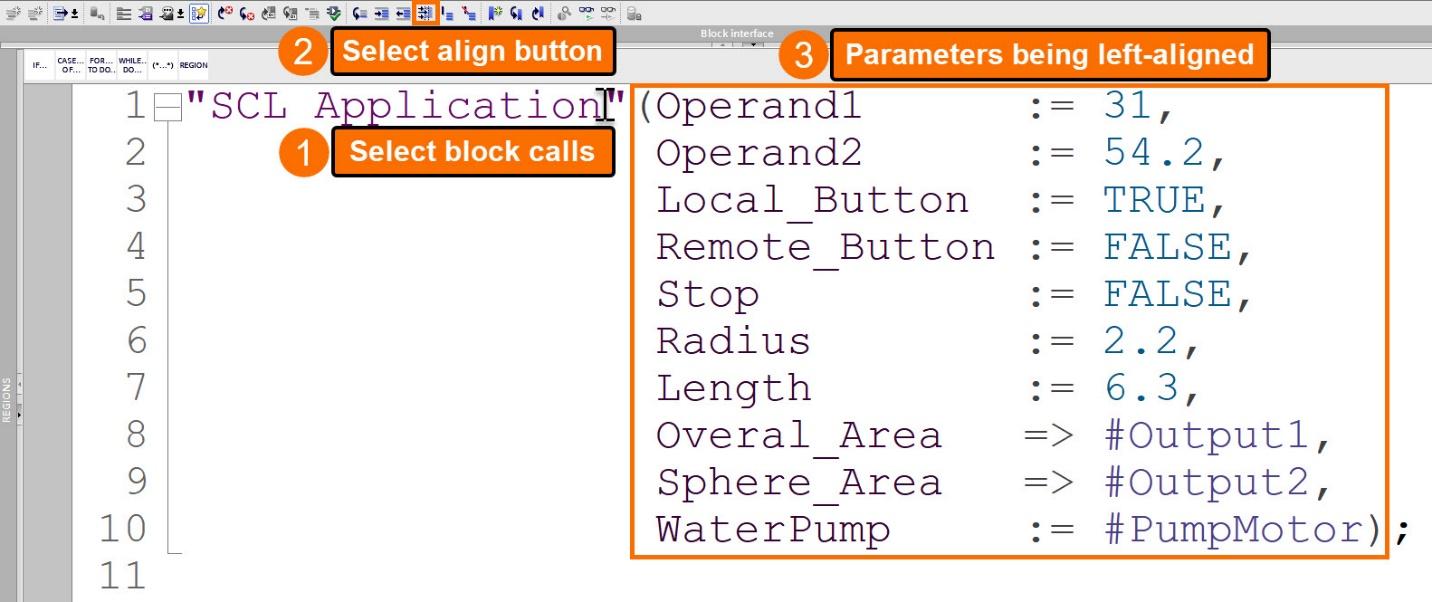
Furthermore, you can specify that the actual parameters of block calls are typically to be left-aligned. For example, figure 1.4 shows a standard function call.
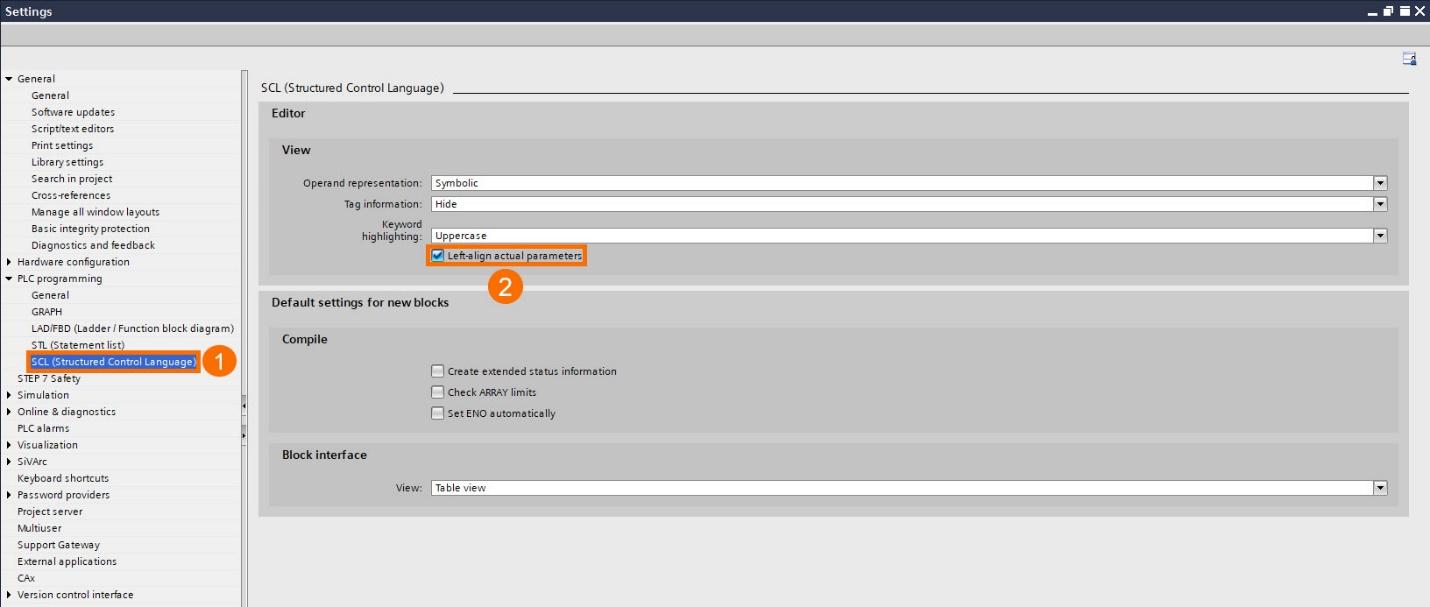
To align the parameters of block calls to the left, select "Settings" from the "Options" menu in the top toolbar. Then, when the "Settings" window opens, select the "General > Script/text editors" item on the left pane and choose "Smart" from the list of options under "Indent."
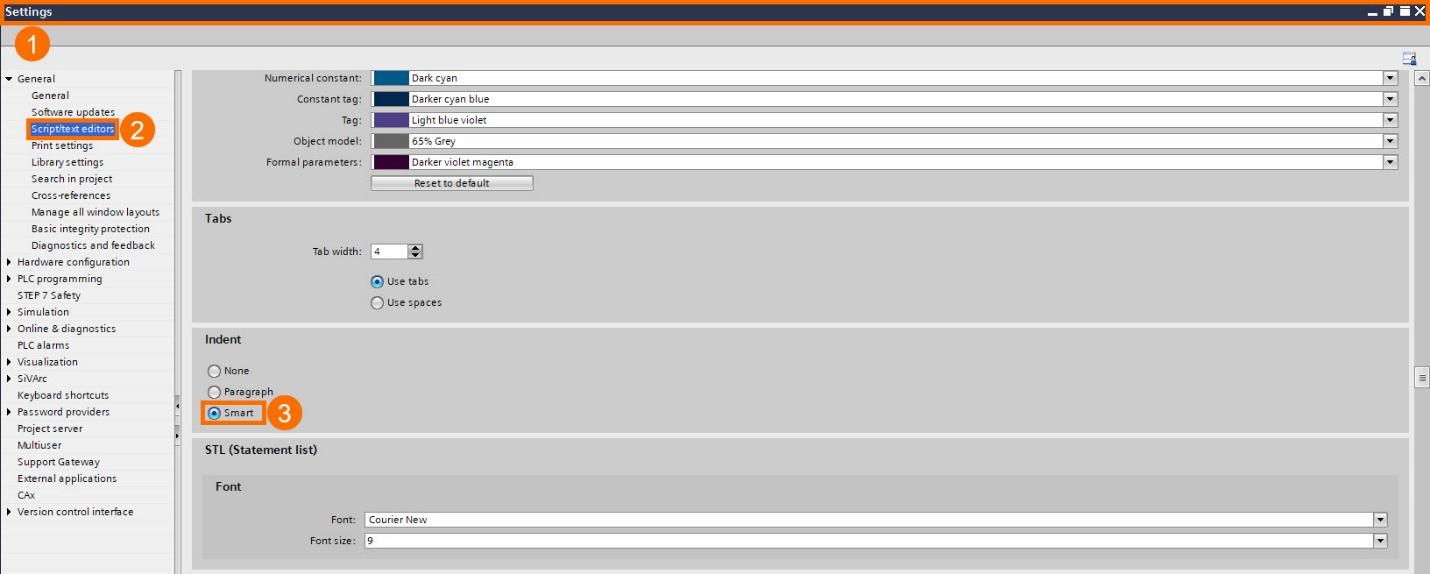
Then on the left pane, select the "PLC programming > SCL (Structured Control Language)" item and then check the box "Left-align actual parameters" in the "View" area.
From now on, the actual parameters for the newly added block are aligned to the left. For example, you can left-align the parameters of existing block calls by selecting the block calls and pressing the "Automatically format selected text" button, as shown in figure 1.7.
Expanding and collapsing sections of code
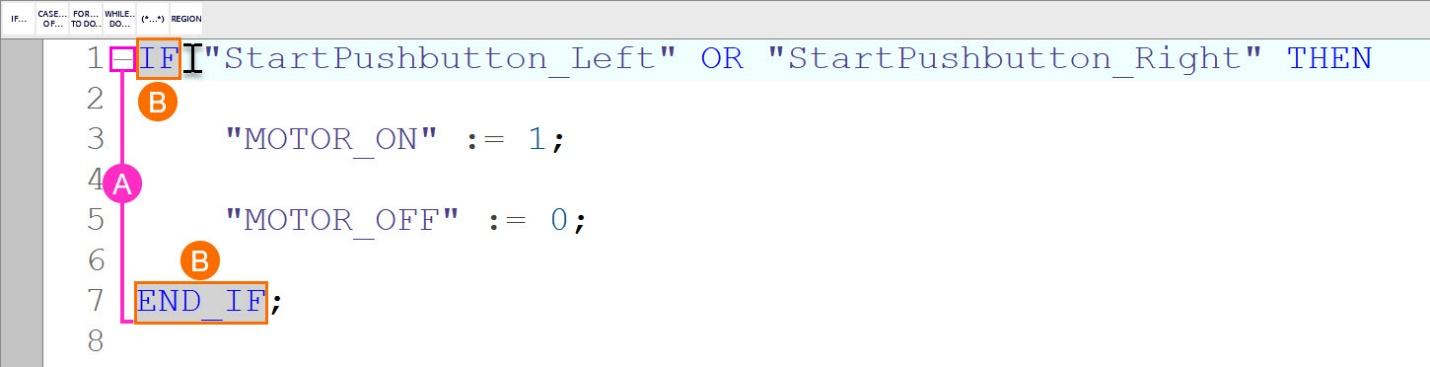
Instructions in SCL might span multiple lines. Block calls or program control instructions are two examples of this. A set of instructions that go together has the following features:
- An outline view Between the program code and line numbers denotes the whole code section.
- The ending keyword is immediately highlighted when you choose the starting keyword.
You may expand or collapse groups of related code in the outline display to make it easier to read. For example, when you close the block or the project, the selected outline display is preserved so that the next time you view the SCL block, the portions of code are displayed just as they were when you closed it.
To expand or collapse the code section, left-click the plus or minus sign in the outline view so that the code section opens or closes.

Navigate to definitions
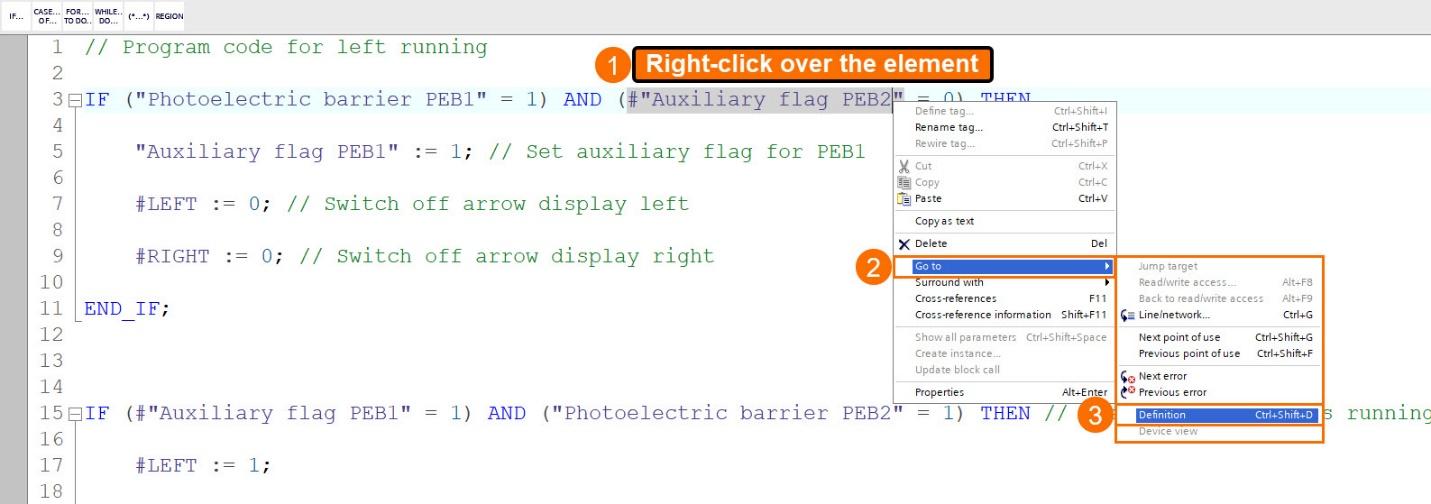
You may include elements specified in other editors into your application code, for instance, tags or data blocks (DBs) of so-called function blocks (FBs). Then, you can go directly to the definition instances in the relevant editors to view them.
There are two options to get to the definition of a code element. First, you can right-click over the code element and then choose the "Go to > Definition" command from the shortcut menu. This way, the code element definition editor opens with the definition instance shown.
Secondly, you can press the <Ctrl> key while holding it down and then place the mouse cursor over the program code. Then, when the mouse cursor passes over a code element whose definition can be seen, it becomes underlined, and the element's name changes to a link. Finally, the code element definition editor opens with the definition instance shown if you left-click the link.

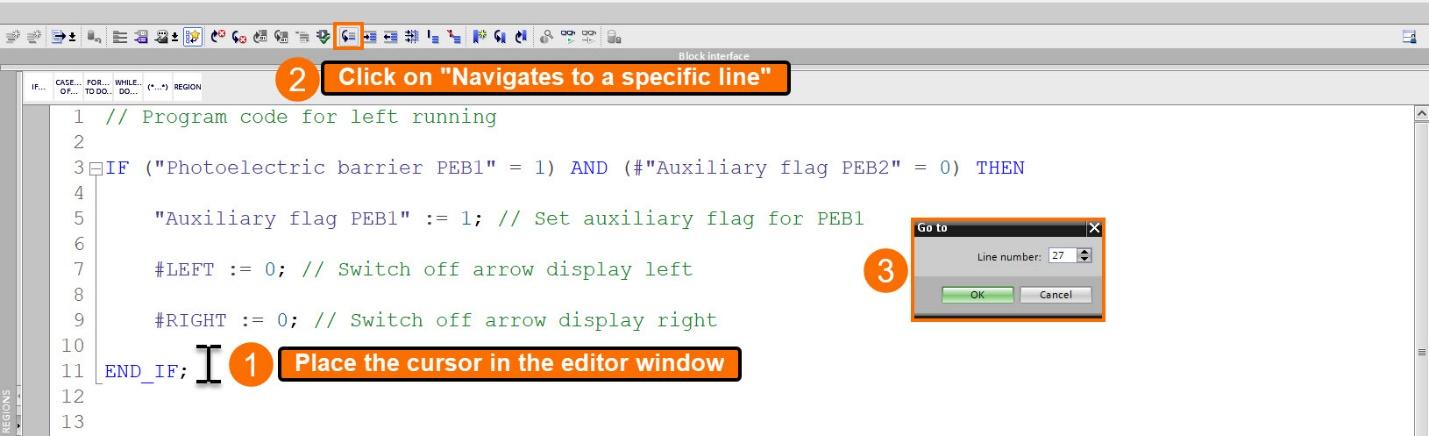
Navigate to a specific line
If you are dealing with a program that becomes larger with each step you proceed, this feature becomes handy for your programming. Place the mouse cursor in the editor window and choose the “Navigates to a specific line” button in the toolbar. Then you can set a line number you want to go directly to and press OK.

Bookmarks
You can utilize bookmarks to mark program areas in large programs so that you can find them afterward if they need to be revised. Bookmarks appear in the sidebar of the programming window. You may use menu commands to move between various bookmarks within the SCL block. Bookmarks are kept with the project and are therefore accessible to anybody wishing to modify the block. But they aren’t loaded onto a PLC. Therefore, when you compare the blocks, bookmarks are not considered.
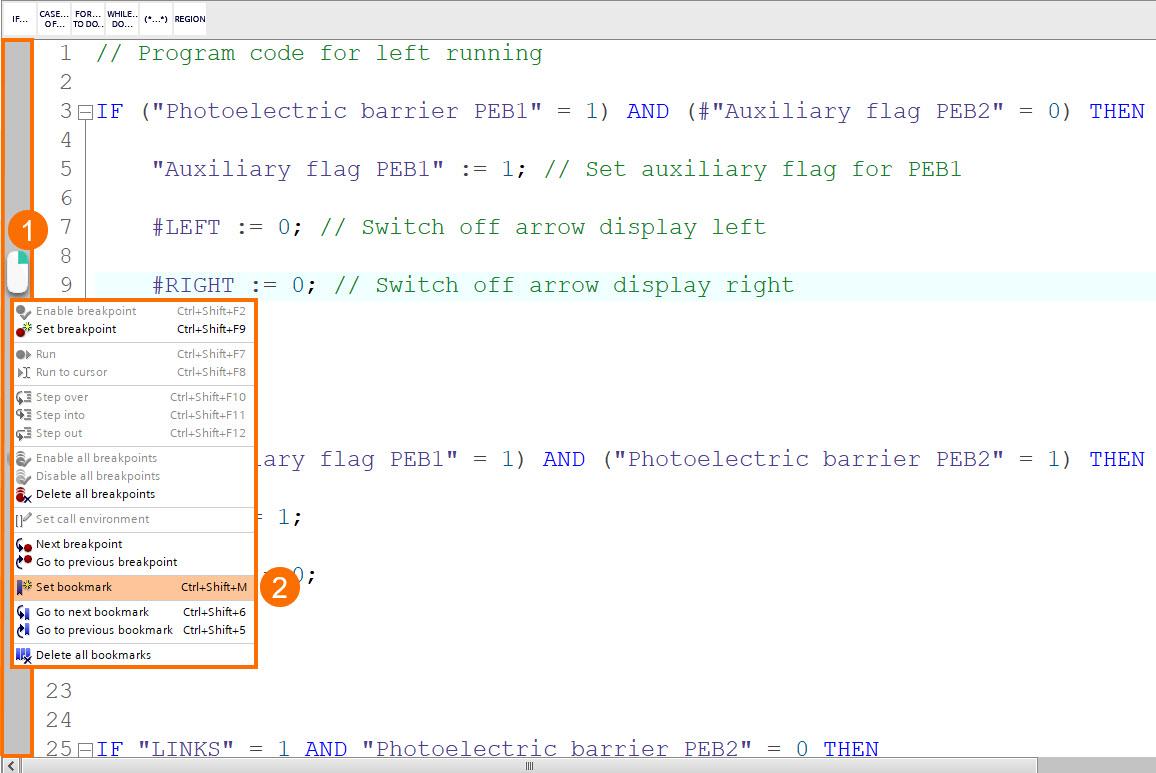
There are three options to add a bookmark within the block. First, you can right-click on the targeted line in the sidebar and then choose the “Set bookmark” item from the pop-up menu.
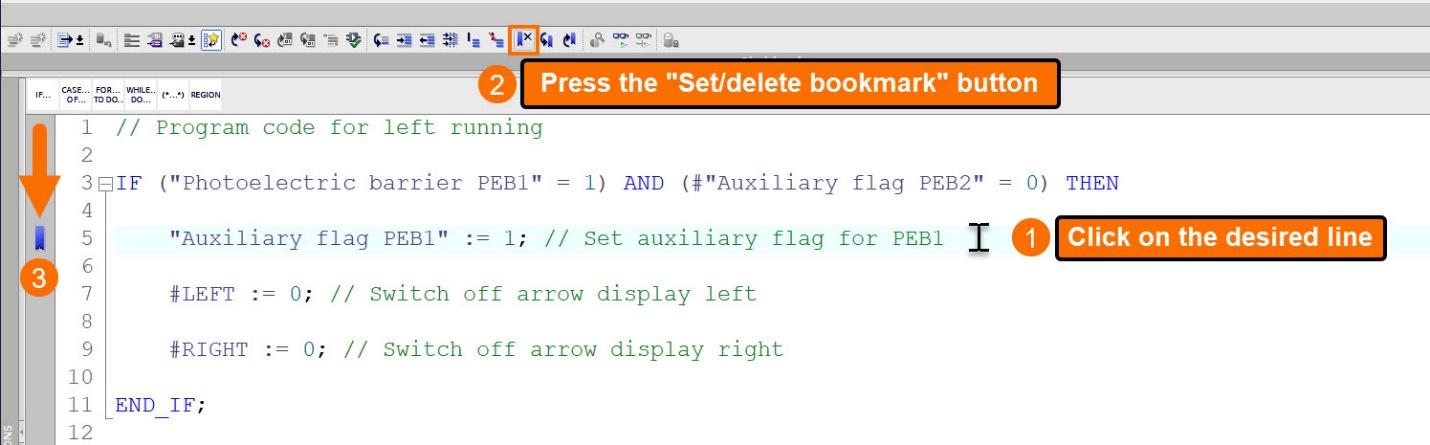
Secondly, you can insert the bookmark by clicking on the desired line and pressing the “Set/delete bookmark” button in the editor’s toolbar.
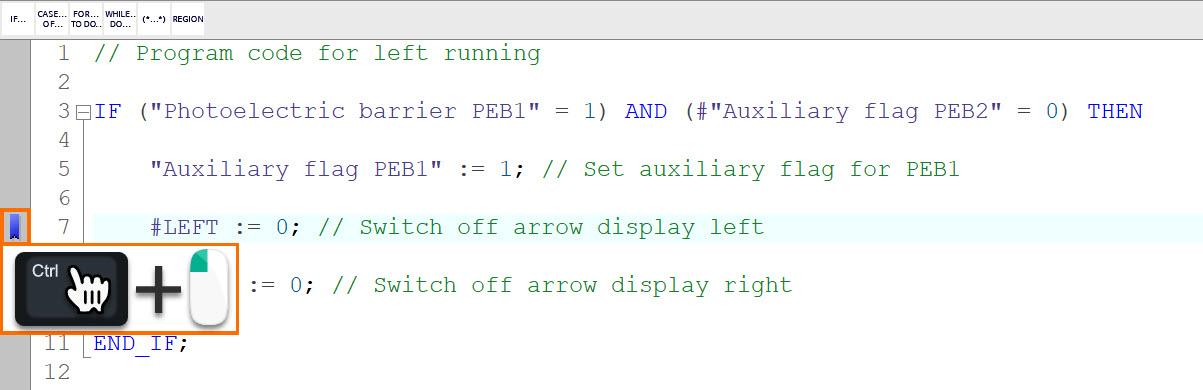
And thirdly, you can click on the line in the sidebar where you wish to set the bookmark while holding down the <Ctrl> key. As a result, the program code is marked with a bookmark.
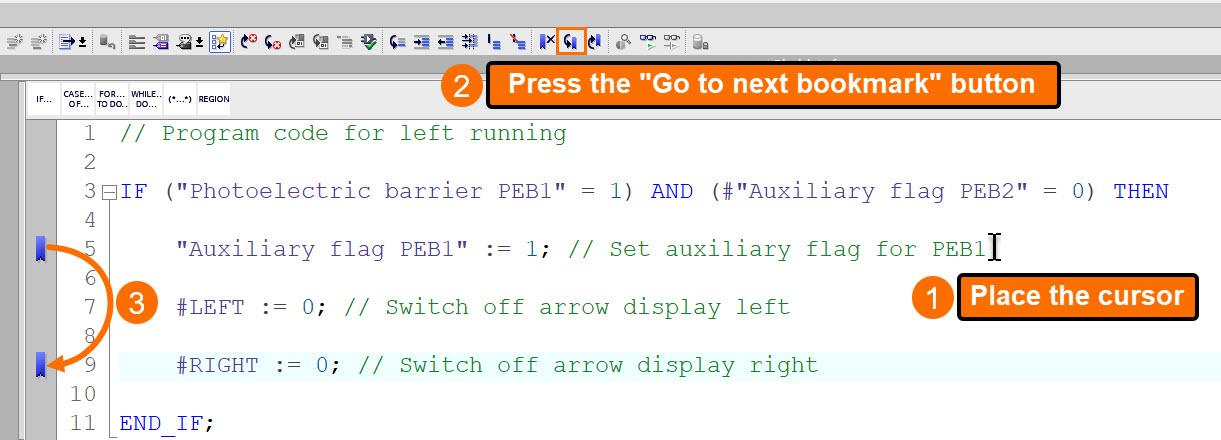
If you have set several bookmarks within the block and want to navigate between them, you can place the mouse cursor in the application code. Then press the “Go to next bookmark” or “Go to previous bookmark” buttons in the programming editor’s toolbar.
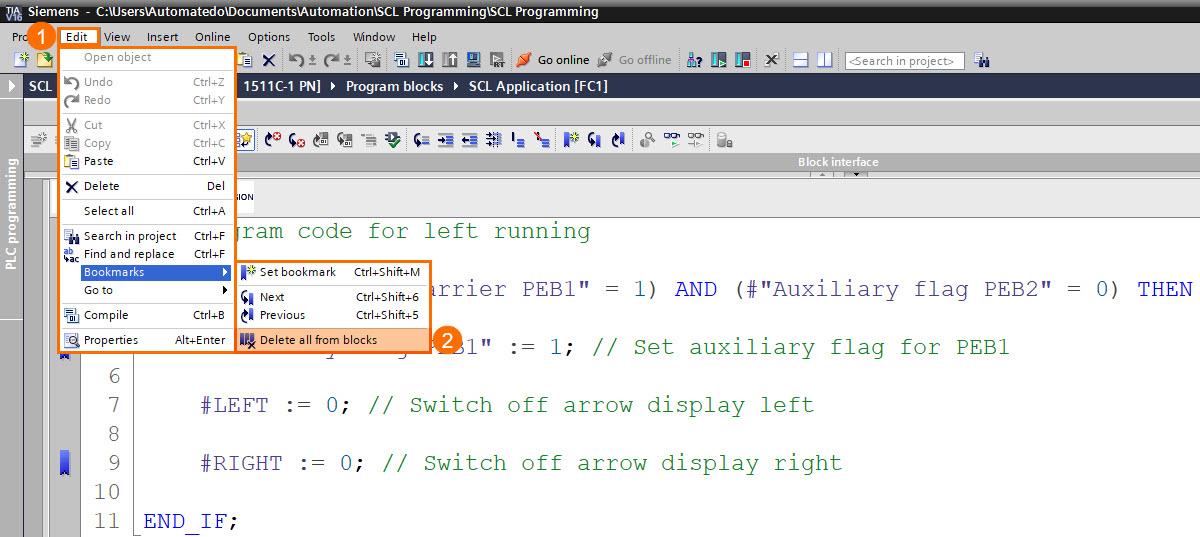
If you want to remove individual bookmarks in your programming block, it is similar to the way of adding separate bookmarks. But, if you decide to delete all bookmarks within the application code, you have two options. First, right-click on the sidebar and choose the “Delete all bookmarks” item from the shortcut menu.
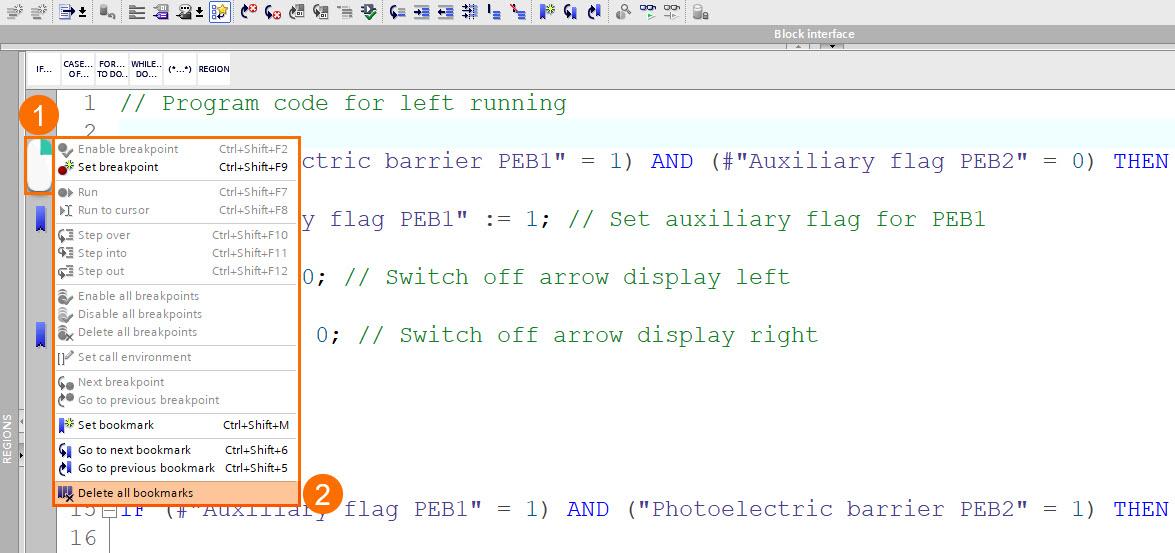
Secondly, click over the “Edit” menu in the top toolbar and choose the “Bookmarks > Delete all from block” item.
Syntax debugger rule
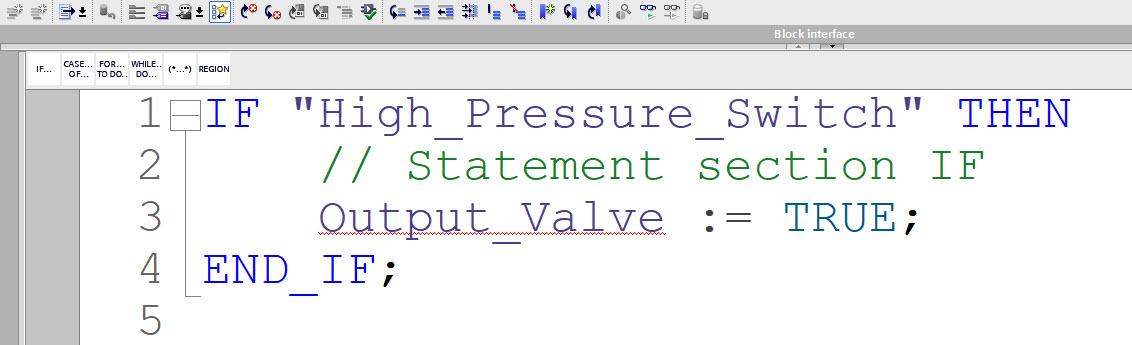
A first-rate debugger comes with the SCL editor. While you type, programs can be debugged. For example, look at the written program in figure 6.1. The red underline in line 3 indicates that there is an issue here.
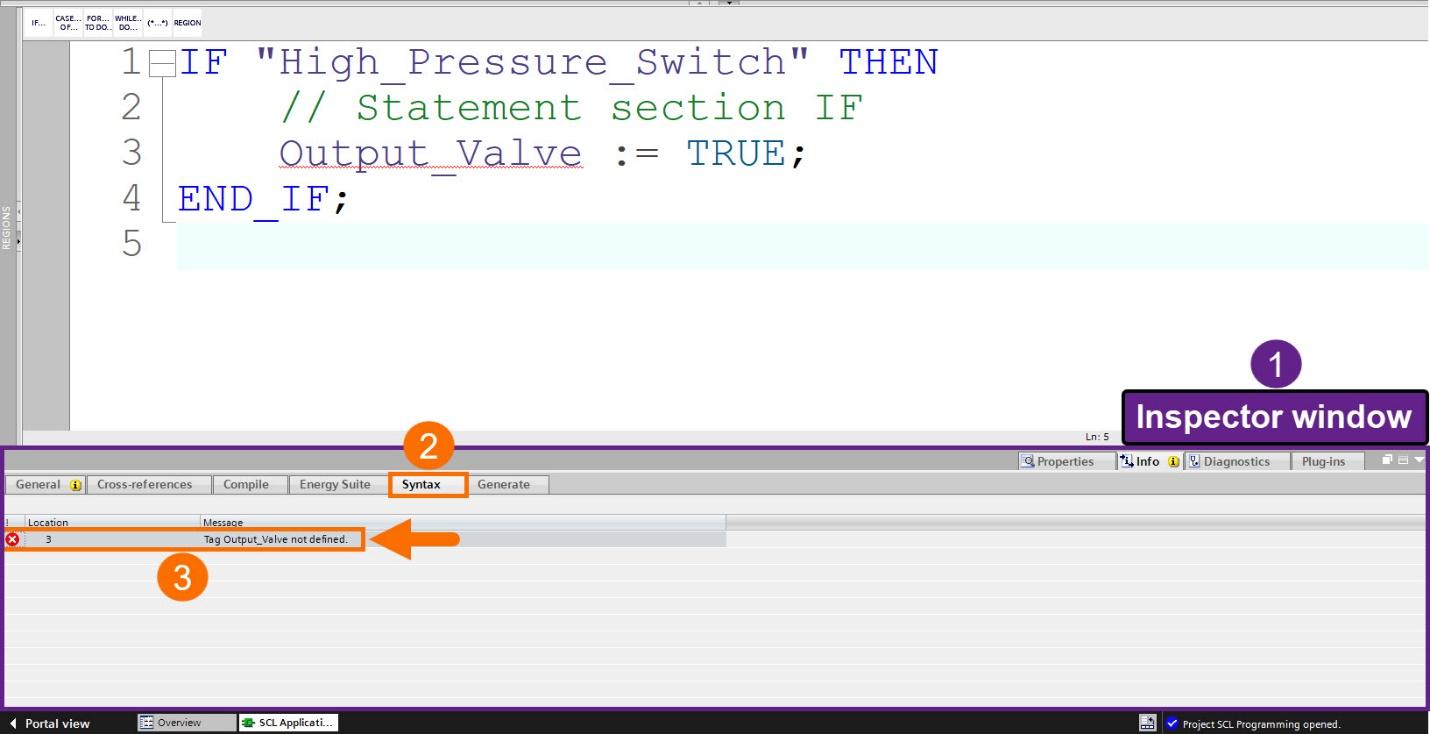
To understand what is wrong, open the inspector window at the bottom of the TIA Portal software and click on the “Syntax” tab to see the error. As the syntax checker displays under the “Message” column, the tag “Output_Valve” is not defined. It also shows the line number that carries this issue under the “Location” column.
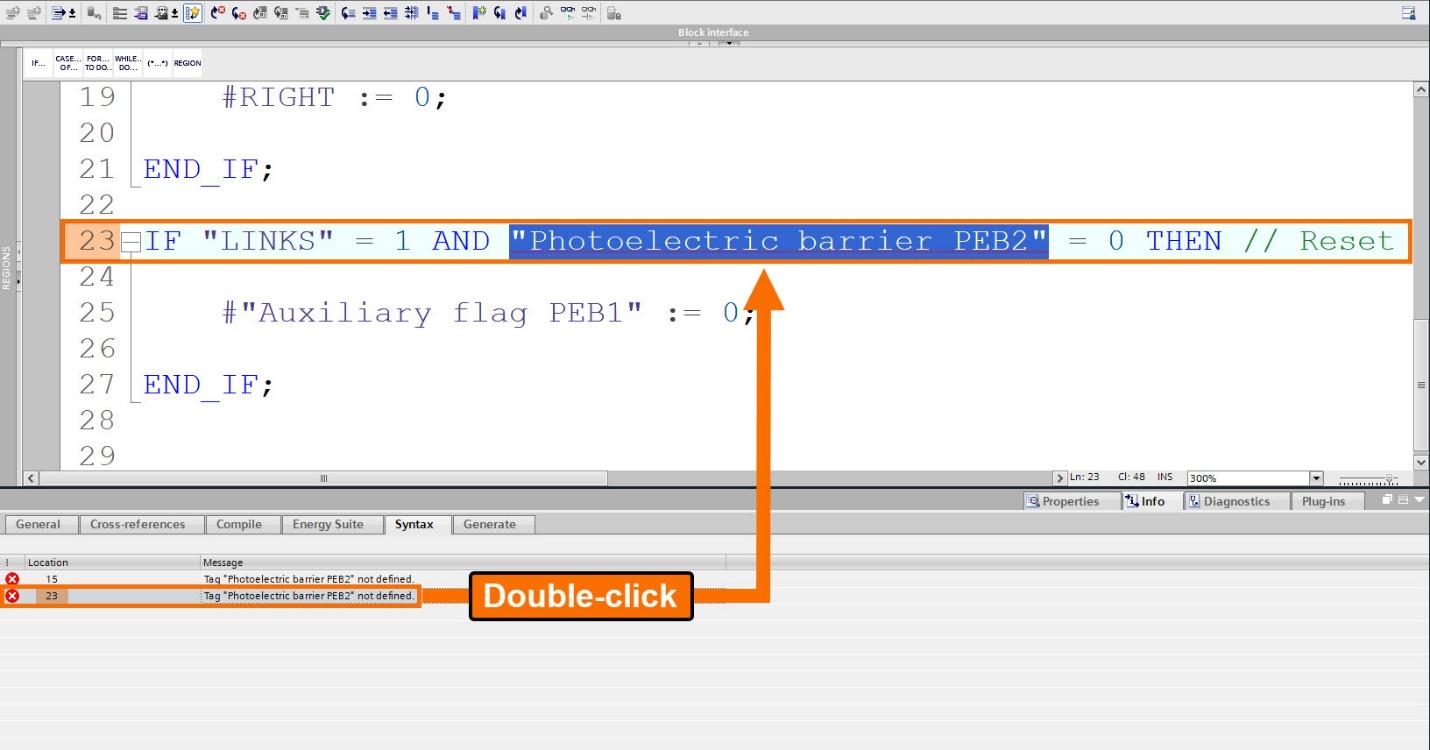
If your program contains several lines and you want to find the line that has the issue as soon as possible, double-click on the syntax error, and TIA Portal will bring you automatically to the corresponding programming line.
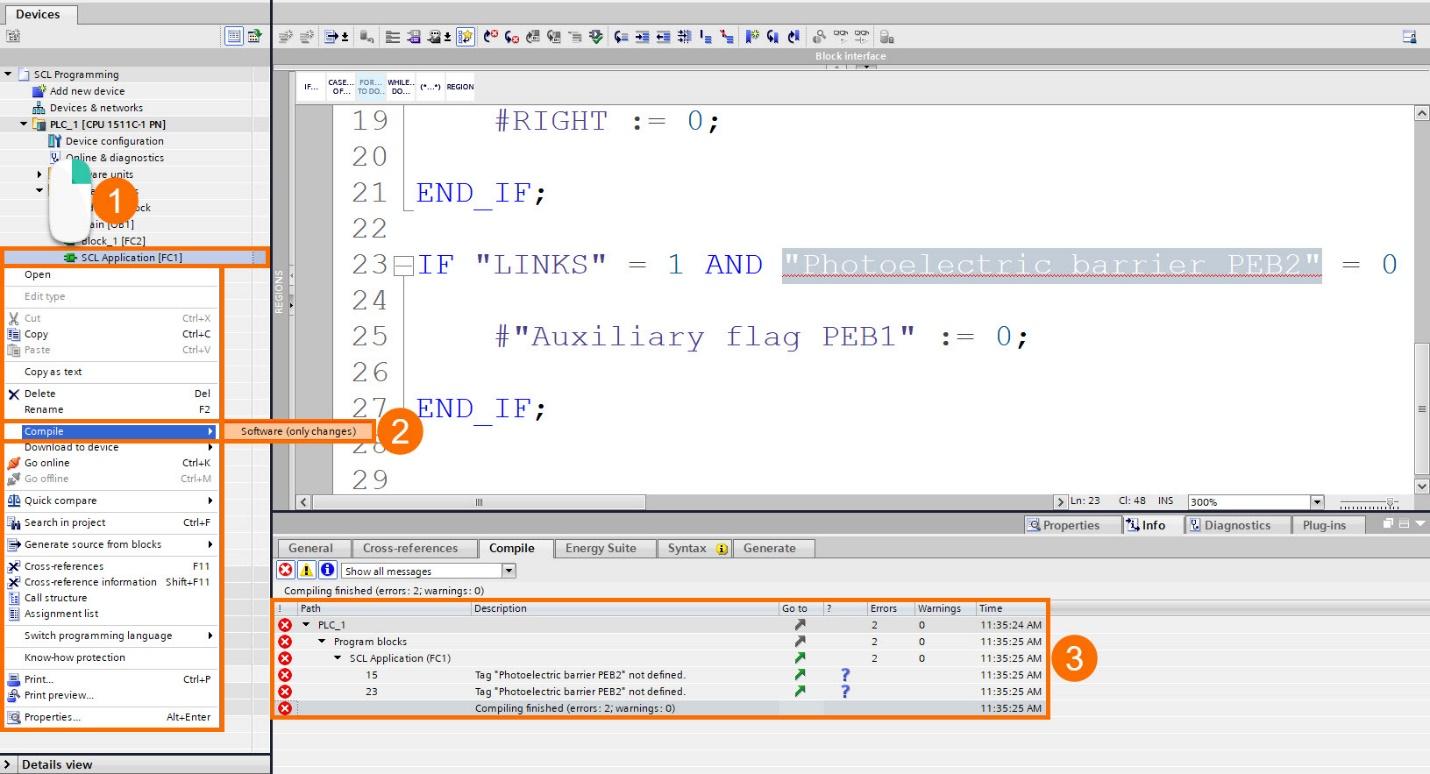
Compiler rule
When you create an SCL program in any S7 Siemens PLC and wish to download it to the programmable logic controller, you must first compile it. Then, the compiler checks the syntax, appropriate usage, sequencing, and context of all statements within the SCL block.
To compile your SCL program, right-click over the SCL block and choose compile, as shown in figure 6.1. Since the program has no error, the block has successfully compiled.
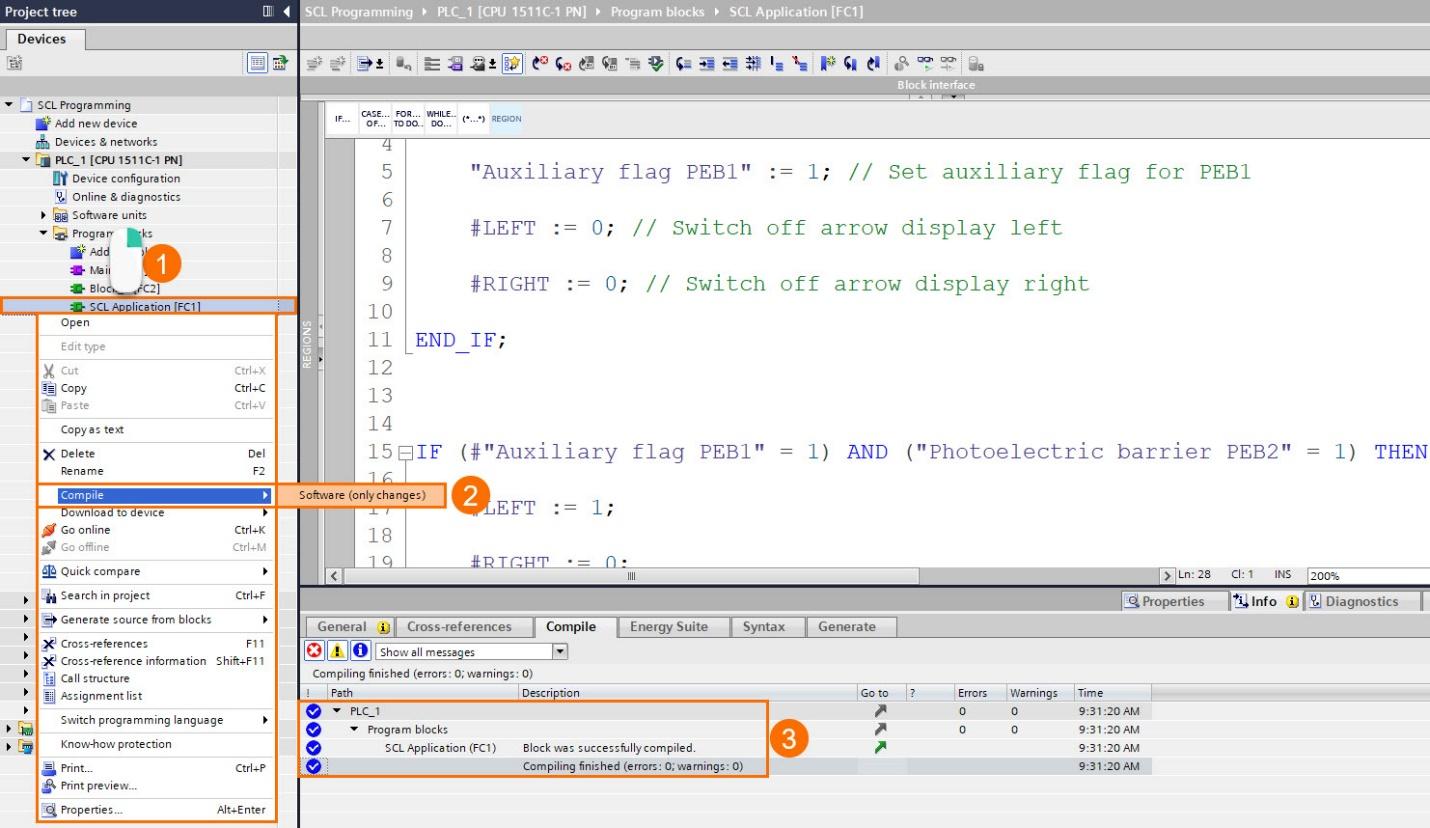
If you compile the program that has issues, errors are displayed on the “Compile” tab in the inspector window. The compiler discovers the identical syntax errors found by the debugger on the “Syntax” tab. Also, the line numbers on which the errors appear are determined by the compiler.
Conclusion
In this tutorial, we have discussed the SCL programming interface in TIA Portal. You learned how to format your application code using indent, outdent, and alignment features. You also learned how to expand and collapse sections of SCL code and how to navigate definitions and browse to a specific line.
You understood what bookmarks are, why they are important, how to add and remove them from the application code, and how to use bookmarks to navigate your SCL program.
You got familiar with the SCL debugger and its rule to find syntax errors while typing the program for a particular application.
Finally, you became acquainted with the compiler, which is necessary to test your SCL program to find possible issues and errors before downloading it to the PLC.
