Working with multiuser engineering using TIA Portal’s Project Server

Introduction
We explored the setup and configuration of Project Servers in the TIA Portal, which laid the foundation for collaborative and multiuser engineering. This tutorial will delve into the practical aspects of working with Project Servers and managing projects and libraries within a multiuser environment. We will observe user interaction and learn how to handle modifications, synchronization, and flagging of program blocks. We will explore the new feature introduced in TIA Portal v18, which enables the creation and management of global libraries within the Project Server.
Working with Project Servers in TIA Portal entails a smooth collaborative experience, allowing multiple users to work simultaneously on the same project. Each user can contribute to specific parts of the program they have been assigned to. They create, delete, and modify blocks as needed. Program blocks can be flagged to indicate that a user is currently working on them to ensure efficient collaboration between engineers. Users must perform a "Check-in" to push their changes to the server when making modifications. Conversely, if another user modifies a part of the program, a "Check-out" is required to refresh the local session and retrieve the latest changes made by other users.
This tutorial teaches you how to effectively work with projects and libraries in a Project Server environment. We will simulate interactions between two users connected to a local Project Server. User 1 will create new blocks, perform a check-in, and observe the changes on User 2's side. We will explore the flagging mechanism to indicate work in progress and demonstrate the synchronization process. Furthermore, we will explore the new global libraries feature introduced in TIA Portal v18, allowing users to create and manage libraries within the Project Server, facilitating collaboration and code sharing among team members.
Prerequisites
To follow this tutorial, you will need an installation of TIA Portal. We will be using v18, but you can use any other version. No additional hardware or software is required.
This tutorial assumes familiarity with the “Getting started with multiuser engineering using TIA Portal’s Project Server” tutorial.
Working with multiuser projects
To show the interactions between users in a Project Server, we will use two different instances of TIA Portal using two user sessions. Both are connected to a local Project Server containing a pre-created project. Please note that the following steps can also be applied to an external server. The project includes a CPU 1511 configuration and a default main program block.

To avoid confusion, each figure will indicate which user is being used.
The concept of multiuser engineering is to allow different users to work simultaneously on the same project. Each user contributes to different parts of the program they have been assigned to. They can create, delete, and modify blocks.
Each time a modification is performed on your local session, you will need to push this modification to the server. This is called a “Check-in.” If another user modifies a part of the program, you must refresh your local session. This is called a “Check-out.”
Also, the interface adds indicators or “Flags,” used to notify the other users that you are working on a specific block so none else would attempt to work on it simultaneously. They’re also used to select the blocks you want to check in or check out.
Let’s take a look at how it works. In this part, we will use User 1 to create new blocks on the project and perform a check-in to send them to the server. Then, in each step, we will check what happens on the User 2 side before performing a “Check-out” to update the session.
Go to User 1, create a new FB block, and give it the name of your choice.

After that, call the newly created FB in the main program and create its associated DB.
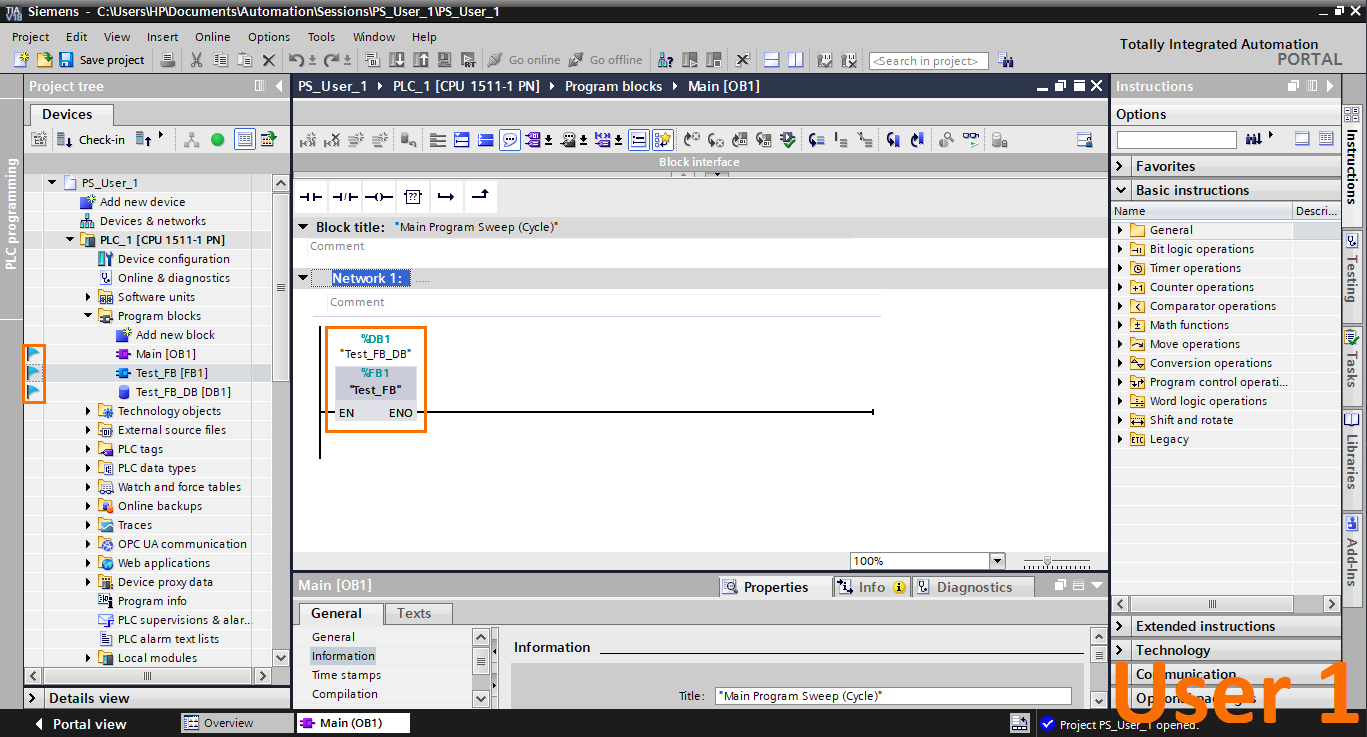
You can notice that since all program blocks have been modified (OB1 and newly created FB1 and DB1), they all have been flagged automatically (blue flag icon at their right).
On the User 2 side, you can notice that the main program has a yellow flag. This indicates that another user has flagged this block to work on it (So another user won’t work on it). The main program has been flagged (blue flag) on the User 1 side.

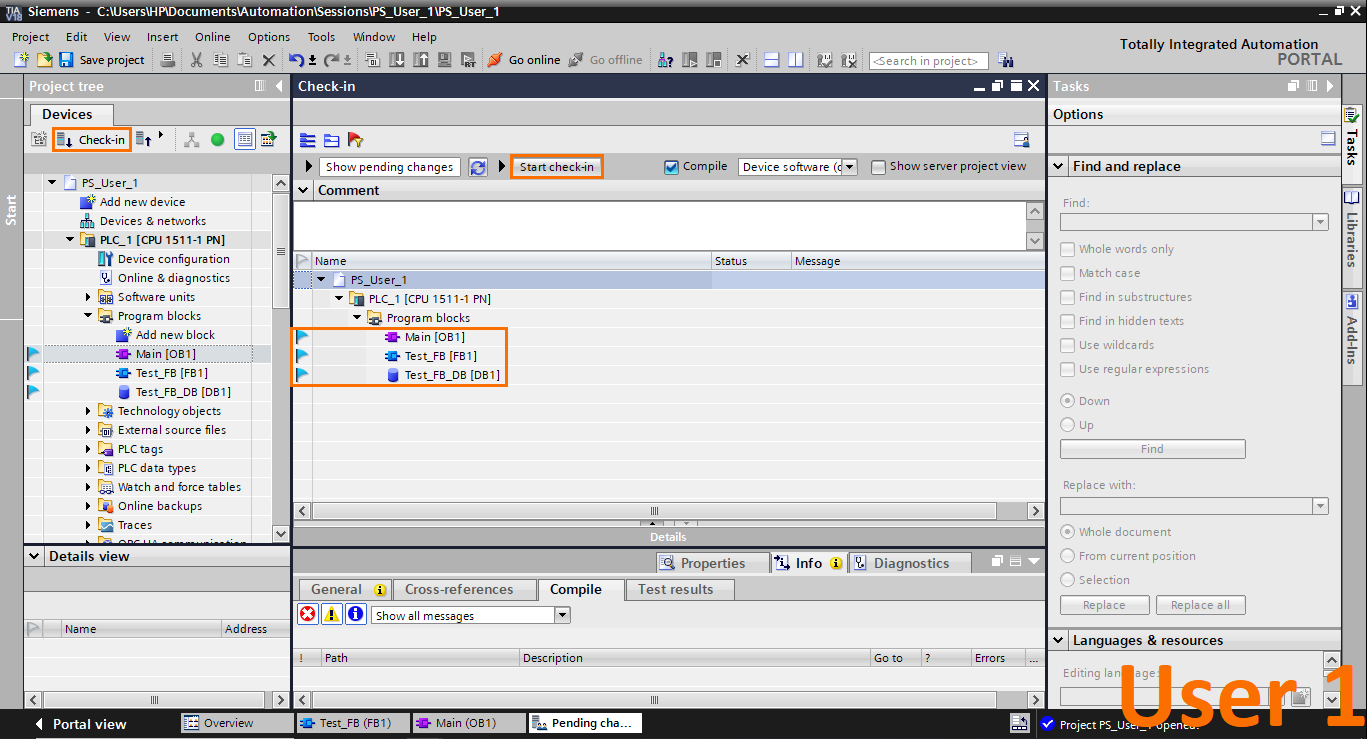
Now click on the “Check-in” button.
The check-in interface will open, where you can see all the selected objects we want to update in the server. Click on “Start check-in.”
Once the check-in is done, a small window will open asking you if you want to refresh your session or keep the local session. If you have other modifications on your session you want to keep, click on “Keep local session.” Otherwise, your session will be refreshed (synced with the server) by clicking “OK.”

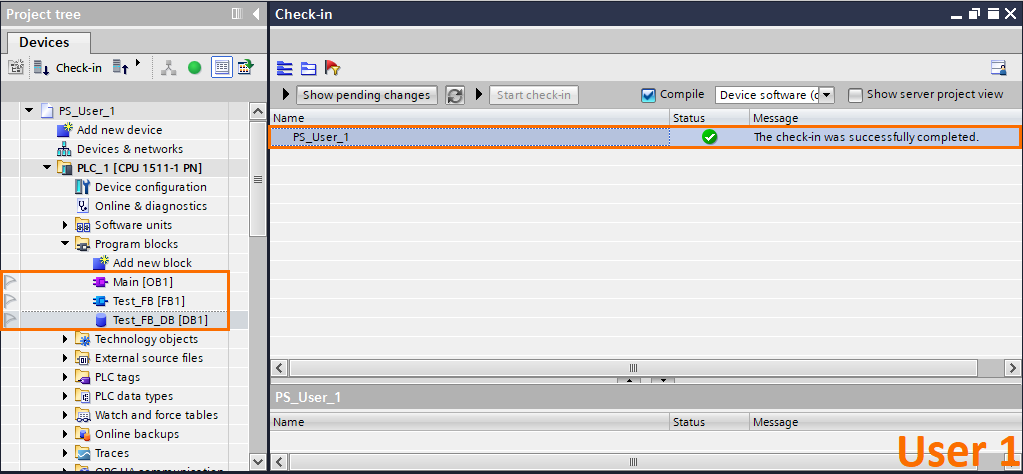
The check-in interface should indicate that the operation has been completed successfully and the blocks are automatically unflagged.
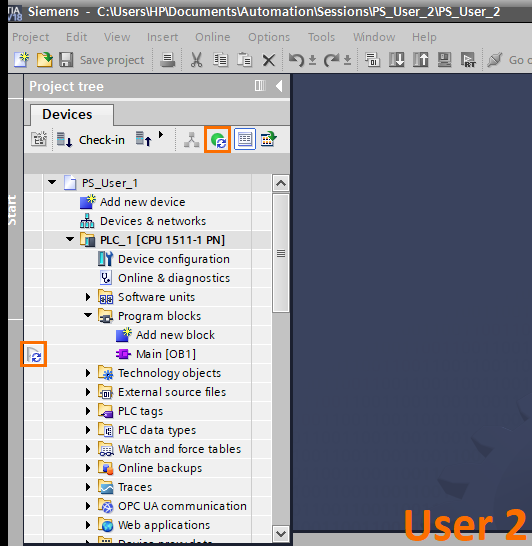
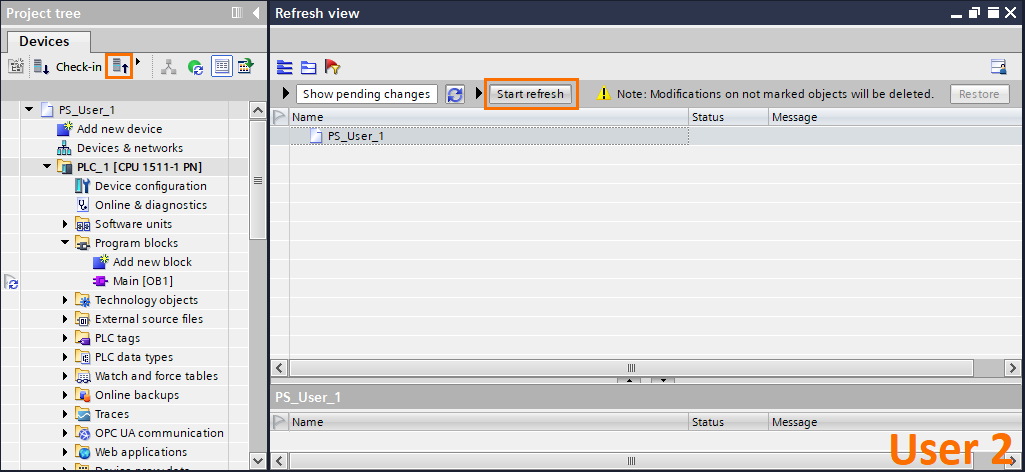
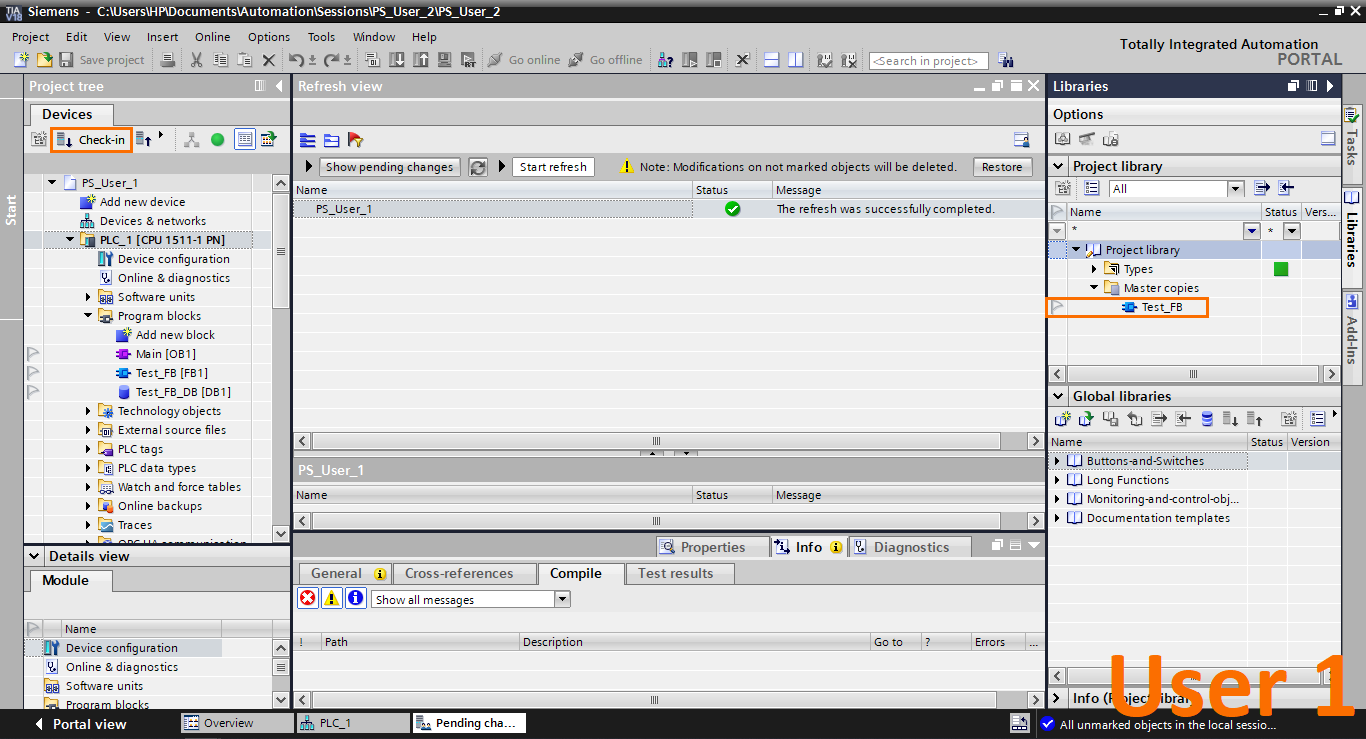
Now let’s take a look at the User 2 side. Since User 1 uploaded modifications to the server, the server state icon should indicate a small refresh sign meaning that modifications are pending. This same sign appears in the flag icon of the concerned blocks.
To refresh your session, we have to perform a “Check-out.” Click on the “Check-out” button. After this, click on “Start refresh” in the check-out interface.
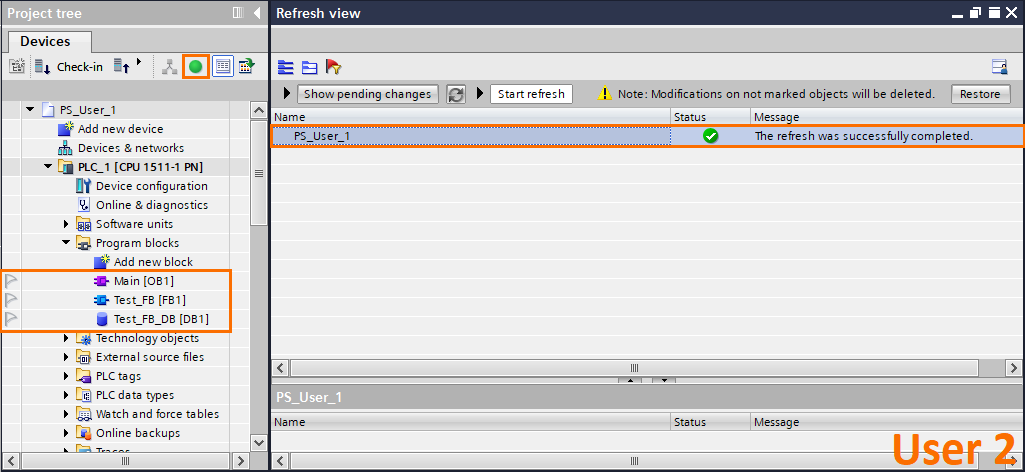
Once the refresh is done, it should indicate it has been performed successfully, and the new blocks should appear in the Program Blocks section.
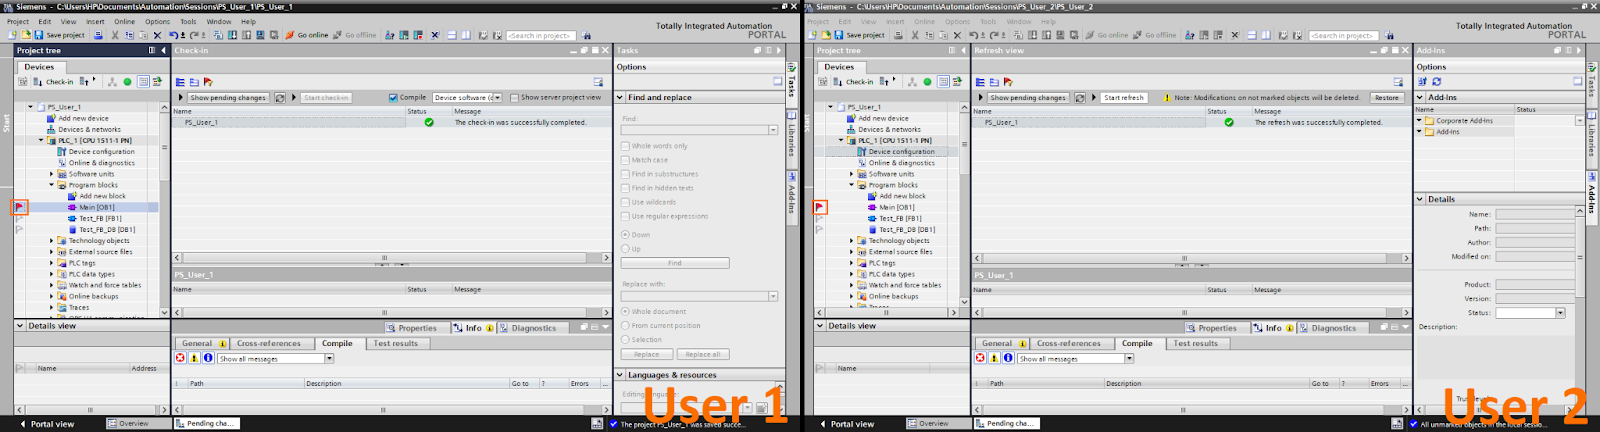
Let’s look at what happens when two users flag the same block. On the User 2 side, click on the flag of the main program block (to indicate you are currently working on it). A yellow flag on the User 1 side will appear on the main program block. Yellow flags indicate that another user flagged this block.

Still, on the User 1 side, click on the flag of the main program block. It will become red on both users' sides. The red flags indicate a conflict between two users.
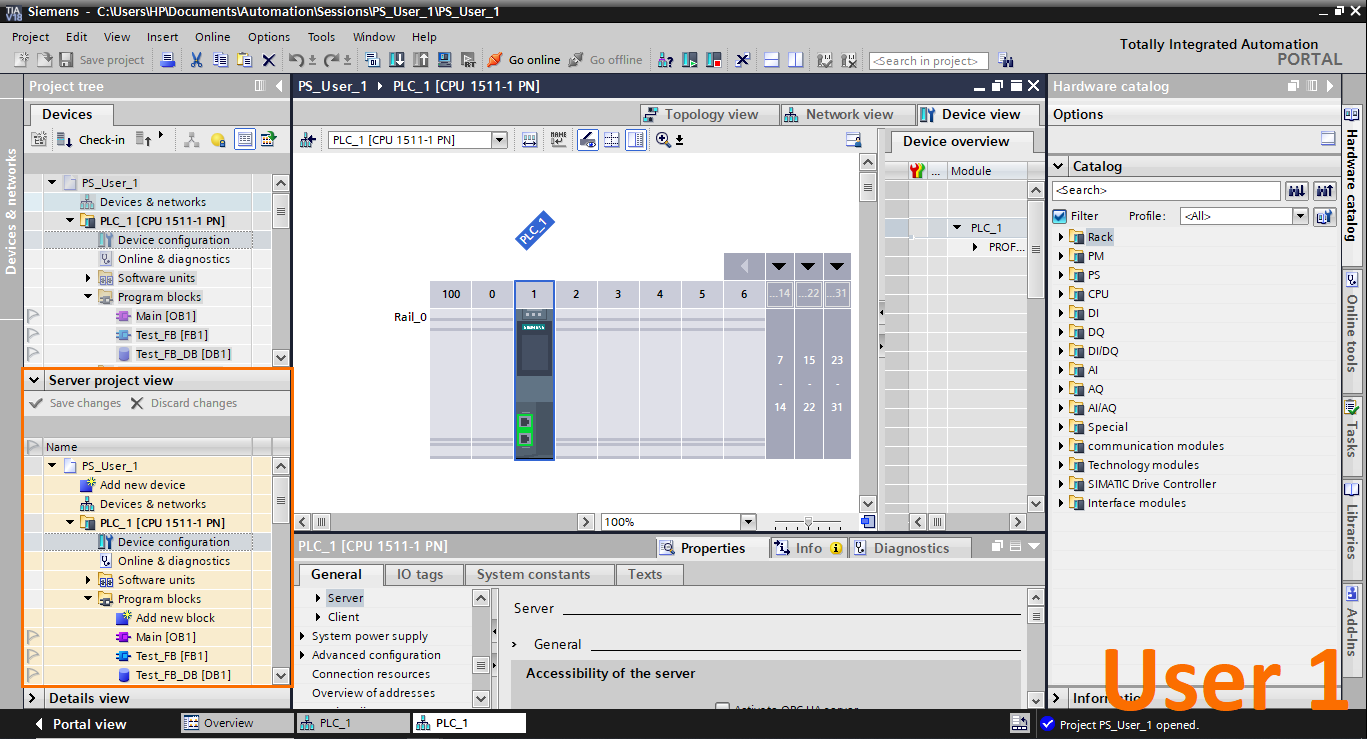
Now for the last part of this tutorial section, open the “Device configuration”.
You will notice a message telling you you can’t modify the hardware configuration using the Project Server. The only way to access the hardware configuration is to open the Project view to access the current project inside the server and edit there directly. This is done to avoid all confusion during development. Take note that not all users can access the Project view. You can manage the project’s users using the administration tool shown in the previous tutorial.

Then, open the small arrow near the check-out button and click the “Open project view” button.

This will open the project view interface that gives you access to the project's content inside the server. It will appear as a second project tree with a yellow background. Any modification made here will be made directly on the server itself. You can also notice that the previous message is now absent, and you can edit the hardware configuration inside the project.
Working with multiuser libraries (TIA Portal v18 new feature)
Let’s head now to the second aspect of the Project Server: The global libraries. Starting TIA Portal v18, you can create and manage global libraries inside a Project Server. It works similarly to the project; You have to create a global library within the server, create individual workspaces (local sessions), and each user contributes to the library by flagging and checking in/out data with the server. While connected to a server, open the “libraries” tab on the left side of the screen of User 1.
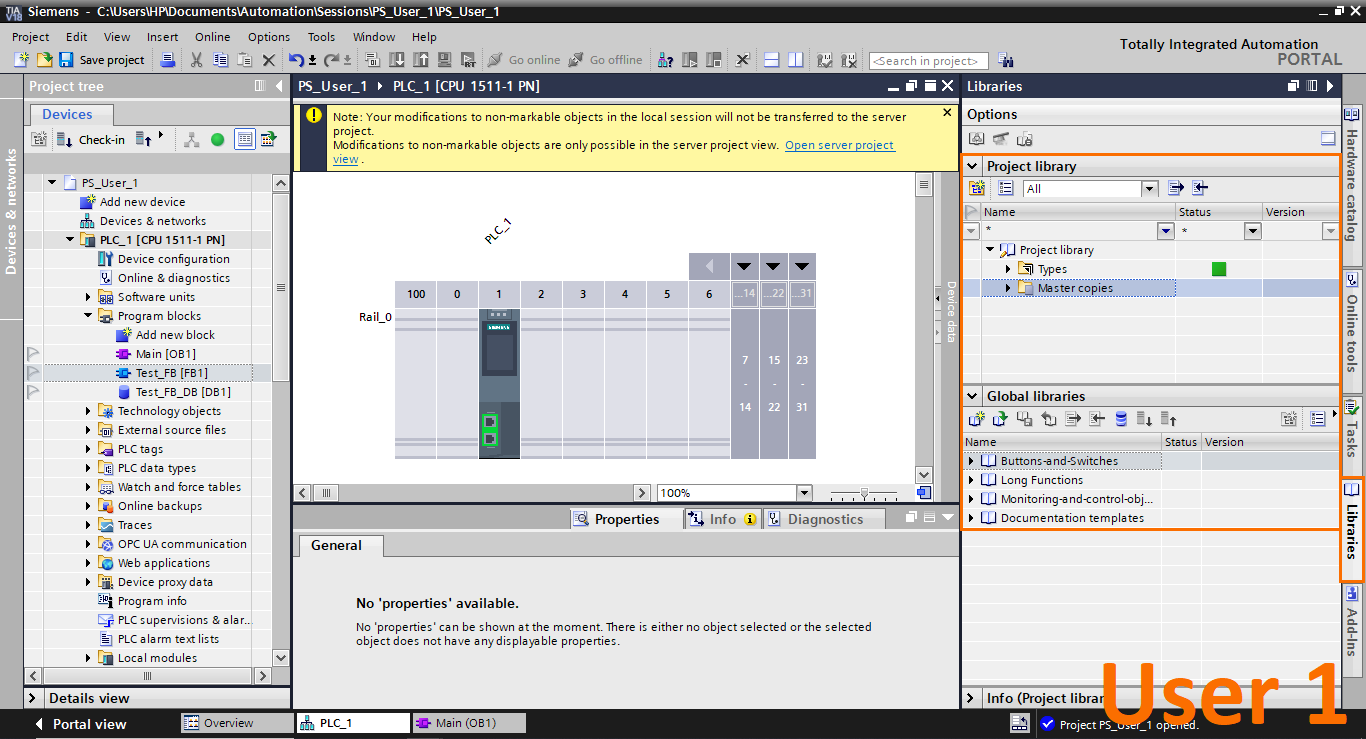
Your current project session has a project library, and it works the same way as a regular project. You can drag and drop program blocks inside it, and it will have a server status notifying you if the library is up to date on the server or not.
Any modification done to the Project library must be checked-in like any other program block in the project.
Under the project library section is the global libraries interface. Now with TIA Portal v18, you can create, manage and use global libraries in your Project Server. To demonstrate how it works, I created a test library that will be used in the server. On the global libraries toolbar, click on the “Manage global libraries” button.

After that, a “Manage to sever libraries” window will open. It is identical to the server project manager. You can check the Project Server introduction tutorial for more details about it. Here, you can create and manage global libraries inside your Project Server. Click on “Add global library to server”.

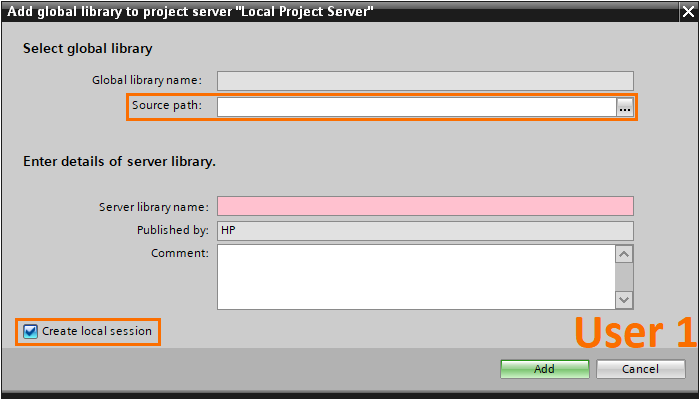
Another window will open where you select the source path of the library and add comments. Don’t forget to check the “Create local session” checkbox.
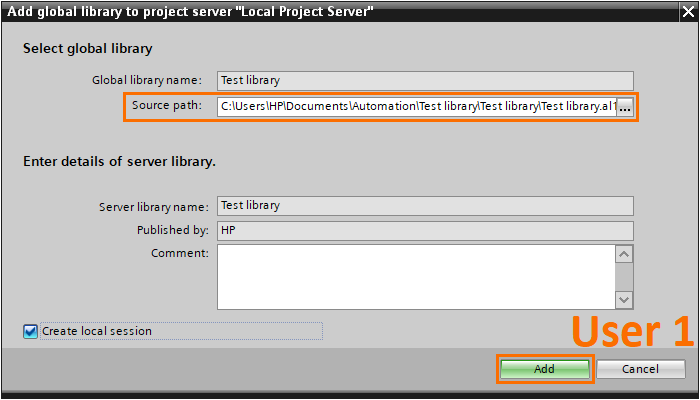
Selected the test library created previously and clicked on “Add.”
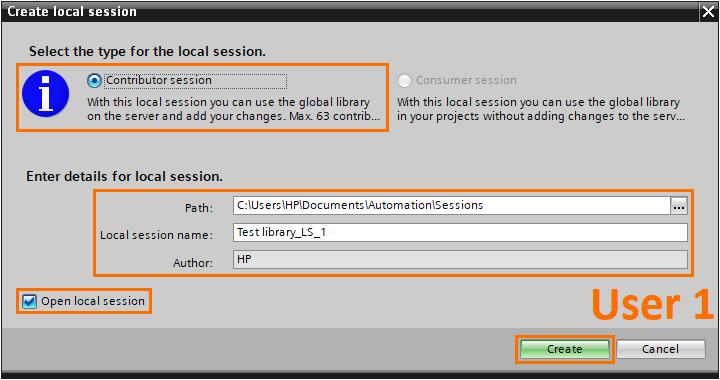
Next, we need to configure the local session we created. Select the “Contributor session” option, give a name to the session, check the “Open local session” checkbox, and click on “Create.”
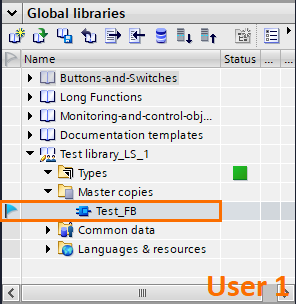
We have now created a global library on the server. It will be displayed in your “Global Libraries” interface. You can identify server libraries with the small multiuser icon. They contain the different folders of a global library and a server status icon.

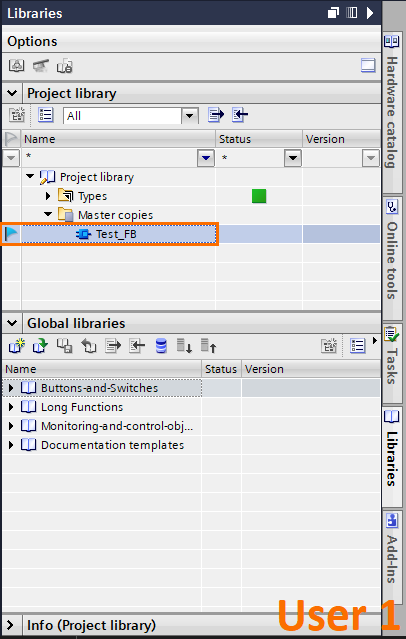
Let’s a program block to the library. Drag and drop the Test FB to the “Master copies” folder. It will automatically be flagged.
Now we need to check in the added block. In the case of a server global library, you need to use the check-in button in the Global Libraries section.Projects’ programs and libraries are located in two different workspaces and need to be checked in with their respective buttons (The same applies to the check-out). Once done, click on “Start check-in.”

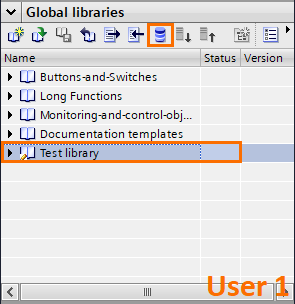
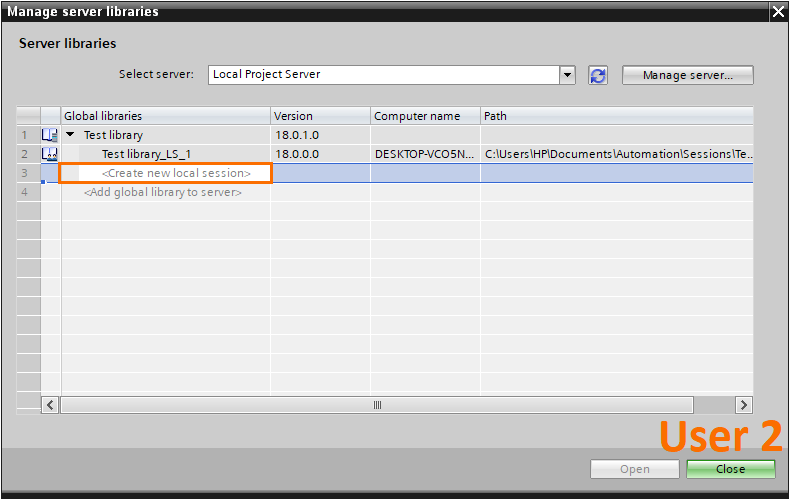
We can now head to the User 2 side to create its session and retrieve the newly created global library. Open the server libraries manager, then the library, and click “Create new local session.” Then, follow the same steps as we did to create the User 1 local session.
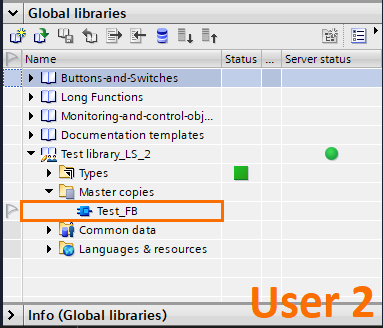
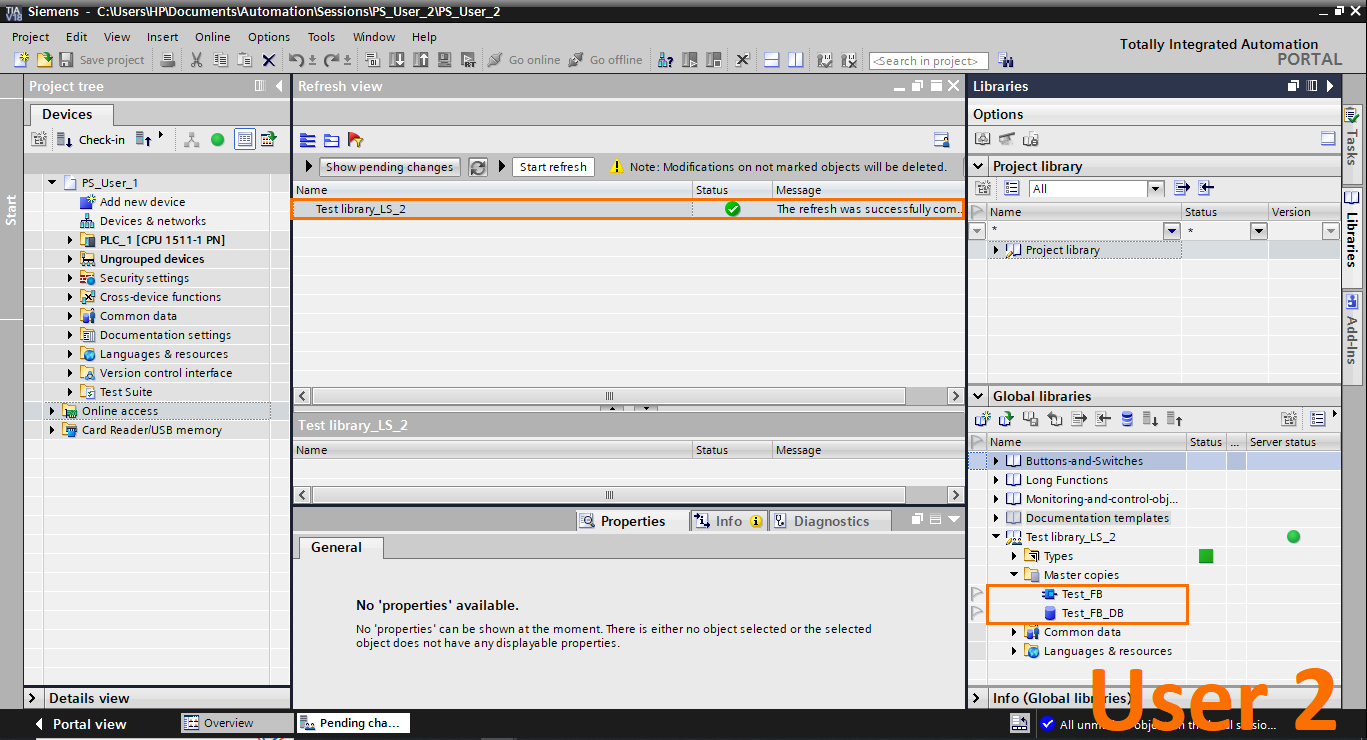
Once the local session is created on the User 2 side, you should directly find the block we added previously.
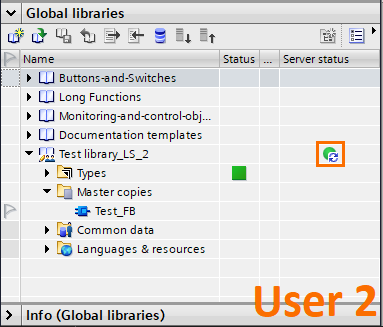
If a modification is done on the User 1 side, the server status icon will indicate a pending update from the server. Requiring a check-out to refresh the library's local session.
To perform a check-out, click on the check-out button in the global library section. Then, click on “Start refresh.”
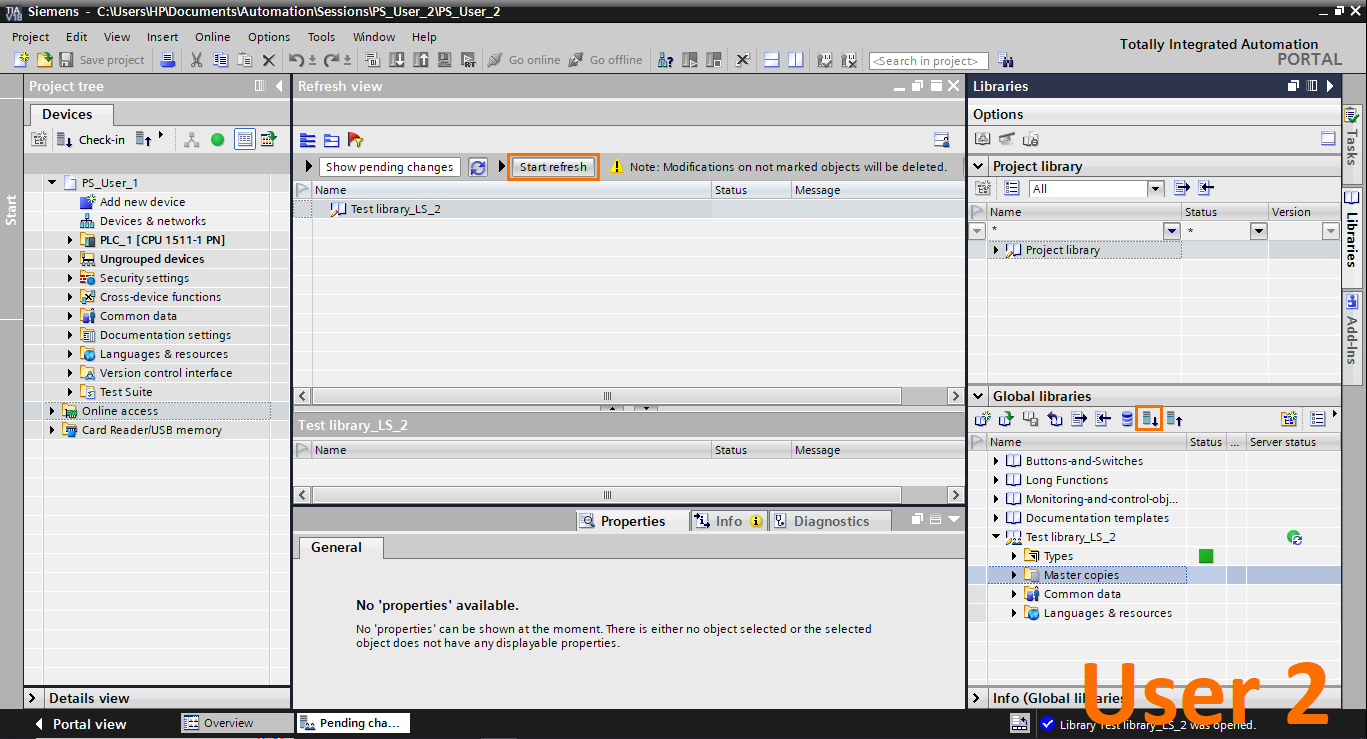
Once the check-out is done, the modified blocks will appear in your server's global library.
Conclusion
In this tutorial, you learned how to effectively work with projects and libraries in a Project Server environment. You discovered the process of flagging program blocks to indicate work in progress and successfully performed check-ins and check-outs to synchronize modifications between users. Additionally, you explored the new feature of global libraries, enabling seamless sharing and management of code within the Project Server.
Precise interactions are paramount in a multiuser engineering environment to avoid confusion, overwriting, or errors and ensure smooth collaboration among team members. TIA Portal plays a vital role in facilitating multiuser development by providing robust tools and mechanisms. The flagging system allows users to indicate their active involvement in specific blocks, preventing conflicts and duplicate efforts. The check-in and check-out process ensures synchronization of modifications, enabling users to stay up-to-date with the latest changes made by their colleagues.
