Getting Started with Siemens S7-1200 PLC in Factory IO

Introduction
In the world of factories and machines, we need smart controllers to make things work smoothly. One such controller is the Siemens S7-1200 PLC, a kind of brain for machines. It tells machines what to do.
But before we make machines in the real world, it's a good idea to practice and test them. That's where Factory IO comes in. It's like a pretend world for machines where we can check if everything works as it should.
This guide will show you how to connect the Siemens S7-1200 PLC with Factory IO. It's like making sure the brain (the PLC) talks well with the pretend world (Factory IO).
We'll start from the very beginning and keep things simple. By the end, you'll be able to make machines work smoothly in the real world by practicing in the pretend world. Let's get started!
Prerequisites
You’ll need to have a few items to follow this tutorial:
- TIA Portal V15 | Note - The process is the same for other versions of TIA Portal.
- Net-To-PLC-Sim | Note: Necessary for simulating a real PLC when a physical PLC is unavailable.
- Factory IO.
Factory IO side – Configurations
Before we dive into creating a basic project in Factory IO, make sure to download Factory IO , it’s easy to install, and choose to either start a free trial or purchase it.
Step 1 – How to create scene
Step 1.1
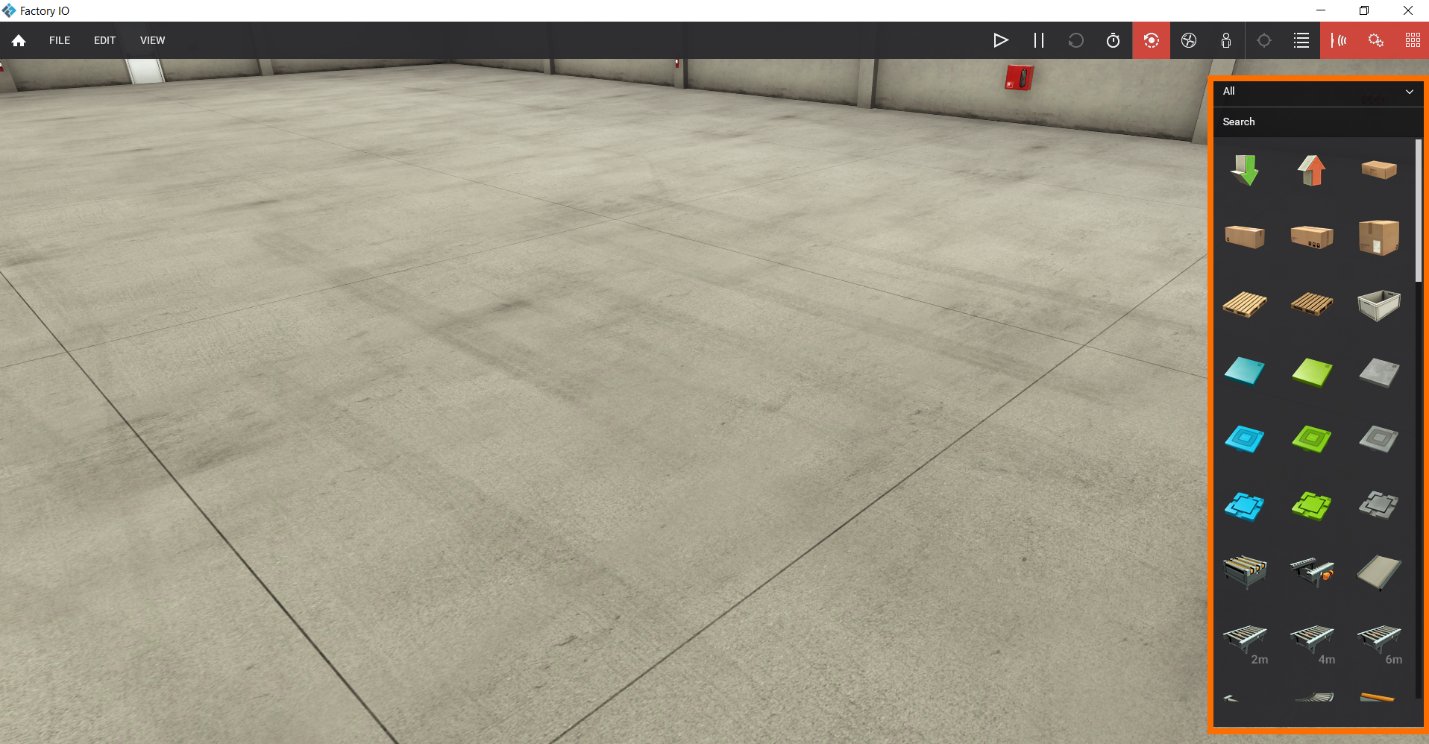
Open factory IO and Choose “New.”

You'll encounter the Factory IO interface, where on the right side, you will find an array of various materials at your disposal, including sensors, boxes, conveyors, and more.
Let's create a sorting project containing cylinders, boxes, sensors, and conveyors. In this project, we aim to identify high boxes and divert them away from the conveyor.
Step 1.2:
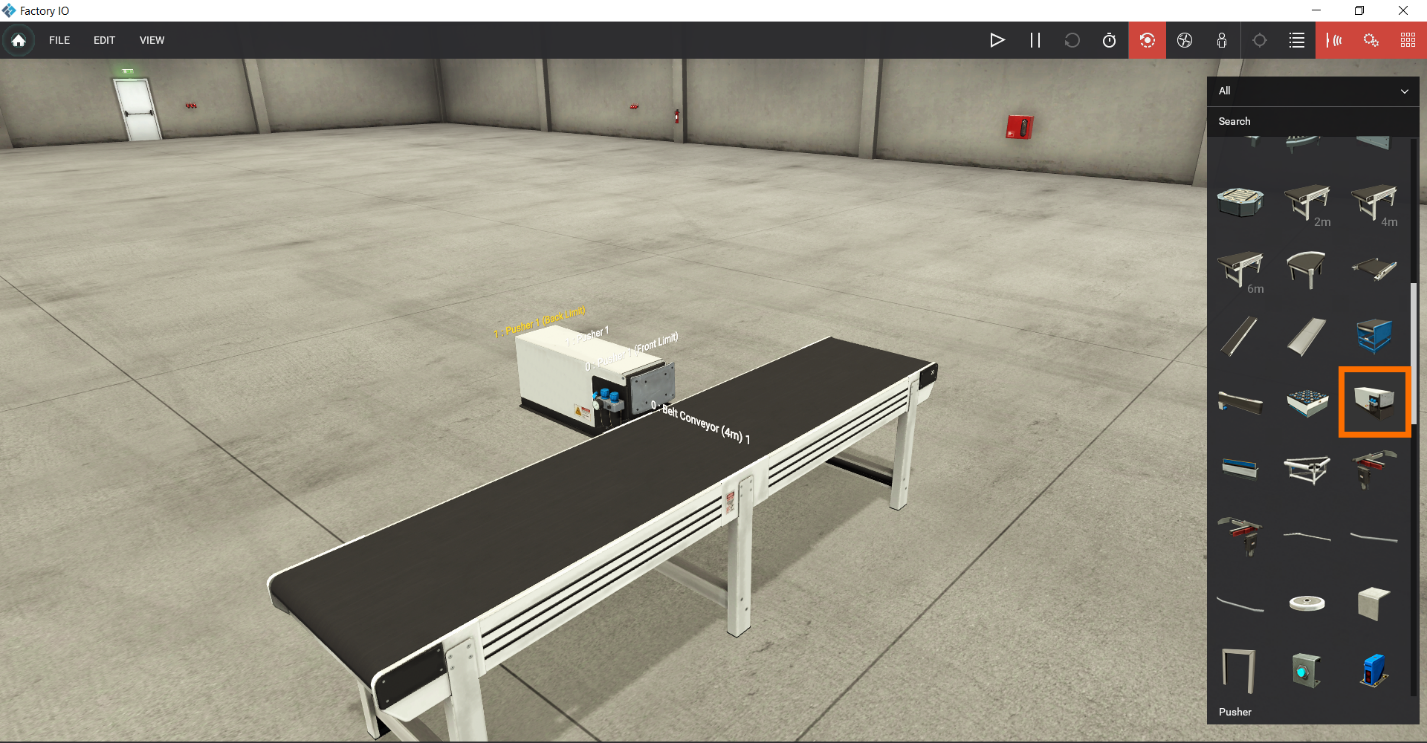
Let's get a “conveyor.” There are various types and lengths available. Let’s choose a 4-meter-long one and grab it in a factory setup.

Step 1.3:
Grab the “pusher” and position it on the conveyor within the factory setup.
Step 1.4:
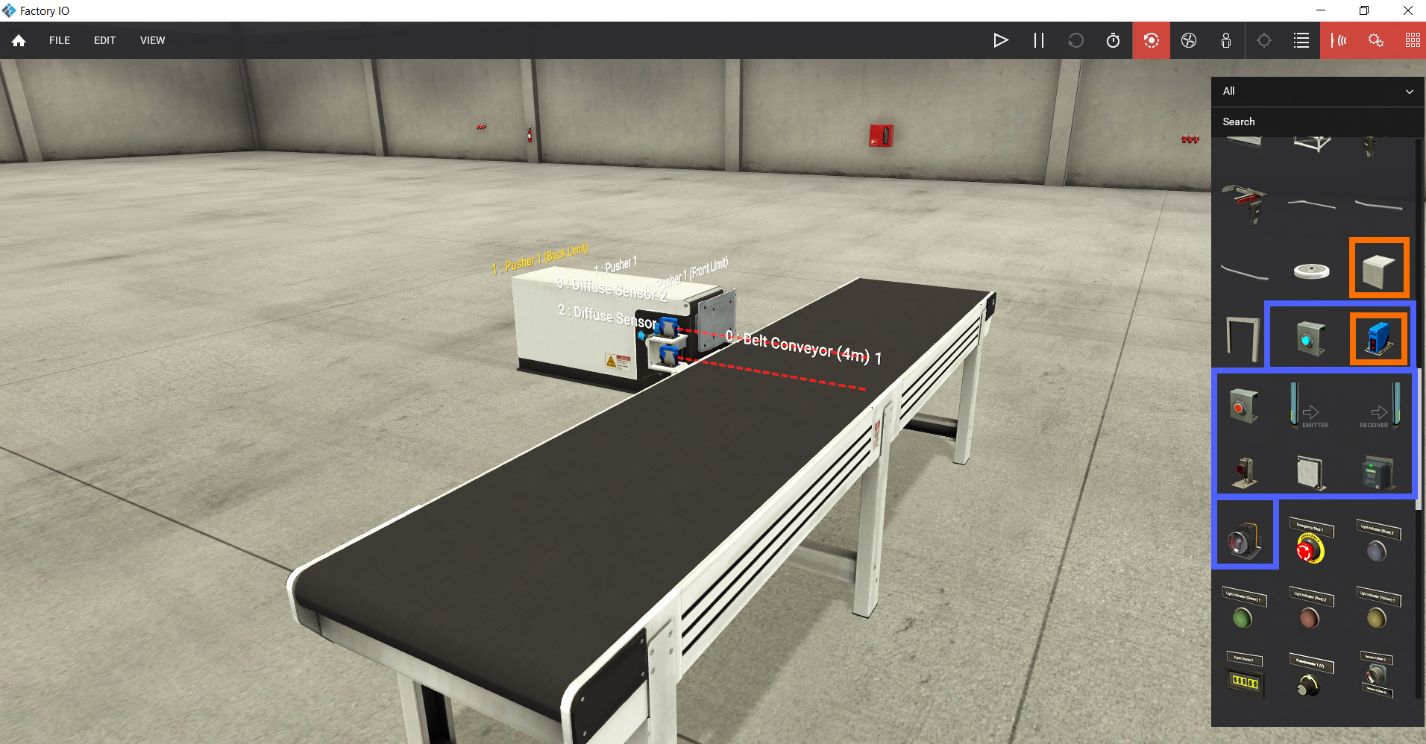
Now, add two “sensors” to the factory setup; one will detect small boxes, while the other will serve as a high box detector.
We have various sensor types, including diffuse, inductive, capacitive, Rx/Tr sensors, and a lot. For this project, we'll use a “diffuse sensor” for detection needs, and a “metal corner” to mount the sensors.
Step 1.5:
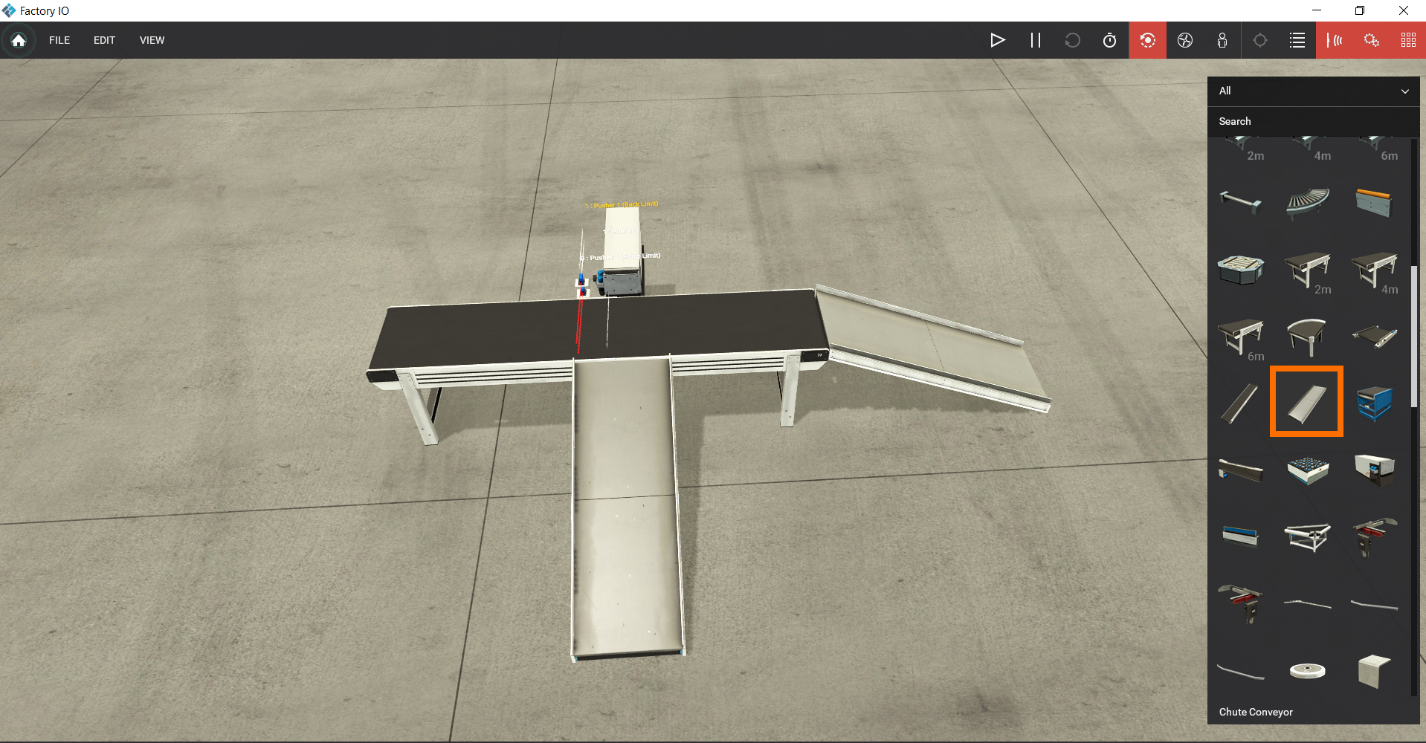
Let's add two “Chute Conveyors” to the factory setup—one for large and small boxes.
Step 1.6:
Now add the box's source “Emitter,” which will reach the conveyor.
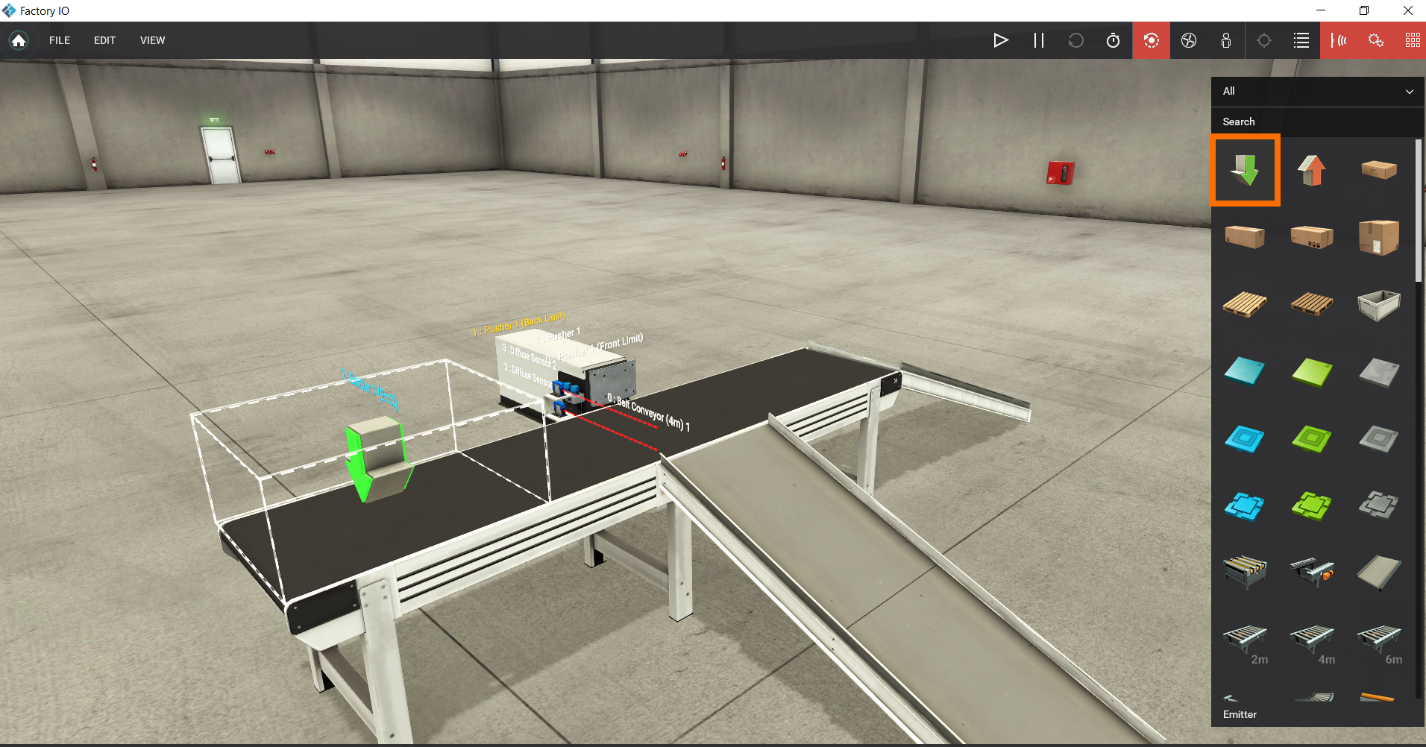
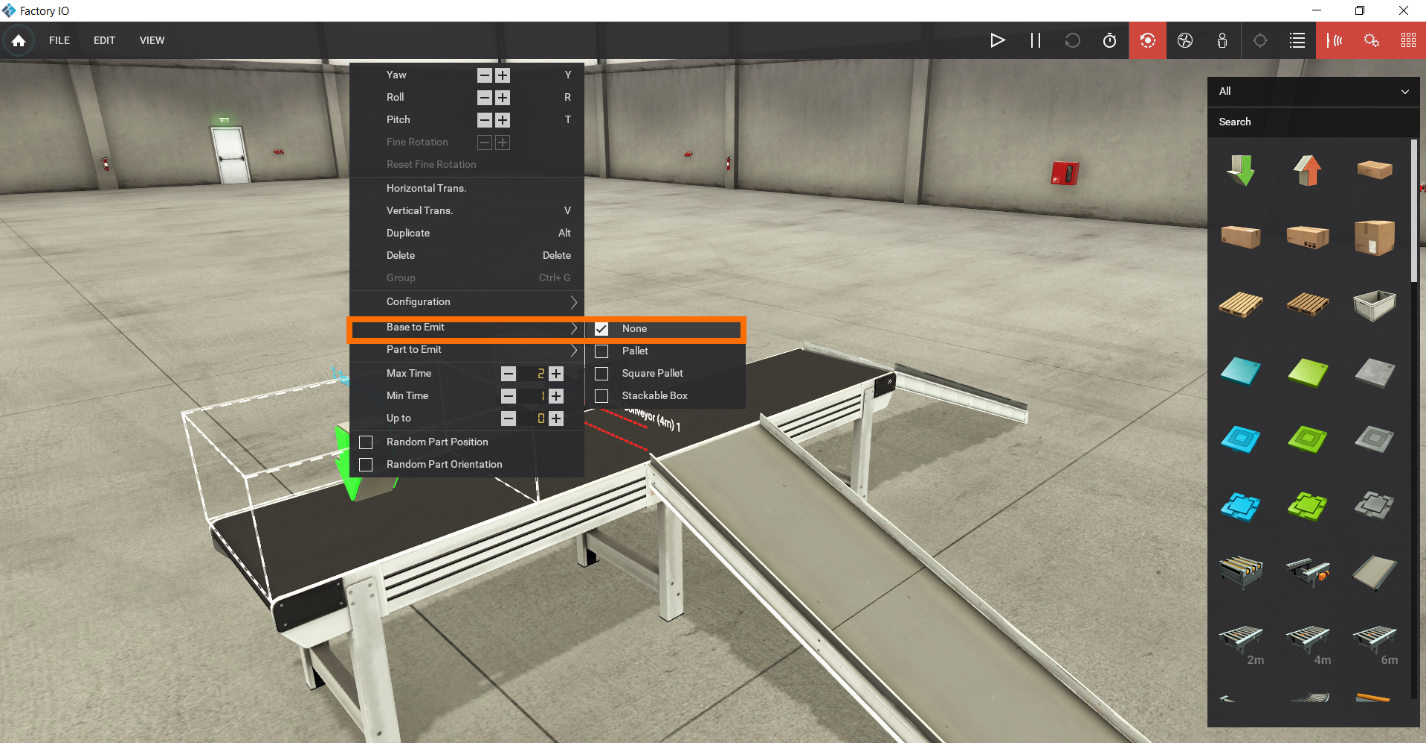
Step 1.7:
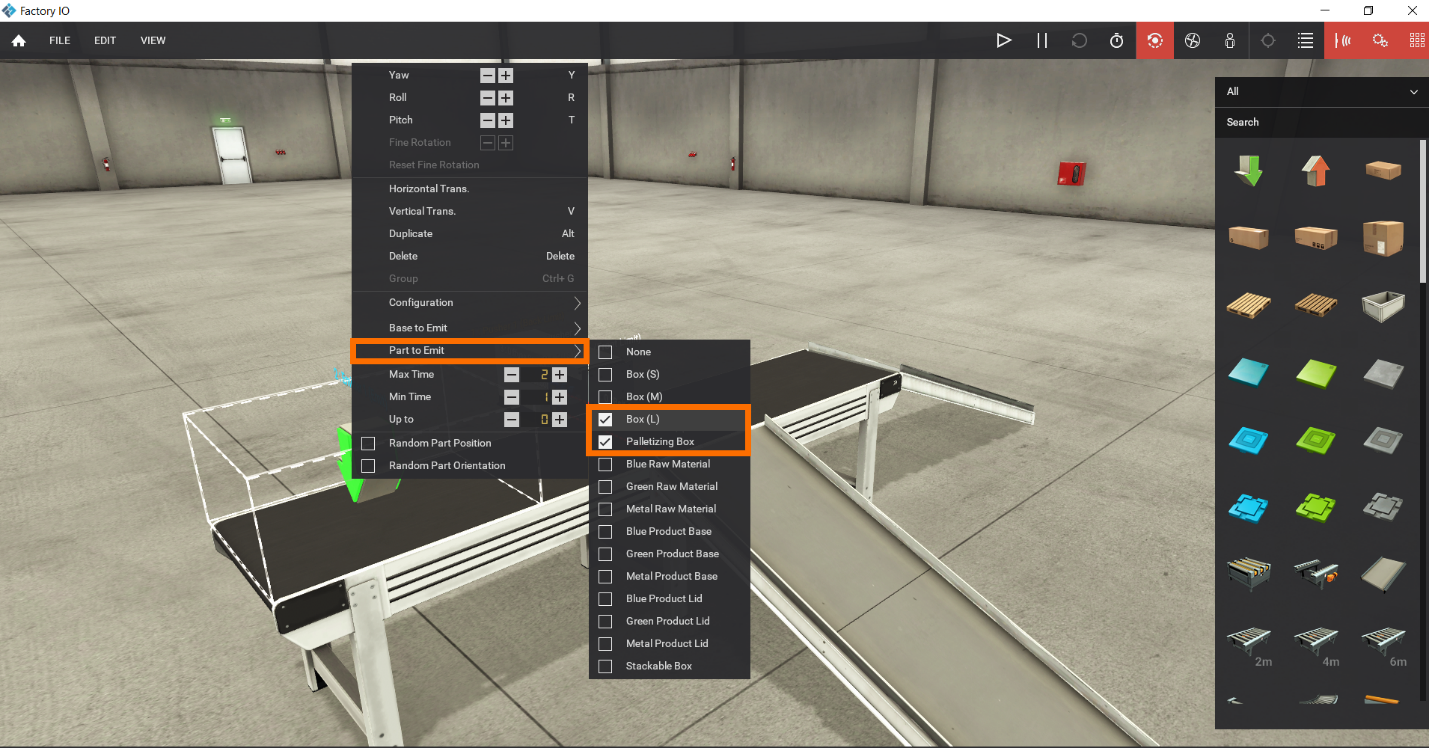
Configure the setting of “Emitter” to get large and small boxes only; first, right Click on “Emitter” and make “Base to emit” to “None”.
Second, select “Part to Emit” and choose “Box (L)” and “Palletizing box.”
Step 1.8:
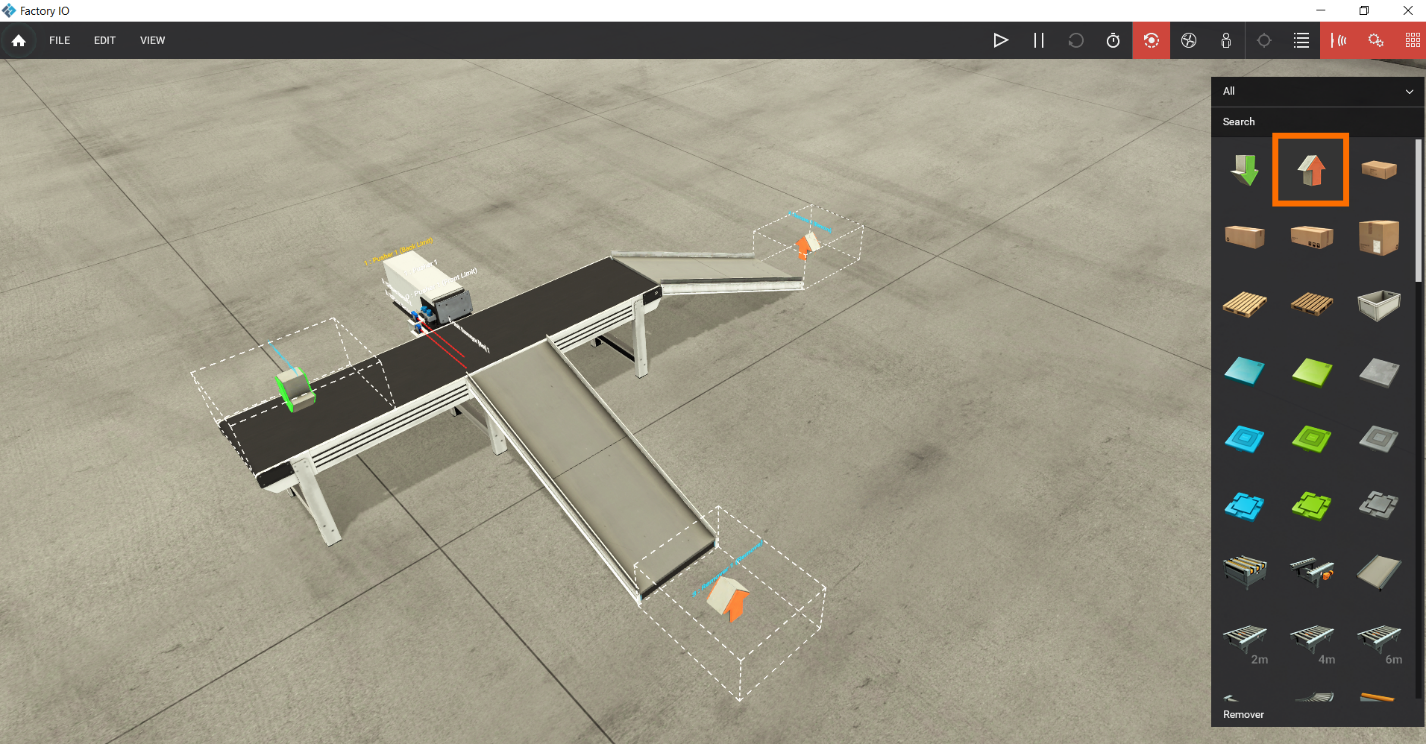
Let's grab the “remover” to remove the boxes once they've exited.
Step 1.9:
Finally, let's include a control panel featuring two buttons, “Start,” and “Stop,” and “Emergency Stop,” along with two “indicators,” one for indicating when the system is running. The other to signal when it's stopped.
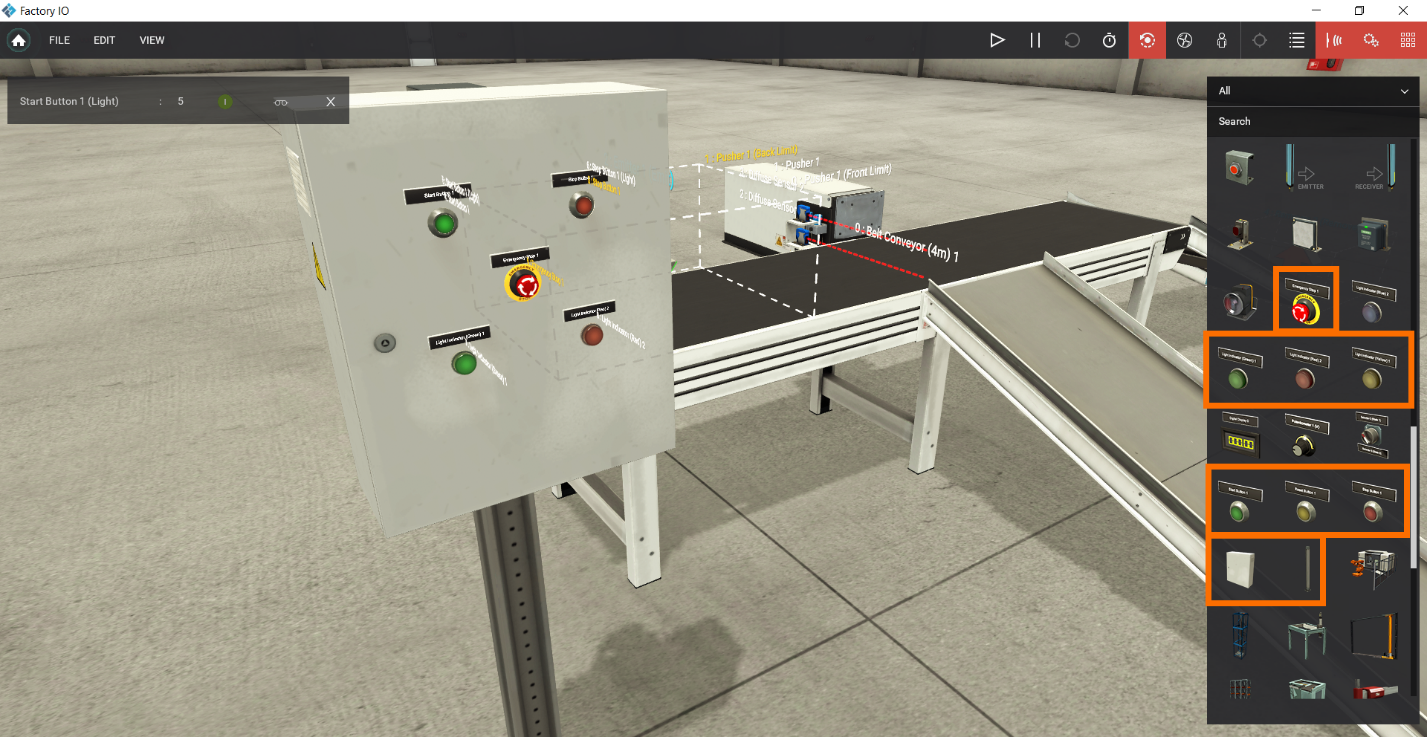
Note, as shown in the figure above, begin by adding a “column” to the factory setup. Then, position a “panel” at the top of this “column.” Next, select and place all the buttons you require onto the panel
Step 2 – How to configure inputs and outputs
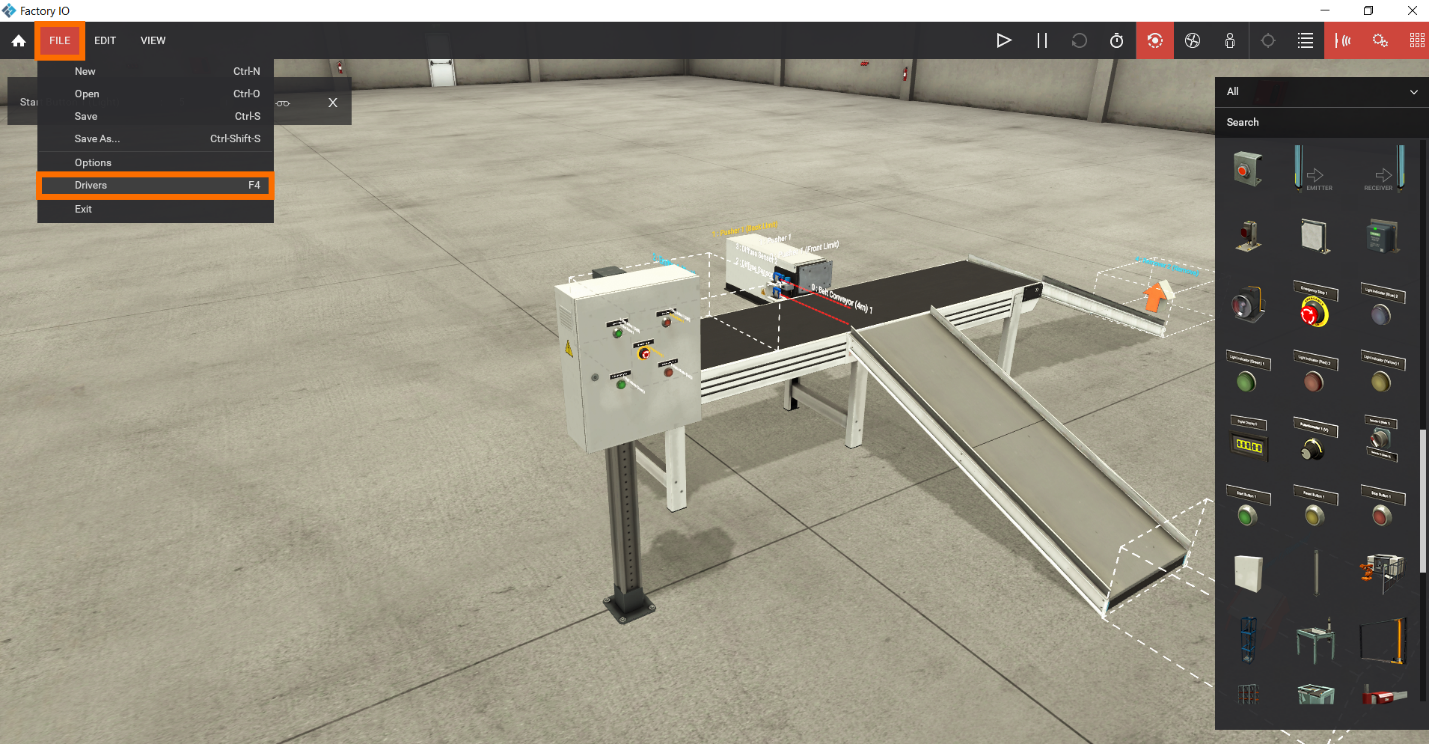
Step 2.1:
Click on “File,” then Select “Driver.”
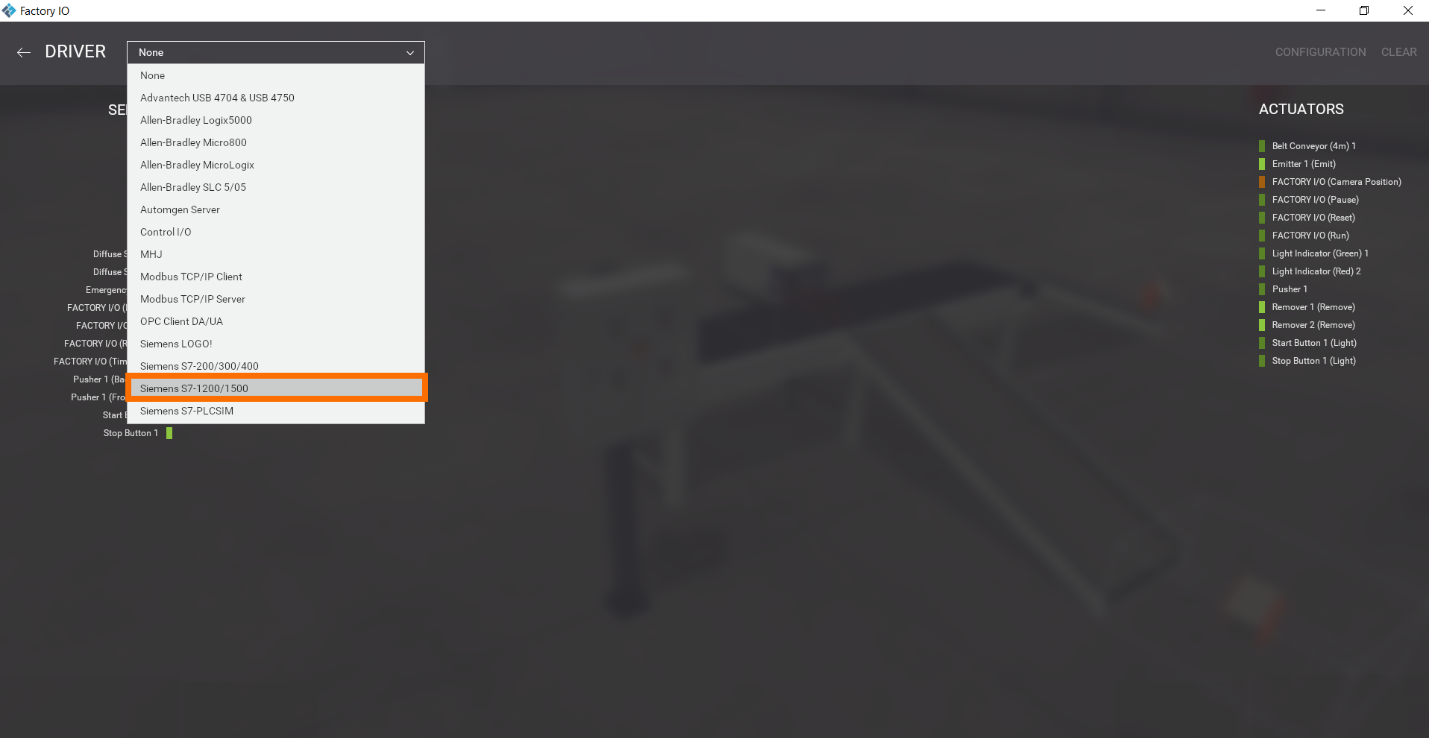
Step 2.2:
Select your PLC; in this case, we will select “Siemens S7-1200 /1500”.
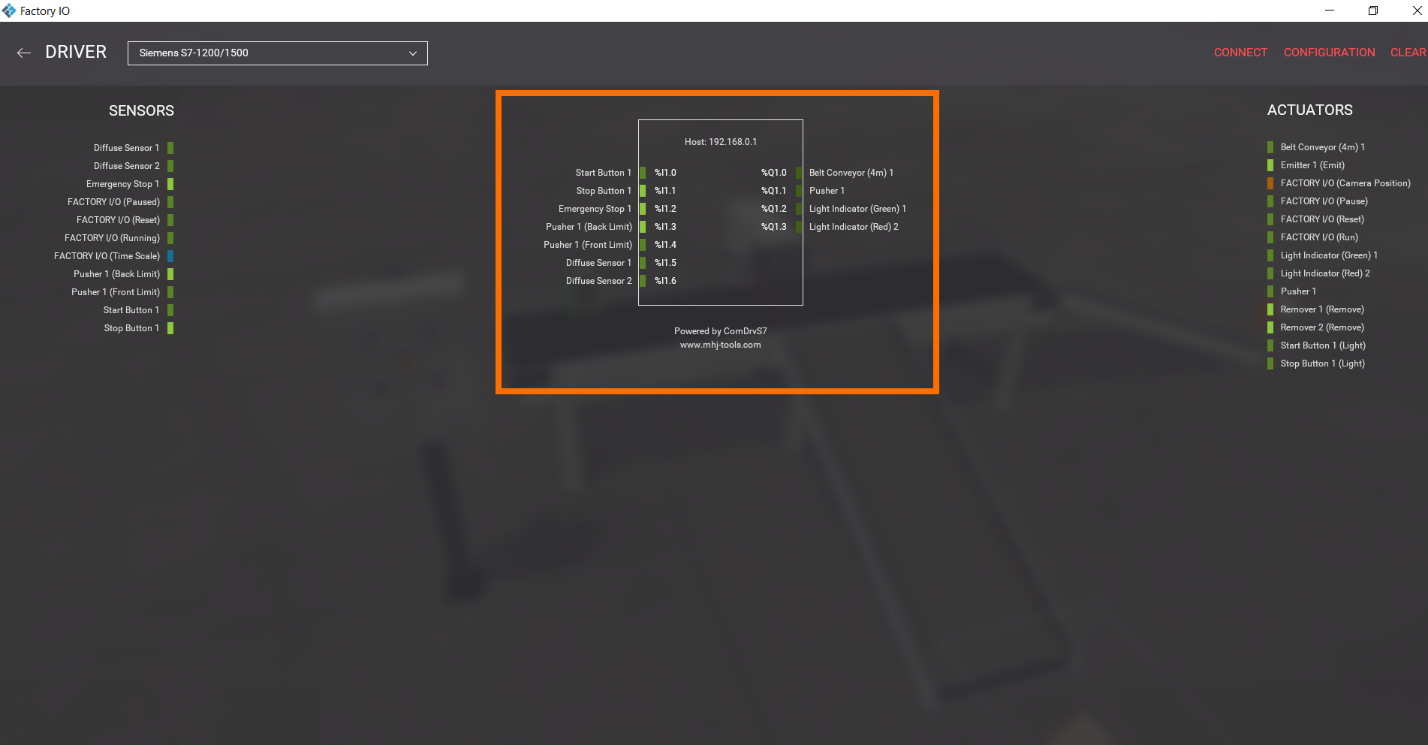
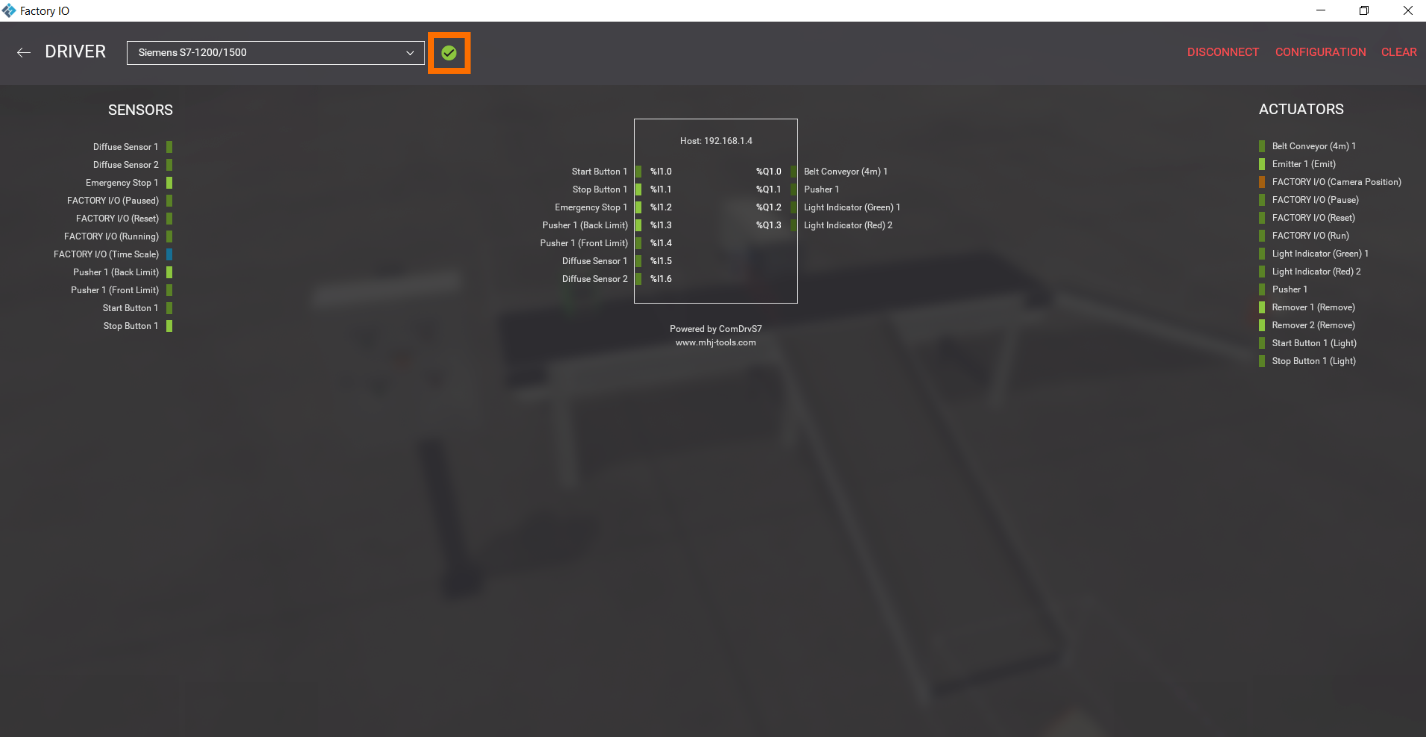
On the interface, you'll notice the 'ACTUATORS' on the right, which represent Outputs, and on the left, the 'SENSORS,' which represent Inputs. In the middle section, you'll find the address where we will assign inputs and outputs.
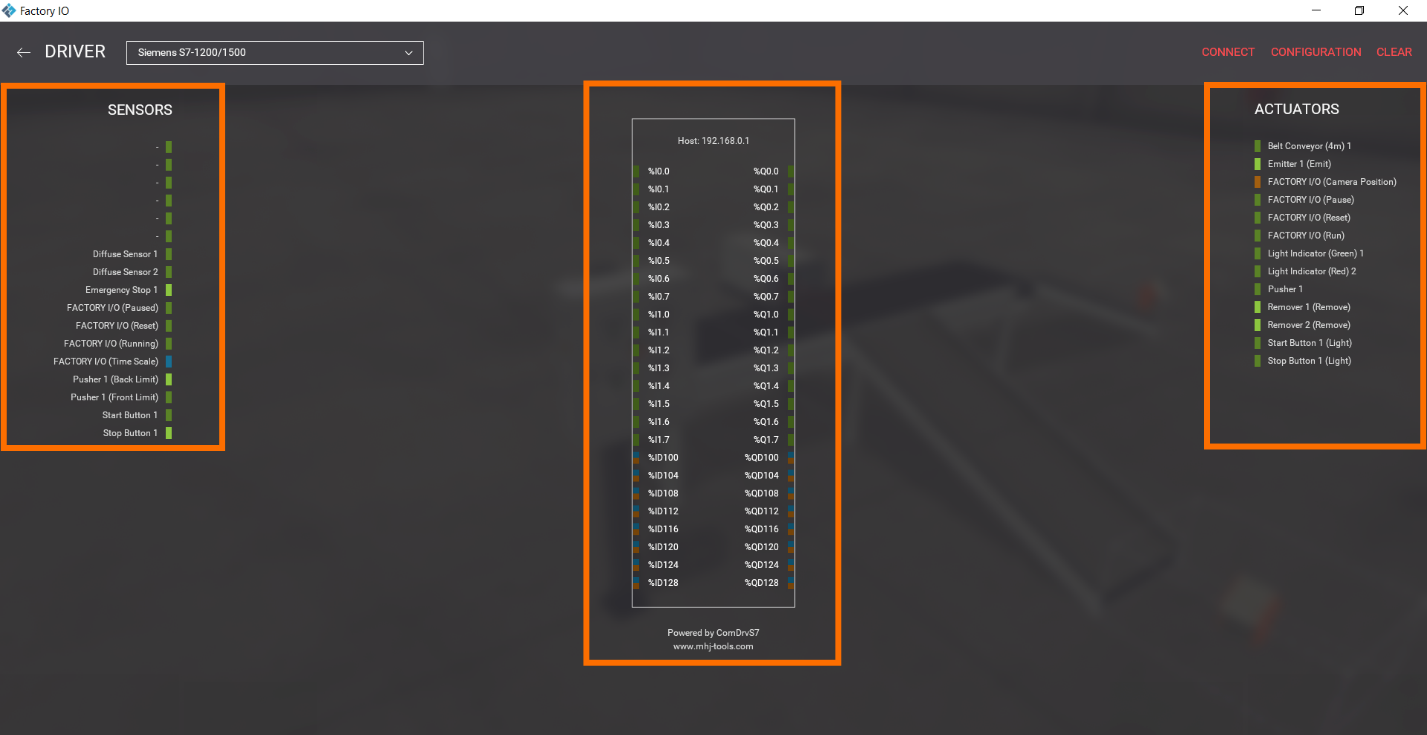
Step 2.3:
Assign all the inputs and outputs to the appropriate addresses by dragging and dropping them to their addresses.
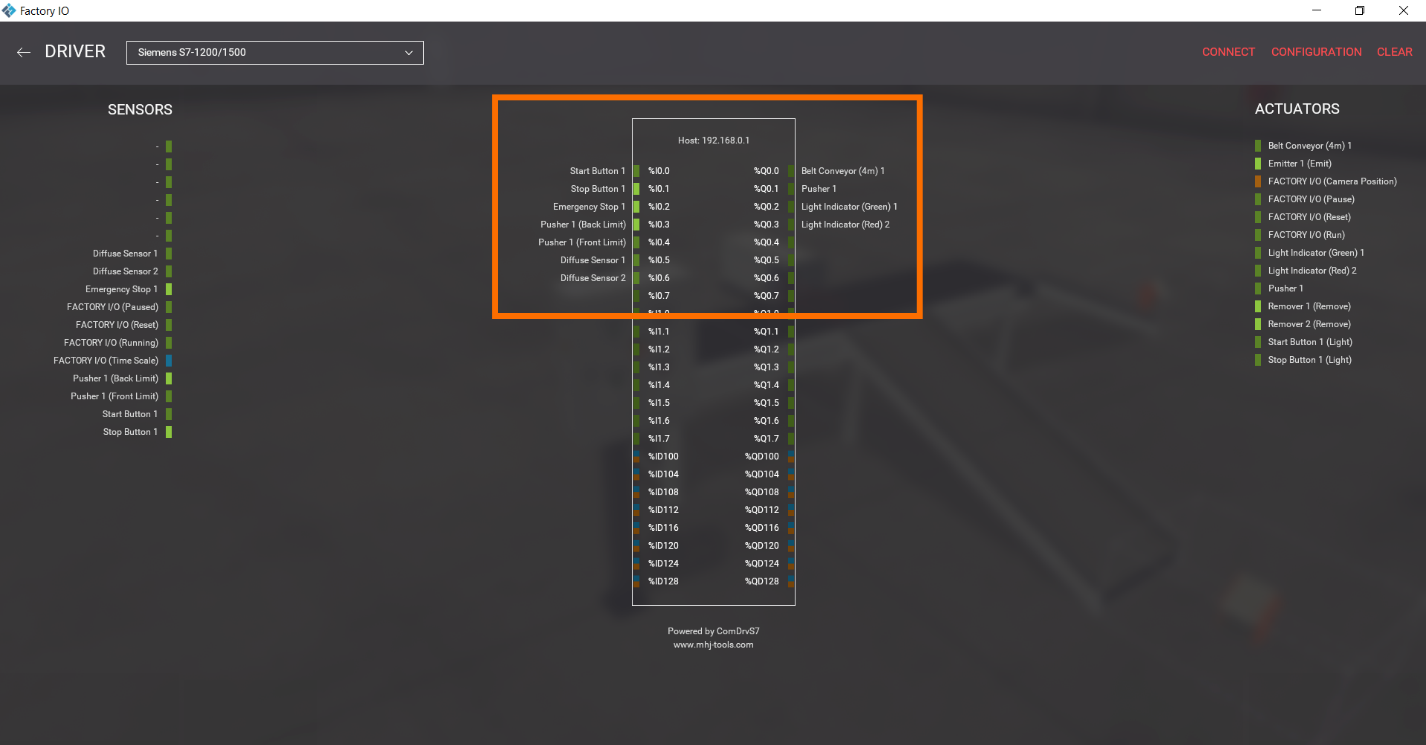
Note that addressing inputs and outputs in the simulation must be distinct from the actual hardware addresses. Therefore, let's proceed to modify them. In real outputs, it will work for both, but it will be better if not the same hardware output addresses.
Step 2.4:
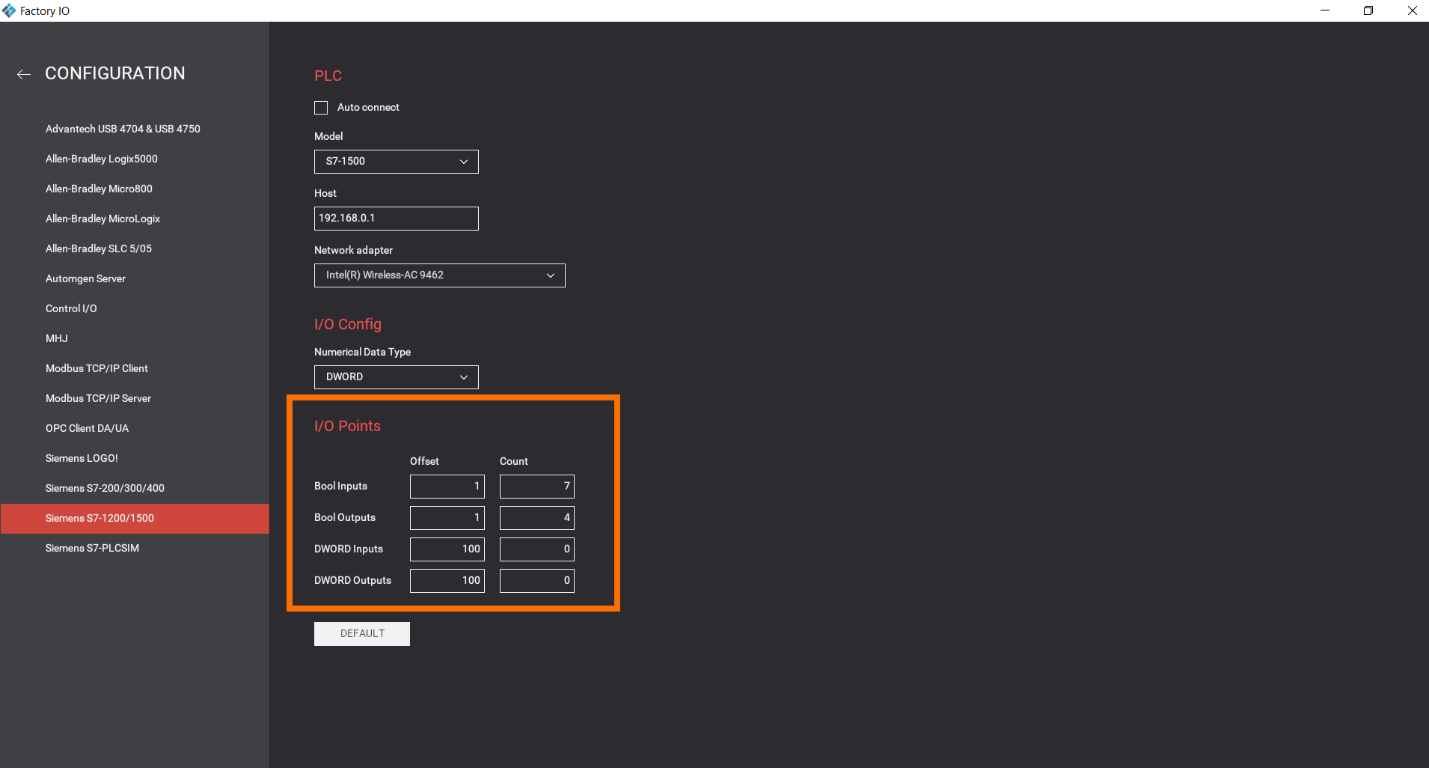
Click on “CONFIGURATION.”

Within the 'I/O Points' section, we can define the offset and count. In this case, we deal with seven input and four output signals. Let's set the offset to 1 for both input and output signals. About the “PLC” section, we will return to it later during connection with PLC.
Now we are done.
Tia Portal side – Configurations
Let's initiate a New PLC project utilizing the S7-1200.
Step 1 - New TIA Portal Project
Step 1.1:
Begin by selecting "Create New Project." During this step, assign a distinctive name to your project to uniquely identify it within the system. Then Click on “Create.”
Step 1.2:
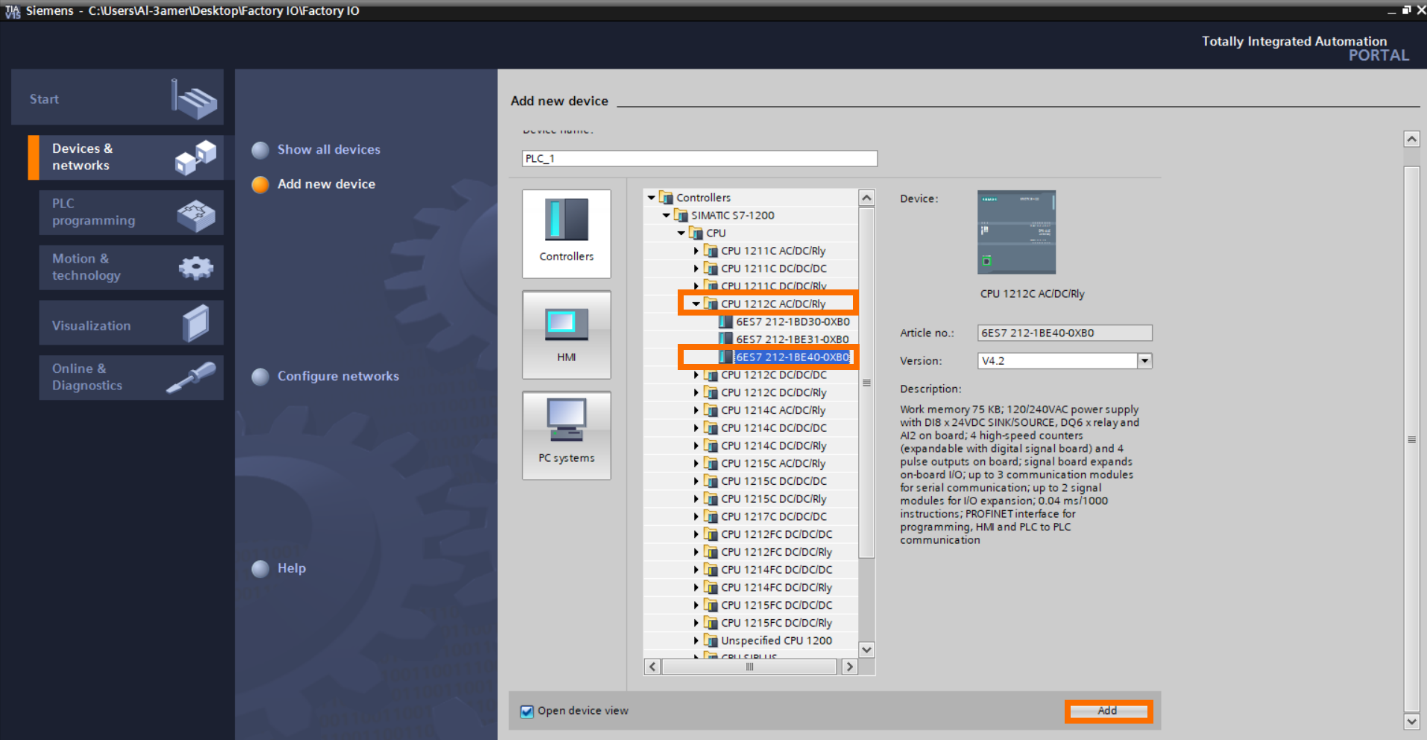
Select “Configure a device.” Then Select “Add new device.”
Step 1.3:
Select your PLC. In this tutorial, let’s use “S7-1200 CPU model 1212C AC/DC/Rly” with the part number of “6ES7-212-1BE40-0XB0.” Please choose the PLC that matches your setup. Then Click “Add.”
Step 2 – PLC program
Step 2.1:
In PLC hardware configurations from “Connection mechanism” active “PUT/GET.”

Access the main organization block (OB) and proceed to write your program.
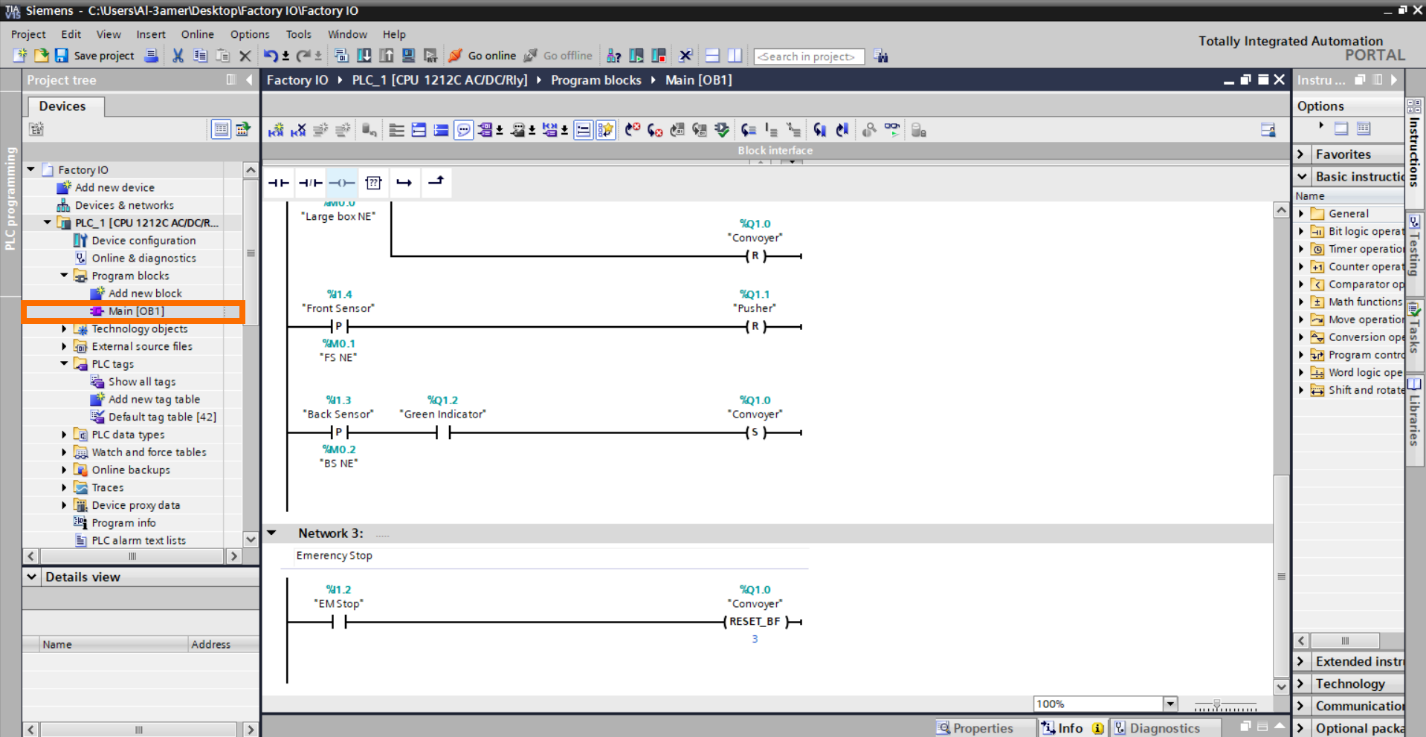
After writing the program, run “Simulation.” Note This option is only if you don’t have a real PLC.
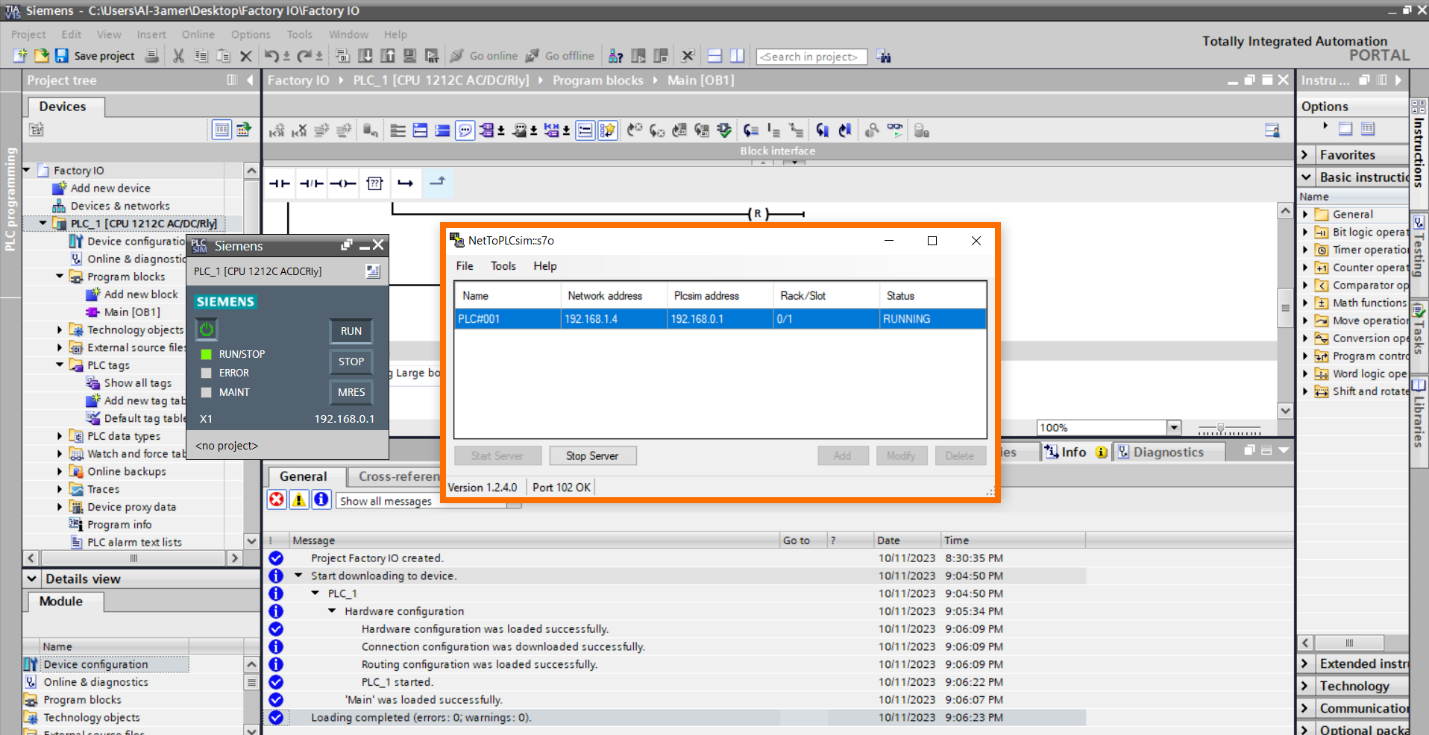
Net-To-PLC-sim side [Optional] – Configurations
Execute "Net to PLCSim" and establish a network connection between your PLC and your PC using their IP addresses. If you are unsure about how to configure these settings, you'll find a detailed, step by step guide in the “Net To PLCSim Side Configuration” section of this tutorial.
Factory IO side – Connection
Step 1 – Configure connection settings
Step 1.1:
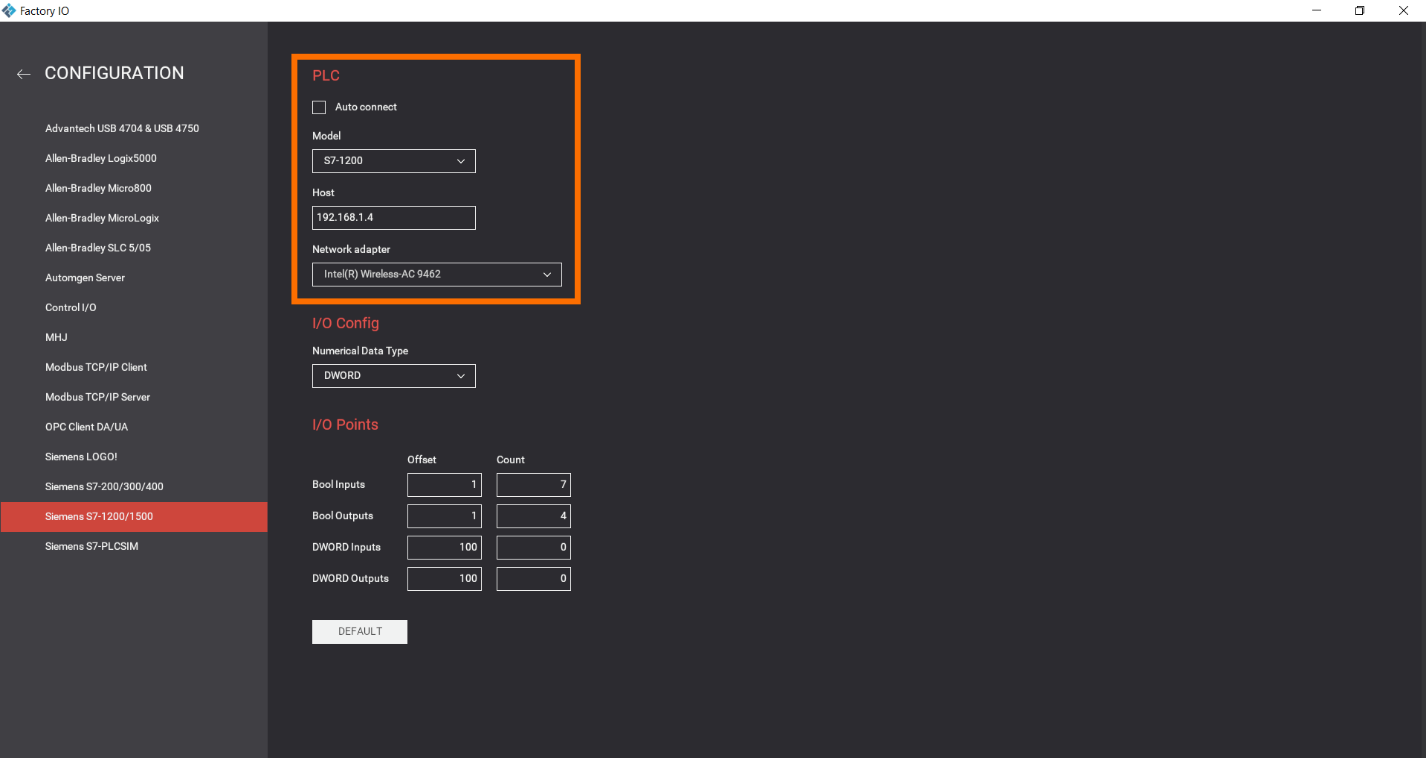
Within the driver interface, click on “Configuration.”

Step 1.2:
Choose your “model,” specify the “PLC-IP,” and select the appropriate “network adapter.” Since we are simulating a real PLC on the PC network, set the host as the IP address of the PC network, and choose the network adapter corresponding to your PC network, which in this case is “Intel Wireless AC 9462.”
Step 1.3:
Return to the driver's interface and click “Connect.”

Step 2 – Run The system
Return to the system and run.
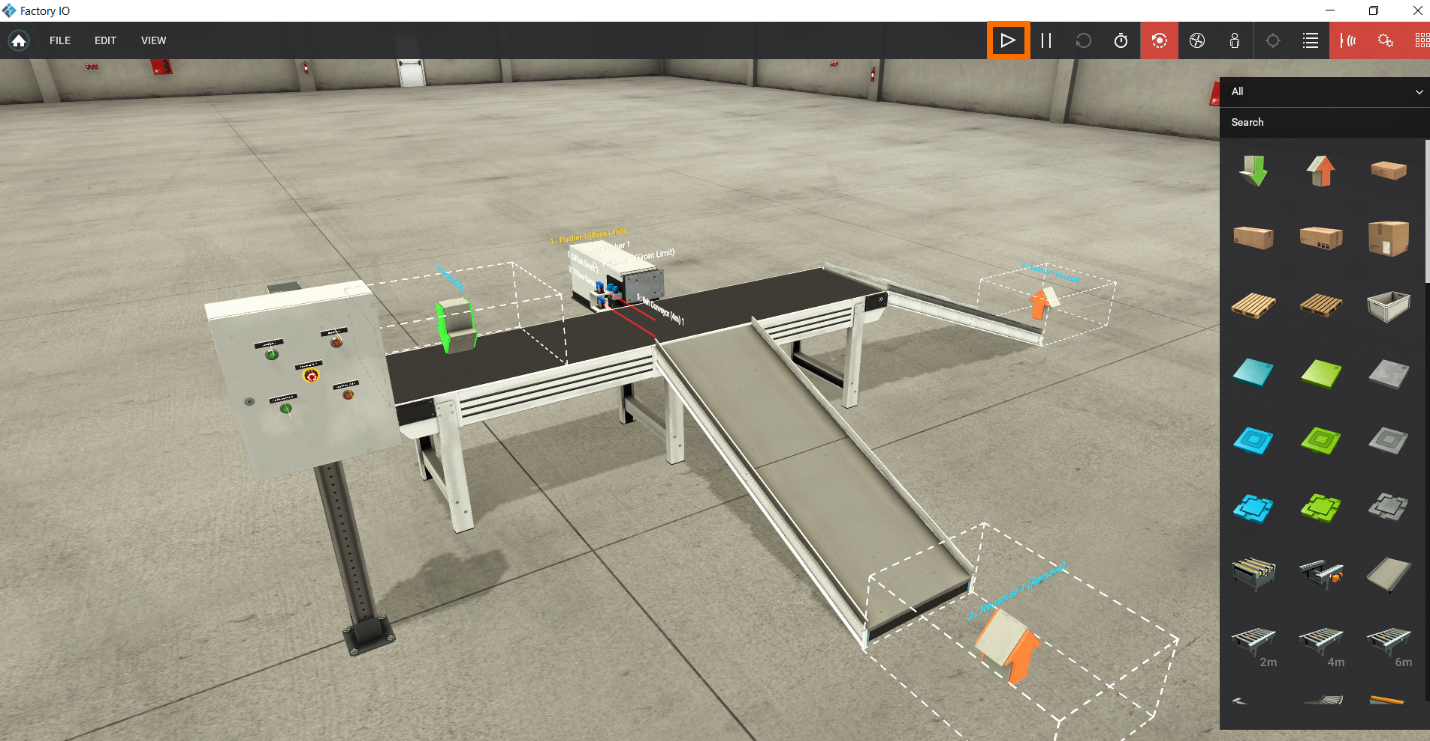
System Overview and Project Files
All the necessary files and a video demonstration of the running system are available here.
Conclusion
In conclusion, this tutorial has provided a comprehensive guide on how to bridge the world of Siemens S7-1200 PLCs and Factory IO for practical industrial automation projects.
We've explored the setup of both the Factory IO and TIA Portal, ensuring that the digital components align with the physical world while allowing for a seamless simulation process. With the ability to create scenes, configure inputs and outputs, and establish network connections, we've laid the foundation for designing and testing various automation systems. Whether you're a novice or an experienced engineer, this tutorial equips you with the essential knowledge to get started with this powerful combination of tools.
As you venture into the exciting realm of industrial automation, remember that the skills you've acquired here can be applied to diverse applications, from manufacturing and logistics to smart factories and beyond. By understanding and mastering these technologies, you are well on your way to becoming an adept industrial automation professional, ready to tackle the challenges of the modern world. So, let your creativity flourish and continue to explore the boundless possibilities of Siemens S7-1200 PLCs and Factory IO.
