Ignition Edge PLC to SCADA | PLC Tag Programming SCADA Tutorial CompactLogix Allen Bradley RSLogix

Introduction
Ignition is a powerful SCADA and MES platform that goes beyond any other offering on the current market. In the last tutorial [Found here: Installing Ignition Edge], we’ve installed Ignition Edge onto a Raspberry Pi. Ignition Edge is a compact version of Ignition, uses less resources & has slightly reduced capabilities. However, it’s still extremely powerful and can run on something as simple as a Raspberry Pi.
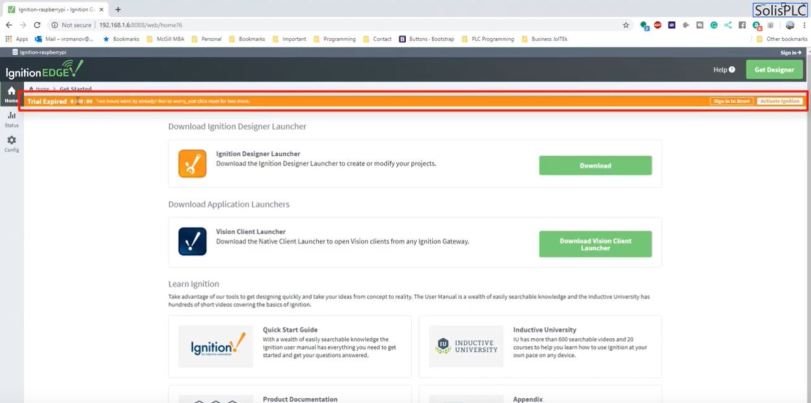
Once Ignition is deployed onto a computer or Raspberry Pi, it’s possible to access the gateway through the local IP address: http://localhost:8088/. If you’re planning to access the gateway remotely, it should be available through the IP address of the machine Ignition was installed on. In our case, on a local network, we access Ignition through the IP set on my PI: http://192.168.1.6:8088/.
As mentioned in the last tutorial, Ignition provides a top-notch trial service. You may use an unlimited version of Ignition for two hours. Once the trial expires, you may reset the trial in order to receive another 2 hours to try the software. In other words, you can use the trial in blocks of 2 hours indefinitely.
Our next step is to setup a communication path between the Raspberry Pi and an Allen Bradley PLC in order to start pulling some data. Ignition utilizes an OPC server architecture to make this possible. In this tutorial, we’re going to walk through the process and send some basic arrays from an Allen Bradley 1769-L24ER-QB1B PLC to the Raspberry Pi running Ignition.
Step 1 – Adding an Allen Bradley PLC to Ignition Edge Gateway
The first step is to add the PLC to our connections within Ignition Edge.
- Navigate to your Gateway.
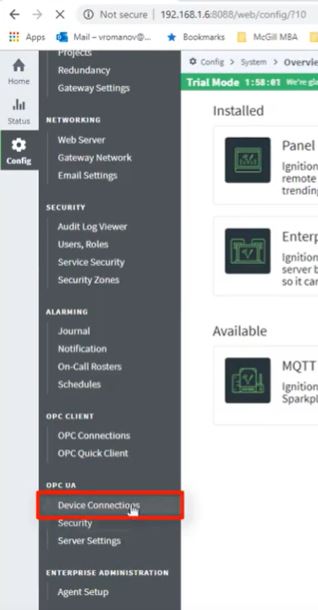
- Navigate to the “Config” tab on the left side [looks like a gear].
- Login.
- Scroll-Down and select the “Device Connections” Tab as shown below.
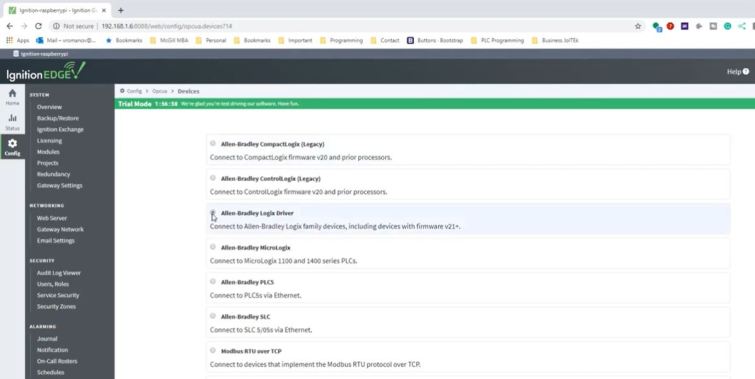
- You’ll need to select the proper driver depending on your style of PLC device. In our case, for an Allen Bradley 1769-L24ER-QB1B PLC, we select “Allen-Bradley Logix Driver”. See an example below.
- Enter a name for the connection.
- Enter an IP address for the connection.
If everything went well, the gateway will return to the connections tab and display a status of “Connected” for the device you’ve added.
Common troubleshooting steps may include veryfying the IP addresses of the gateway as well as the PLC (they must be on the same network), verifying the proper entries within the device creation parameters and verifying that the trial has not expired.
Step 2 – Adding Tags to the PLC & Testing Through the Gateway
The gateway of Ignition Edge allows the user to not only verify the connection to the PLC, but also browse through the tag tree directly from the interface.
Before we get into the verification however, it’s important to show the tags we’ve created on the PLC. In this case, for demonstration purposes, we’ve added an array within a program created specifically for this tutorial. Here’s the exact array we will be adding to the Igntion Edge install.

The Tag is an array of 256 boolean values. As you’ll see in practice, the array will be combined into double integers of 32 bits due to the nature of the OPC server; it’s much more efficient to combine the data into such a structure instead of sending discrete bits of data. In other words, 256/32 = 8 double integers of data.
Once the tags are added to the PLC, it’s possible to view them through the Ignition Edge Gateway interface.
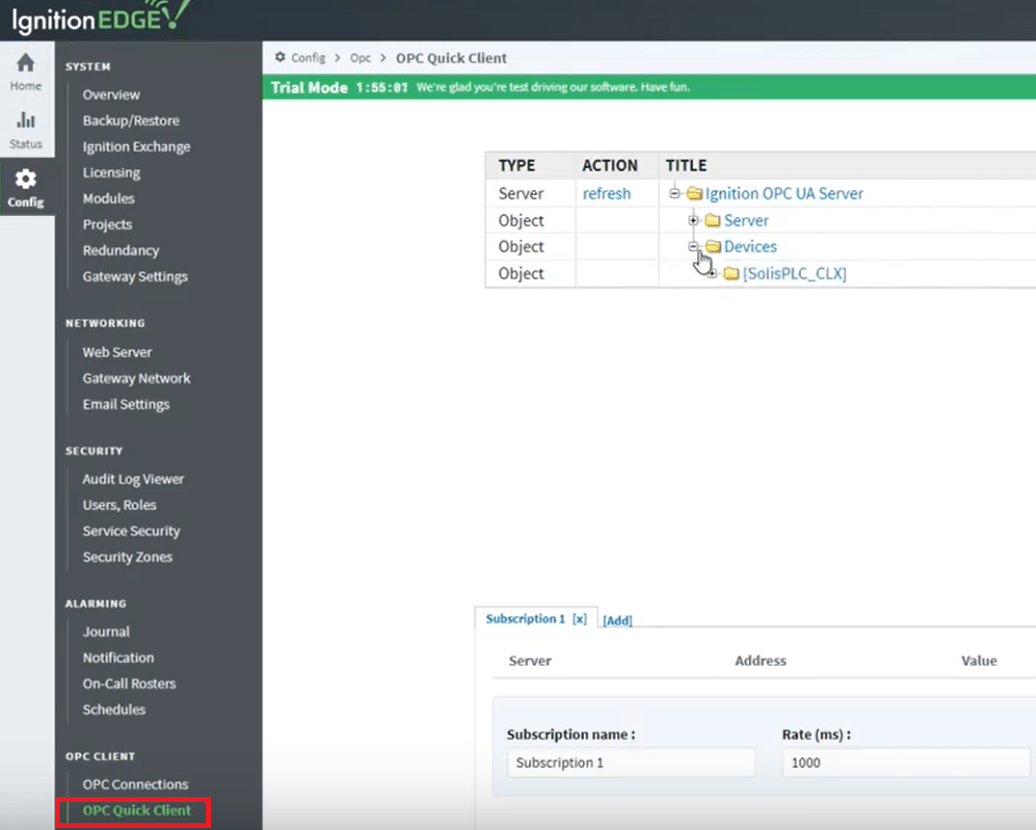
The “OPC Quick Client” is the interface through which the user can browse the connection of the OPC server and verify that the tags are passed correctly from the PLC to the Ignition Edge.
Step 3 – Ignition Designer Tags from OPC Server Connection
Now that we’ve established a connection to our OPC Server, it’s time to create a link from within the Designer application. Start by launching the designer from the home page of the gateway. Connect to the ignition edge device and launch the project. Once the project is open, an OPC Browser panel should be displayed on the screen. If that’s not the case, it can be opened through the tools interface in the control menu of the window.
Within the OPC browser, the same tags will be presented to the user. In order to create the link between the OPC server and the application, the user needs to drag the tag or array of tags into the “Tags” folder.
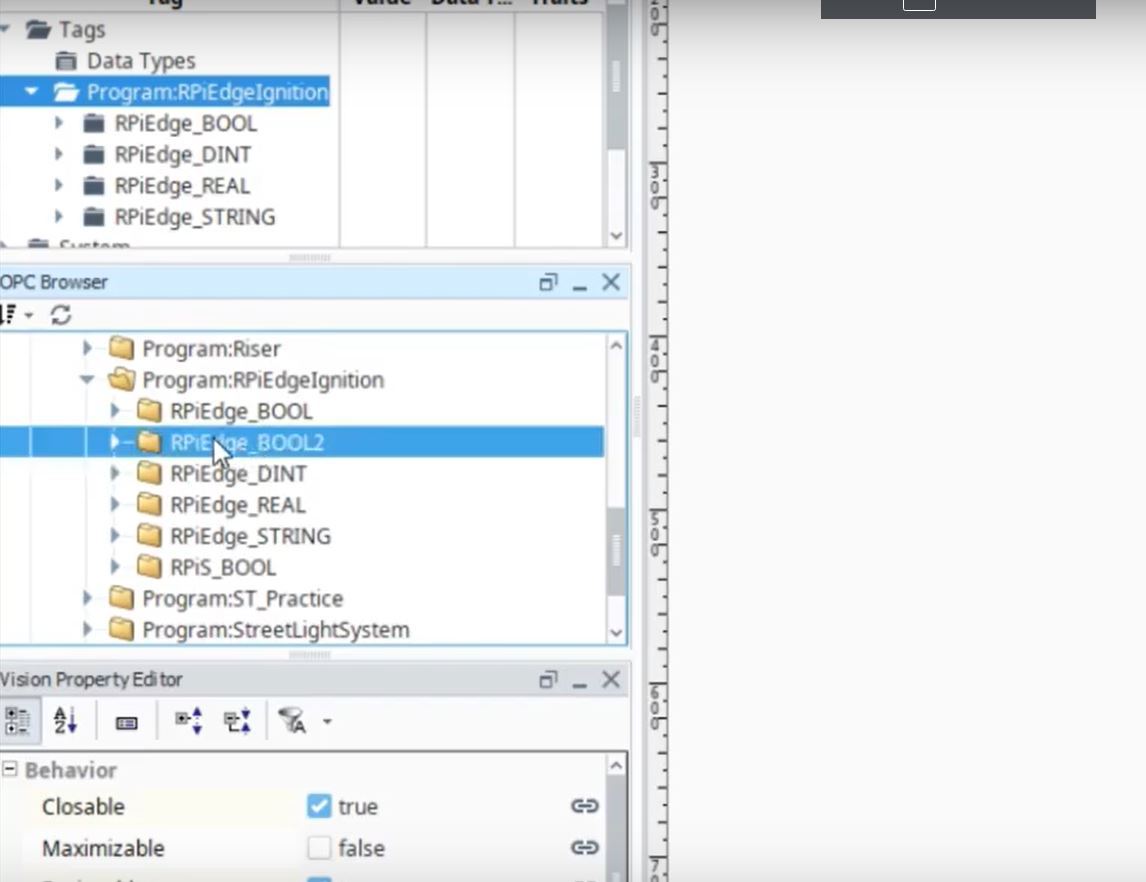
Once the array of tags is transfered into the “Tags” folder, the Designer begins to show the values of each tag. At this point, it’s important to verify that the tags within the PLC are the same as they are within the Designer.
You may now begin to link & analyze the data from within the application.
Conclusion
We’ve established a connection from our Ignition Edge application to the Allen Bradley 1769-L24ER-QB1B programmable logic controller. This is the first step in building a link between our hardware components and sending data into the ignition ecosystem.
Ignition makes it incredibly easy to create such links through the on-board OPC server. By specifying the right driver along with the address of the client, it’s possible not only to create a link, but to monitor each tag within the PLC directly on the gateway.
