Omron PLC Programming | Setting Up a New Omron PLC Project in Sysmac Studio

Introduction to Omron PLC Programming
Creating a new project establishes the framework for the automation solution. Choosing the appropriate controller for the application is essential to leverage its features. Also, it avoids unnecessary complexity or limitations. Additionally, the PLC may need to change later due to changes in the application. So, updating the project configuration is crucial to maintain a functional solution.
Also, setting a strong password protects the proprietary details embedded in the project. It prevents unauthorized access, use, or distribution of sensitive information.
And utilizing the entry assistance feature helps reduce errors and ensure data is entered correctly. These features suggest the appropriate options and display relevant details as you type, guiding your input. They make the development process more efficient and help produce a higher-quality final project.
Prerequisites
To follow along with this tutorial, you need to have Sysmac Studio software installed on your computer. While version 1.50 will be used in this tutorial, you can also use other versions of Sysmac Studio.
Creating a New Project
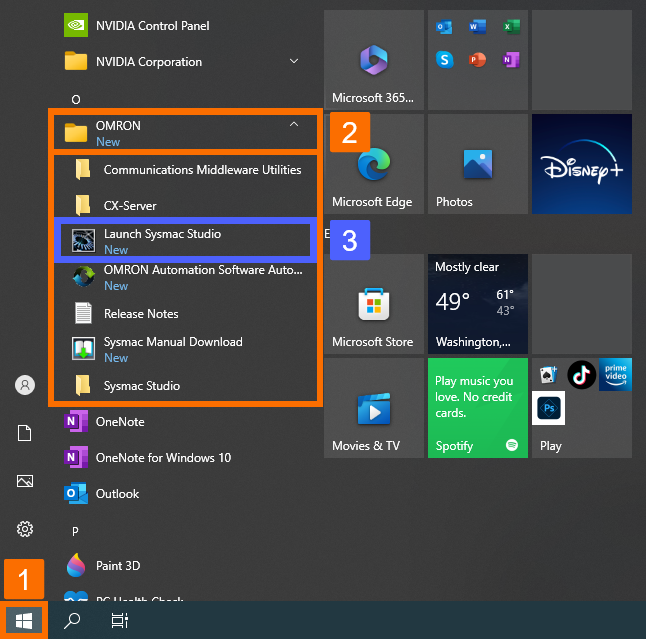
Begin by opening the start menu on your computer. From there, you can navigate to the folder labeled "OMRON." Once you've located this folder, expand it to reveal its contents. Among the files and subfolders, you should see an item labeled "Launch Sysmac Studio." Click on this item to open the Omron PLC programming software.
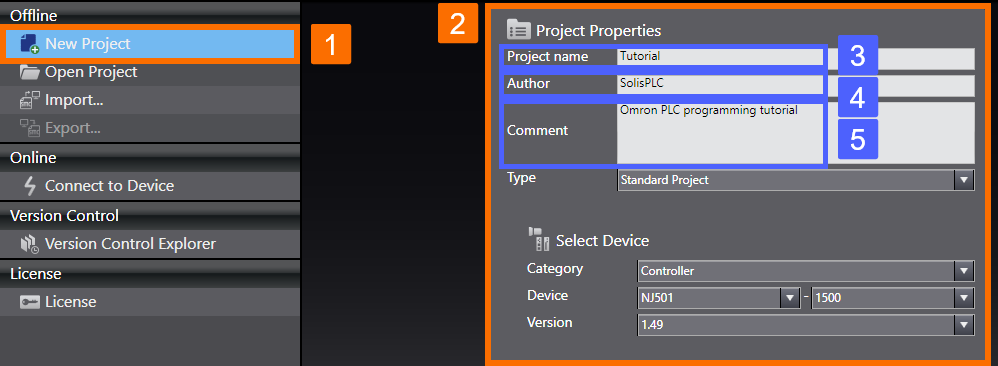
To start, create a new project. Under the "Offline" section, clicking on the "New Project" option will open a new window called "Project Properties." To name the project, input "Tutorial" in the designated field. Additionally, provide your name as the author in the corresponding field. In the "Comment" field, you can write a description of the created project, outlining its purpose.
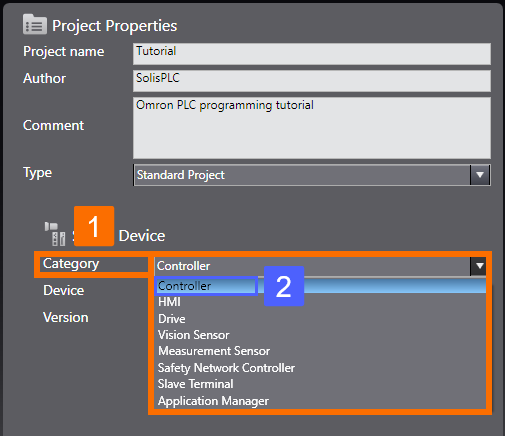
Now that you have given the project a name, it's time to provide details about the device you want to assign to the new project. Here, you will be working with Omron PLC. To select it as your device, you will open the "Category" drop-down menu and choose "Controller."
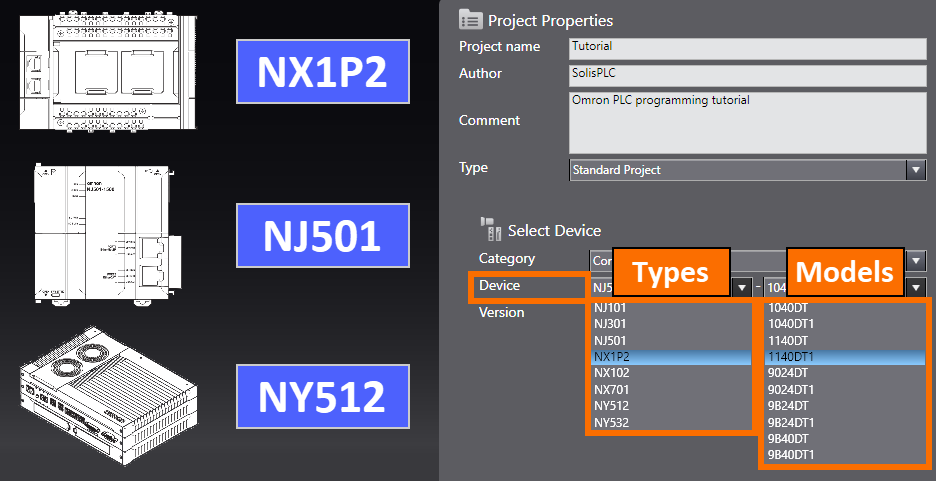
Under the "Device" drop-down menu, a list of available Omron controllers appears. It includes the NJ/NX-series units and NY-series industrial PCs. For instance, choose the "NX1P2" controller.
To proceed, you will need to choose a controller model. Open the "Device Model" drop-down menu and select from the list of available NX1P2 models. One of the most widely used models in the industry is the 1140DT1, so choose this model by clicking on it.
Now, you need to select the appropriate version of the controller. To do this, open the "Version" drop-down menu. It will bring up a list of available NX1P2 versions. Select the version that matches your controller from the drop-down list.
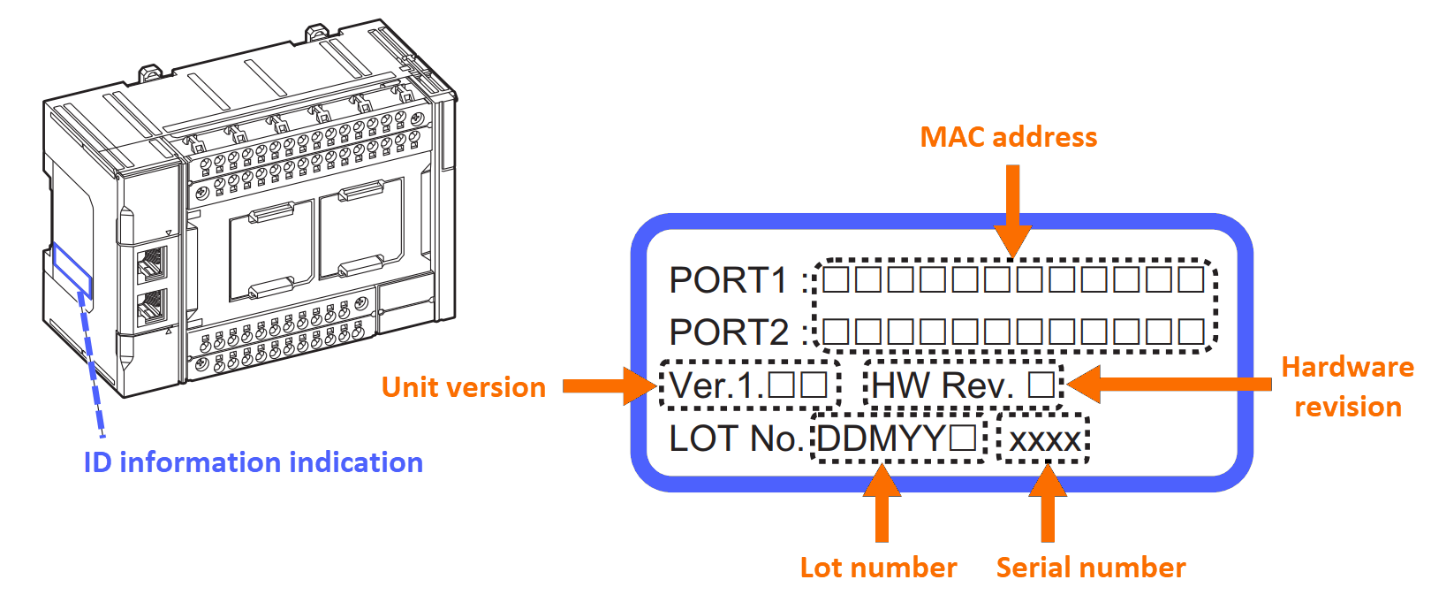
You can find the unit version on the ID information indication located on the side of the controller. Please note that the hardware revision may not be displayed if it is blank for that particular unit. The following picture is the ID information that pertains to an NX-series NX1P2 CPU Unit.
If you are unsure of your controller's version, it is recommended to choose an earlier version. For instance, you can select version 1.42 by clicking on it.
If you later discover that you have chosen the wrong version, you can change it as long as the correct version is newer than the one you have selected.
After selecting the controller, you can proceed by clicking on the "Create" button.

After a brief waiting period, a new screen will appear. The top of the window displays the project name has extended to "Tutorial – new_Controller_0."
You can view the device information you entered earlier by hovering over the controller symbol. The Sysmac Studio software gives the "new_Controller_0" name to the PLC by default.

To assign a more relevant name to the controller that reflects the project's purpose, follow these steps:
Right-click the controller symbol and select "Rename" from the drop-down list. It will display a blue-highlighted box where you can enter the new name. Type in the desired name, such as "NX1P2_1140DT1", and press the Enter key to save the new name.

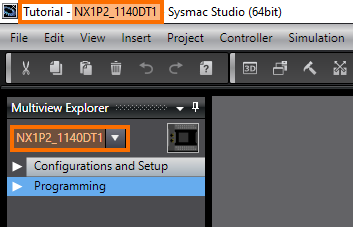
You will now see the new name that you assigned to the controller icon. As a result, you will also notice that the project's name has been updated to "Tutorial - NX1P2_1140DT1".
Adding Devices
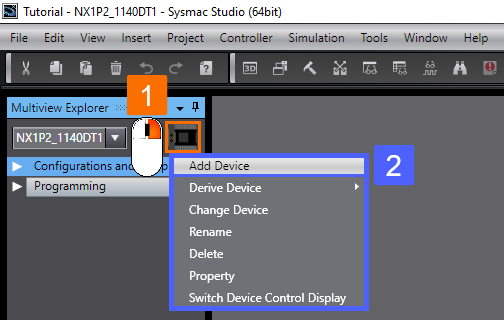
You have two methods to add new devices (controllers, HMIs, etc.) to your created project. First, right-click over the controller symbol and choose "Add Device" from the pop-up menu.
Or second, go to the "Insert" menu and select the desired device, such as the NJ501 controller. It will open the "Add Device" dialog box. Choose the desired device model and version from the list and click the "OK" button to add it to the project.

Changing Devices
During an industrial project, the controller selected for the application may need to be changed. So, it requires the PLC programmer to update the software as well.
To do this, you have two methods. First, right-click over the controller symbol and choose "Change Device" from the pop-up menu.

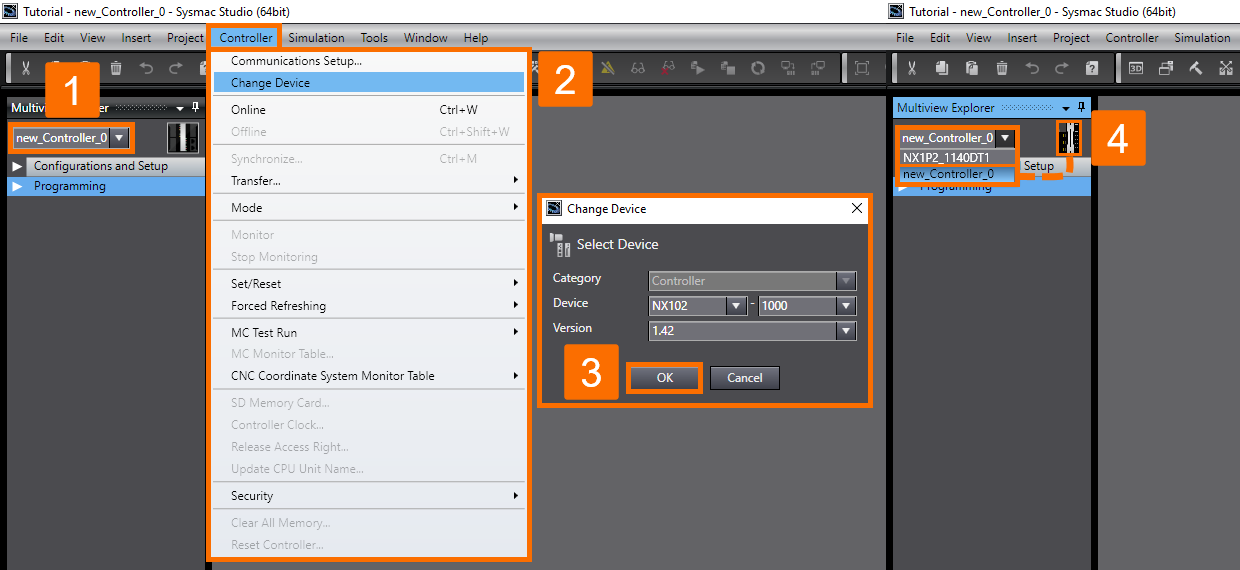
Or second, after selecting your original controller, go to the "Controller" menu and choose the "Change Device" option. It will open the "Change Device" dialog box, where you can select the desired controller and confirm the change by clicking the "OK" button.
Note that any settings linked to functions that are not compatible with the new model will be erased. Furthermore, switching to a device that falls under a different category is not possible.
Password Protection for Project Files
You can establish password protection for project files to secure your assets. It will cause the usage of a password for particular operations, including opening the project file, altering the properties of the project file, and importing the contents of the project files.
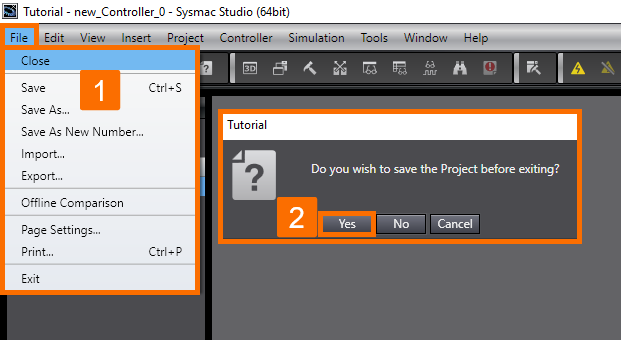
To set a password, close your project file and head back to the "Start" page. To do this, go to the "File" menu and select "Close." A dialog box will appear to confirm whether you want to save the project. Click "Yes" to save the project and register its name in the project properties. Then the “Start” page will appear.
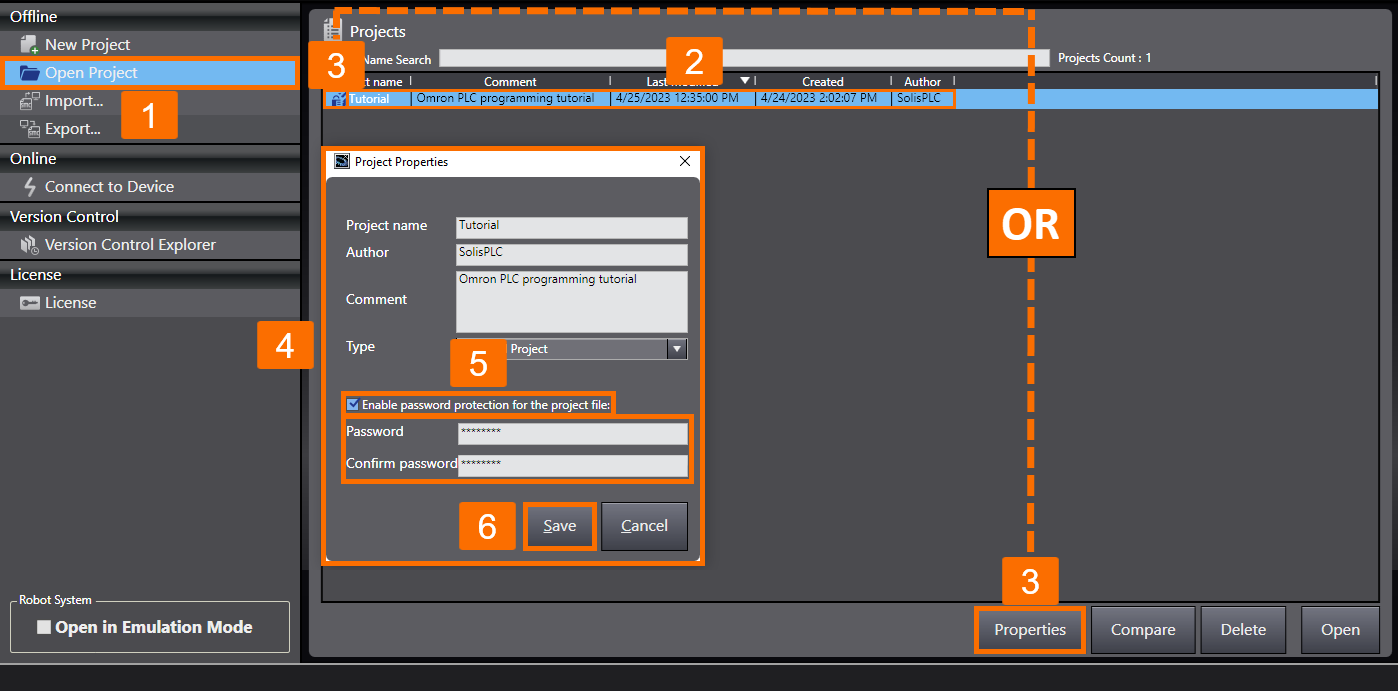
Click "Open Project" on the "Start" page and choose the desired project file to set a password. Click the "Properties" button or the "Edit Properties" icon to open the "Project Properties" dialog box. Check the "Enable password protection for the project file" box. Enter the desired password, and click "Save" to enable password protection for the file.
The password should consist of 8 to 32 single-byte alphanumeric characters. Also, considering the password is case-sensitive. If you forget the password, you won't be able to deal with your project file anymore. It is advisable to keep a record of your password somewhere.
Entry Assistance
As you type characters on the keyboard, the list of candidates will be narrowed down automatically at the following times:
- Entering variable names and data types:
- Entering variables names in the Structured Text (ST) editor or Ladder Logic editor
- Entering data types in the ST editor or Ladder editor for function blocks or functions
- Specifying data types in variable tables
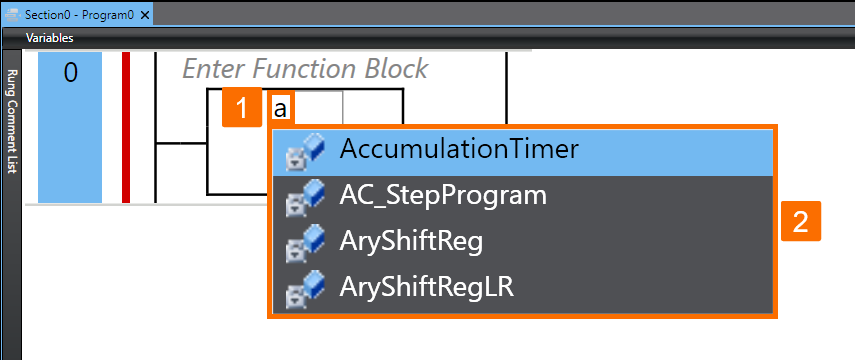
For instance, in the Ladder editor, upon typing a variable name, a list of available variable names will be displayed for selection.
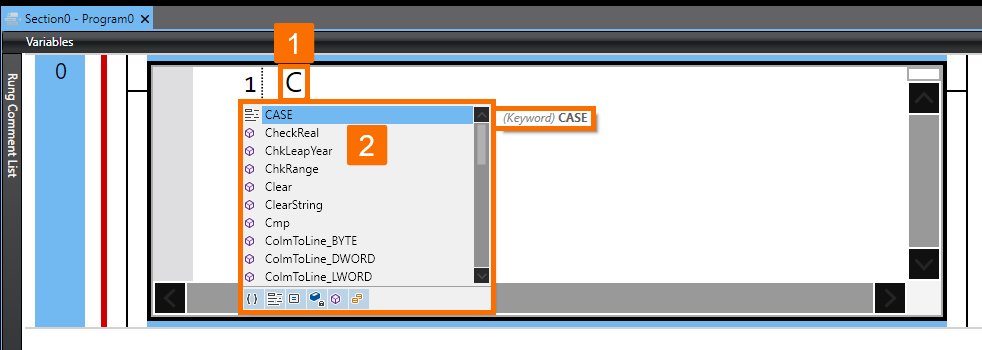
- Entering text in the ST editor:
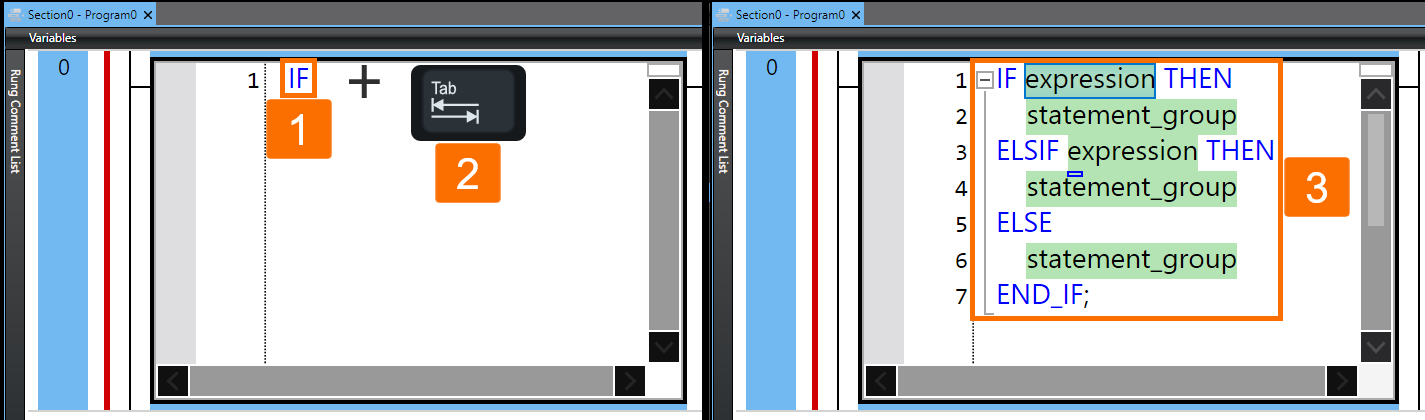
- Upon entering text in either the ST Editor or an Inline ST Box, the cursor will move to the first item in the list that commences with the character you have just typed.
- Once you type the first keyword of a construct (such as "IF" in this instance) and press the "Tab" key, the remaining part of the construct will be generated.
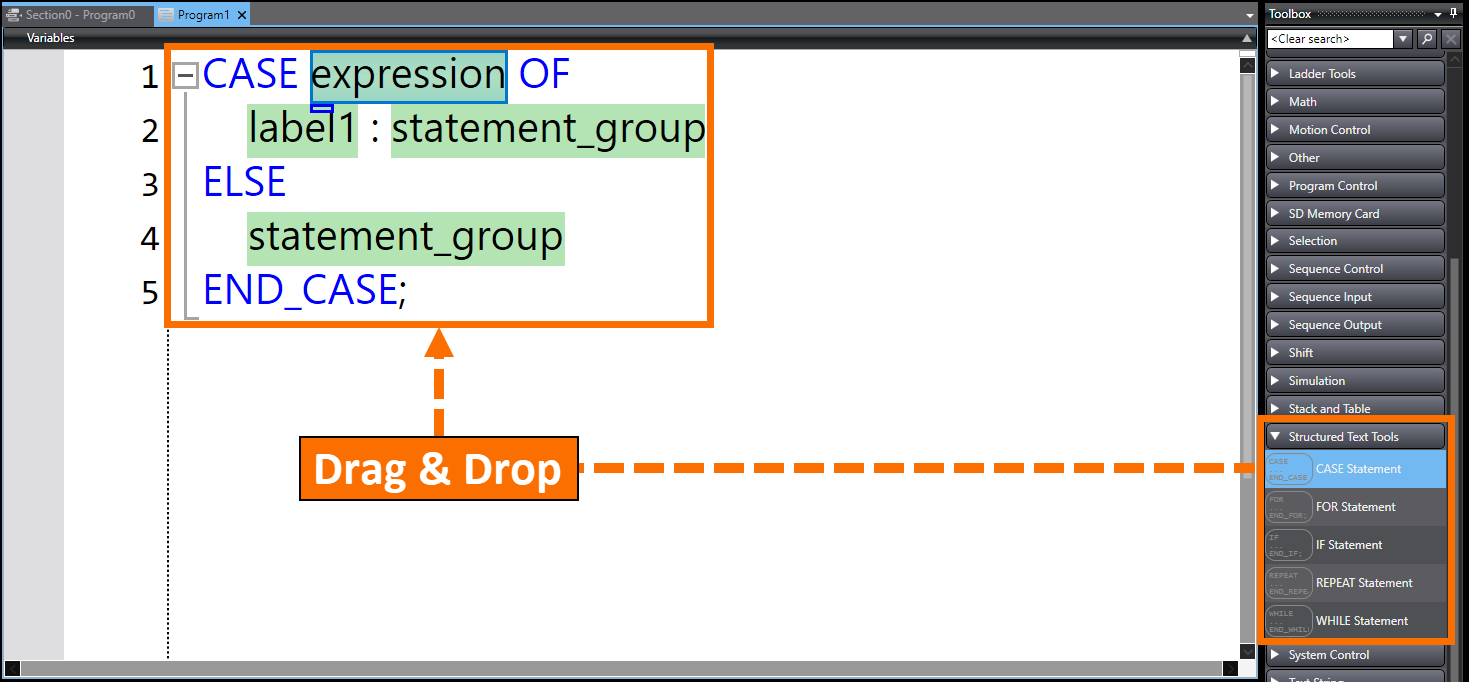
- As you drag an ST statement (in this case, a CASE statement) from the "Structured Text Tools" and drop it into the ST Editor, the keywords for the corresponding construct will be automatically inserted.
Conclusion
In conclusion, this tutorial provided steps to create an Omron PLC project using Sysmac Studio. It started with creating a new project and selecting a controller by specifying its type, model, and version.
You learned how to change the default name of the controller to a more relevant one. It also covered adding and changing devices in the project.
In addition, it showed you how to set up password protection for your project files to prevent unauthorized access and secure your assets. Finally, it shows how to use the entry assistance feature to ensure data is entered correctly.
Overall, this tutorial equipped you with essential skills to get started with programming Omron PLCs using Sysmac Studio software.
