Omron Sysmac Studio Software | How to Download, Install, and Launch Sysmac Studio Software

Introduction
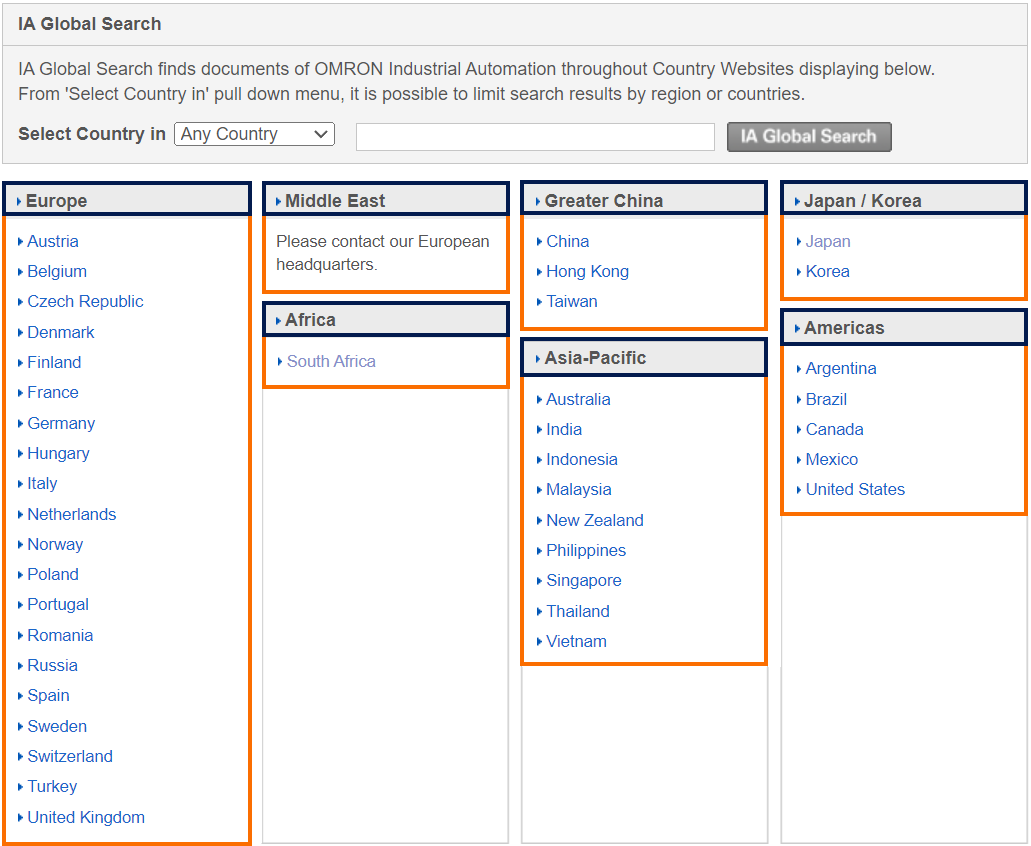
Omron has a massive worldwide network made up of several geographical regions. Countries or regions within a particular geographical area serve as further subdivisions and representations of these unique geographical locations.

In this tutorial, you will walk through the procedures of downloading and installing the Omron Sysmac Studio "Trial version" from anywhere in the world or a "Student edition" of Omron Sysmac Studio in North America.
We suggest contacting your Omron regional office for further information on accessible Sysmac Studio downloads. You can find contact information for your regional office on the Omron industrial automation worldwide website at https://www.ia.omron.com/global_network/
How to Download the Trial Version of Sysmac Studio
The Sysmac Studio "Trial version" will be discussed first. A "Trial version" of Sysmac Studio is available to download if you are not a student. You have unrestricted access for 30 days after activating your "Trial version."
You can finish the application form by clicking the following link. Here, you must enter your email address, first name, last name, company name, phone number, and country.
https://automation.omron.com/en/us/forms/download-sysmac-studio-trial

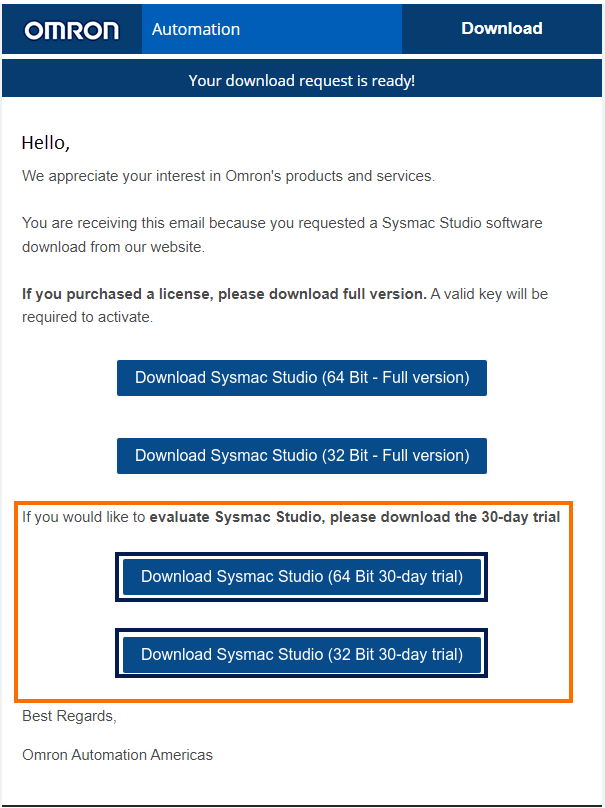
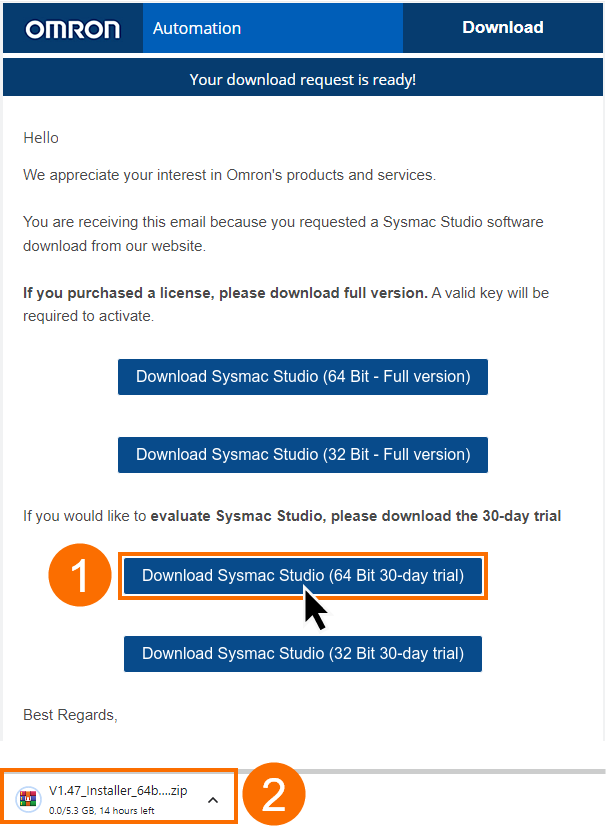
After completing and submitting your application for the "Trial version," Omron will respond through email shortly and give you links (32-bit and 64-bit) to download Sysmac Studio; a license key won't be given for the 30-day trial version.
How to Download the Student Edition of Sysmac Studio
It is time to switch to the Sysmac Studio "Student version." You will have unrestricted use of Sysmac Studio for six months as a student in North America.
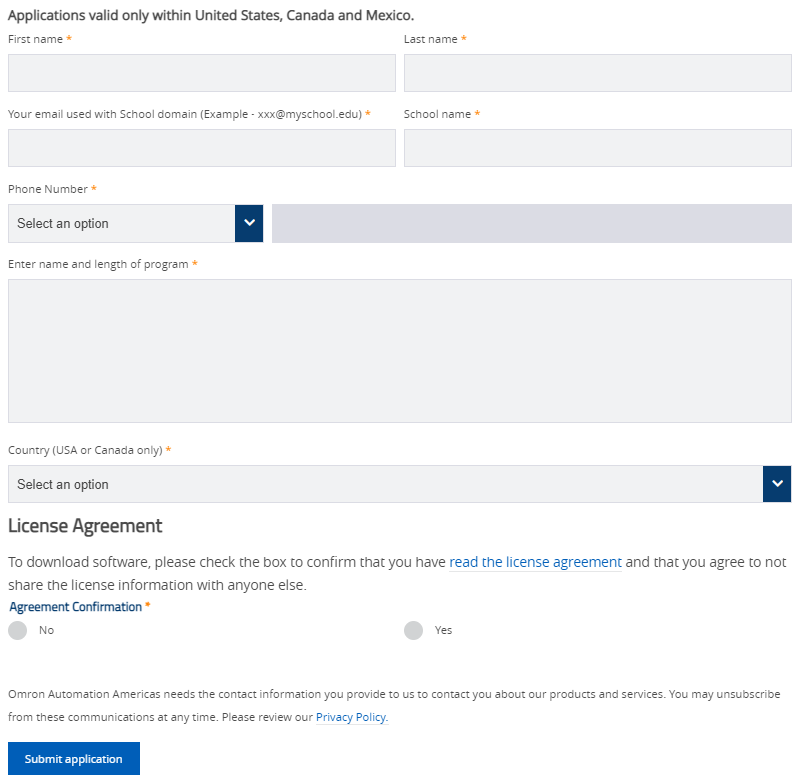
You can finish the application process by heading to the following page. Note, Applications are valid only within the United States, Canada, and Mexico.
https://automation.omron.com/en/us/promotions/sysmac-studio-for-students
Here, you need to enter your first name, last name, email used with school domain (for example, xxx@myschool.edu or xxx@edu.sait.ca), school name, phone number, name and length of the studying program, country (United States of America or Canada only), and accepting the license agreement.
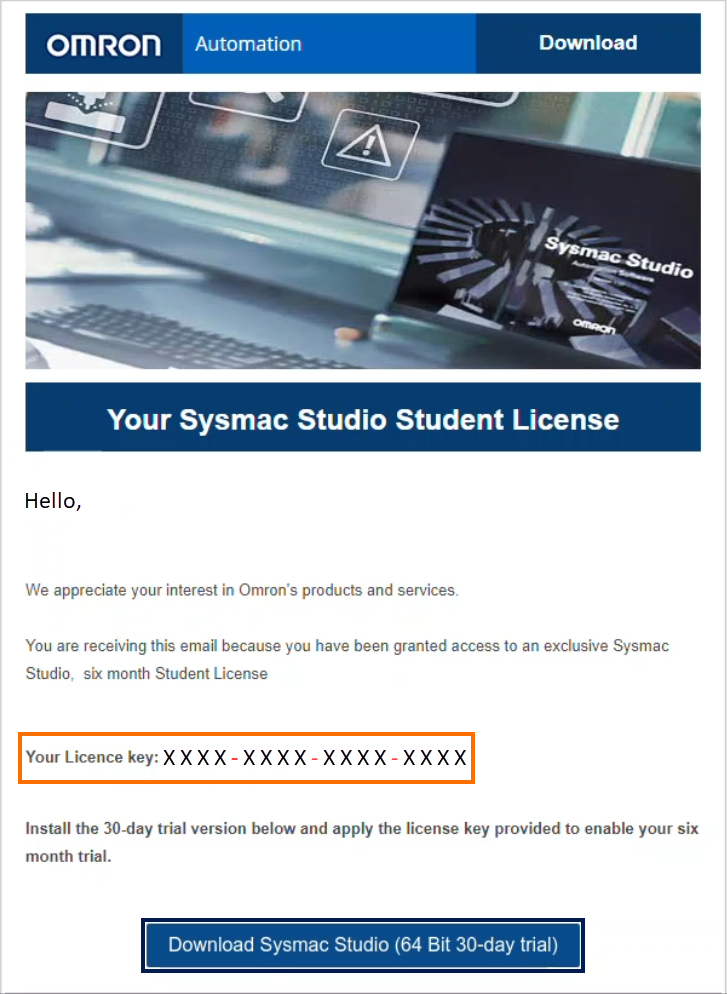
When you have finished and submitted your application, Omron will respond by email shortly afterward, giving you a download link for Sysmac Studio and a 6-month license key.
How to Install Omron Sysmac Studio Software
The "Trial version" and "Student edition" installation procedures are somehow the same. Hence, for both versions, follow these instructions:
Click on the “Download Sysmac Studio” link provided for you by Omron through an email, and an installation zipped package will begin to download. It will be the latest version of Sysmac Studio introduced by Omron. Now, you can step aside from your computer because downloading the installer file can take some time.
After downloading the installer zip file, use an unzipping program to extract all the contents.
Once you have unpacked all the files, locate the "setup" application by scrolling through the files. Then double-click on the "setup."

Select English as the language for the installation and then press the ok button.
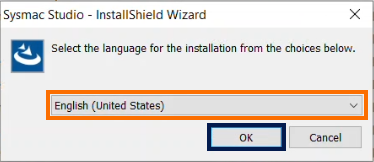
The Microsoft Visual C++ SP1 started to be installed. The Sysmac Studio setup prepares the InstallShield wizard, which guides you through the program setup process.

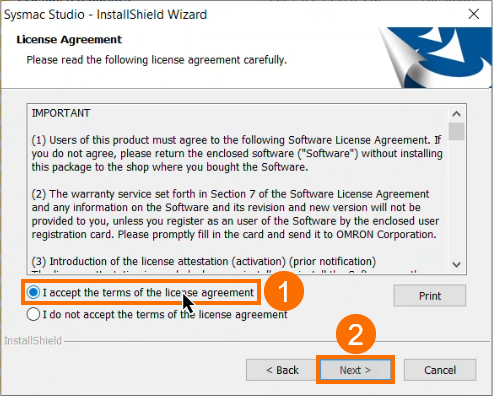
When the "License Agreement" window pops up, you need to accept the license agreement terms and then press the "Next" button.
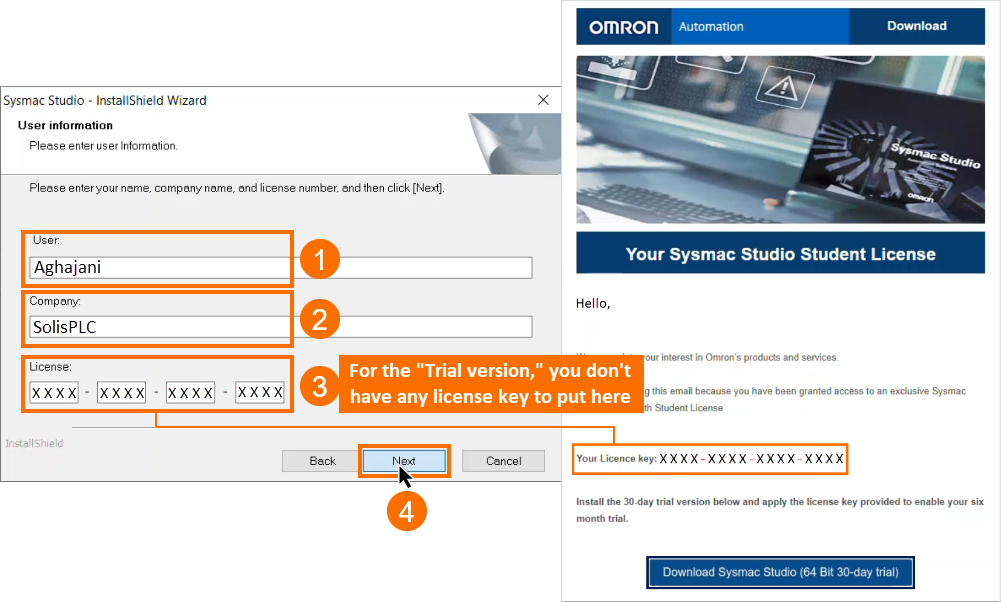
When the "User information" window appears, fill in the "User" name and "Company" name as desired. If you want to use "Student edition" software, be sure to type the correct license number from the email supplied to you by Omron and then hit the "Next" button. Remember that if you want to use the "Trial version" software, there won't be a license key to put here; just disregard the licensing fields and click the "Next" button.
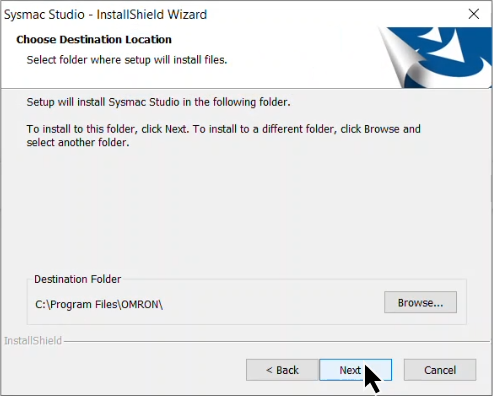
Upon completion of the instructions, a lengthy installation procedure will commence, requiring your input on occasion.
In the next step, installation of the Basler Pylon, DirectX, Visual Studio 2012 VC++ Runtime, Sentinel Protection, CXServer Driver Management Tool, CXServer Device Driver, and Sysmac Studio software will be done. Given that your input is not required for a while, you can take another break in this step.

Upon completion of the installation preparation, you will encounter the following three windows, asking you to install Omron Corporation modems, ports (COM and LPT), and NA5-V1 USB client x64 driver. Choose the "Install" button to proceed with the installation.

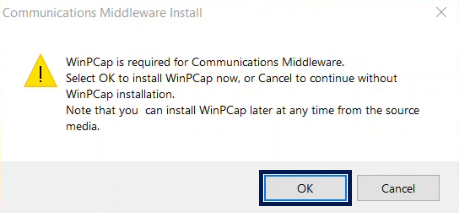
A pop-up window displays and asks you to install WinPCap, which is required for Communications Middleware. You can ignore it and install it later from the source media, but it's recommended to install WinPCap now by pressing the ok button.
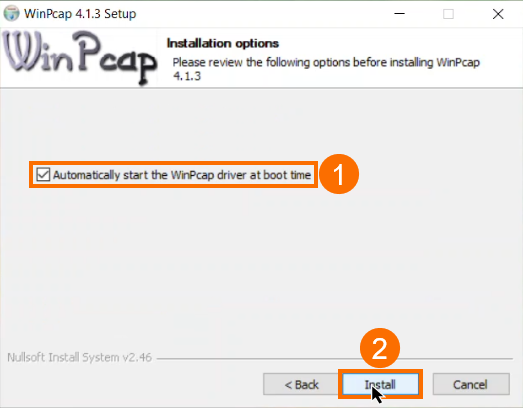
The setup wizard will guide you through the entire WinPCap installation. When you encounter the installation options window, keep the box checked to start the WinPCap driver at boot time automatically and hit the install button.
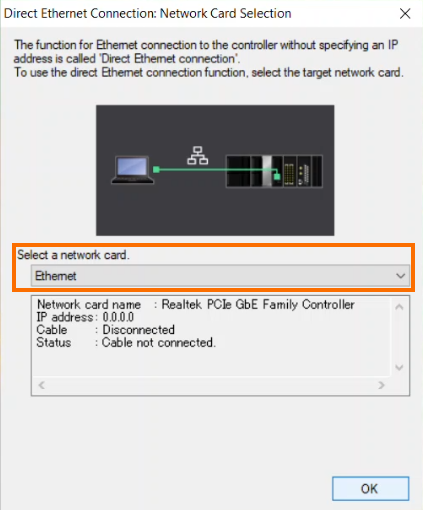
Select the Ethernet as your network card to use the direct Ethernet connection function and press the ok button. The function for Ethernet connection to the controller without specifying an IP address is called "Direct Ethernet connection."
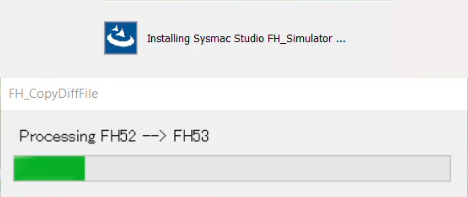
In continuation, the installation of "Sysmac Studio FH_Simulator" will be started.
Finally, the last window of InstallShield Wizard pops up and notifies you that it has successfully installed Sysmac Studio, but a reboot is necessary, as it is with most new software installations.

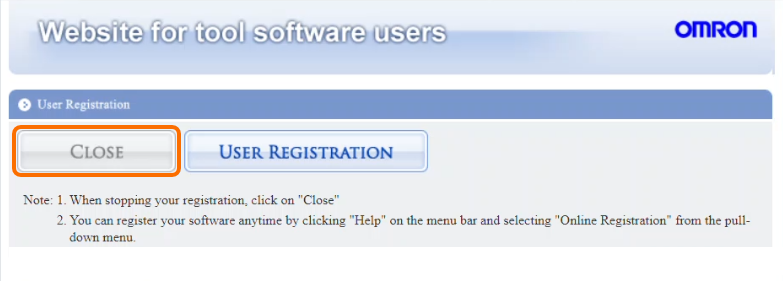
After restarting your computer, you will be prompted to register. Your "Student edition" can run without registration, which you can complete later. So, for now, select the "Close" button. This window won't appear if the "Trial version" is installed and the license key is not entered during the installation. Don't be concerned; it's not a huge problem, and, as previously said, registration may be completed at any moment.
Launching Sysmac Studio
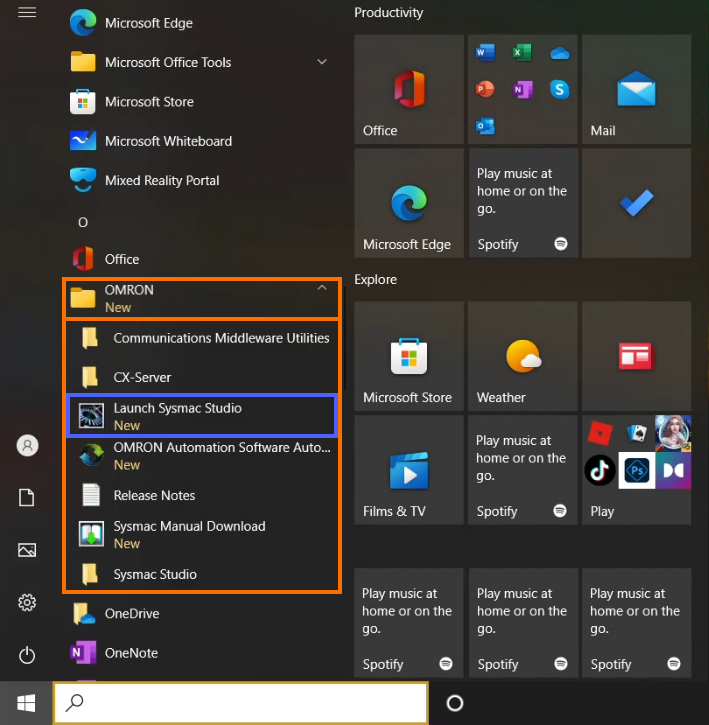
Now is the time to start Sysmac Studio software. When you open the Windows Start menu, scroll down to find and expand the Omron folder and then left-click on "Launch Sysmac Studio."
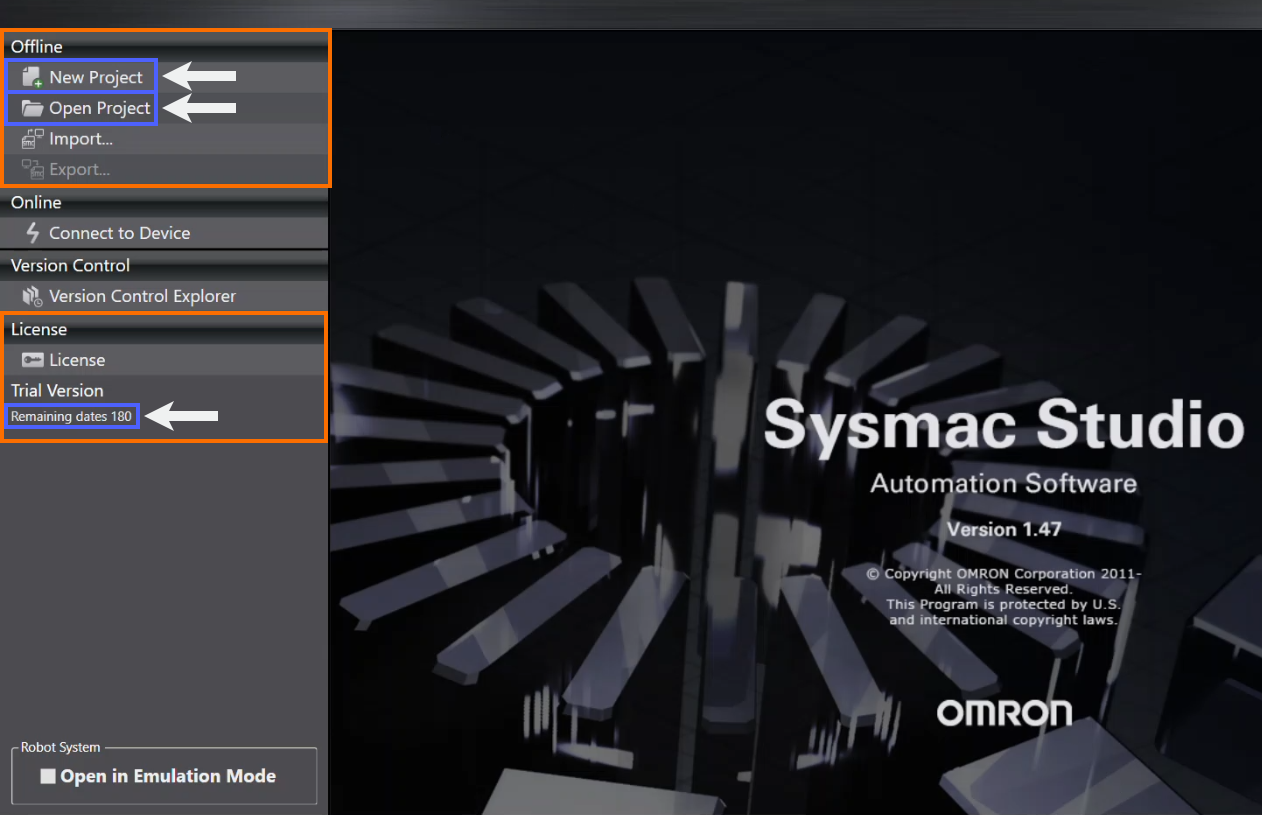
Since you have proceeded through the startup process, it's time to start exploring the main sections of Sysmac Studio software. The "License" section is a crucial area to pay attention to on the opening screen. Here you can check how long your license will be valid to use all software features.
"New Project" and "Open Project" are located on the initial screen's upper left-hand side. Here, you can create new projects or access previously developed projects.
Now, you are getting familiar with displays that can only be viewed once a "New Project" has been established. There are two main displays in Sysmac Studio: "Configurations and Setup" and "Programming." The "Multiview Explorer," located on the opening screen's left side, gives us access to these displays.
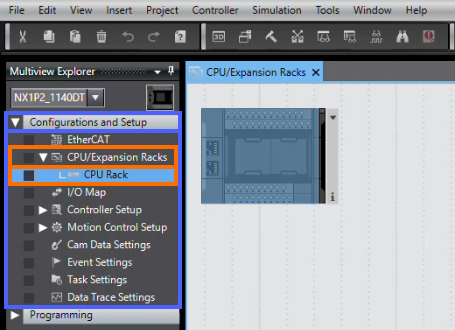
The "Configuration and Setup" display will be examined first. Once you click the arrow next to this tab, a list of additional items will appear. Expand the "CPU/Expansion Racks" item and double-click on "CPU Rack" to display an image of your previously configured controller.
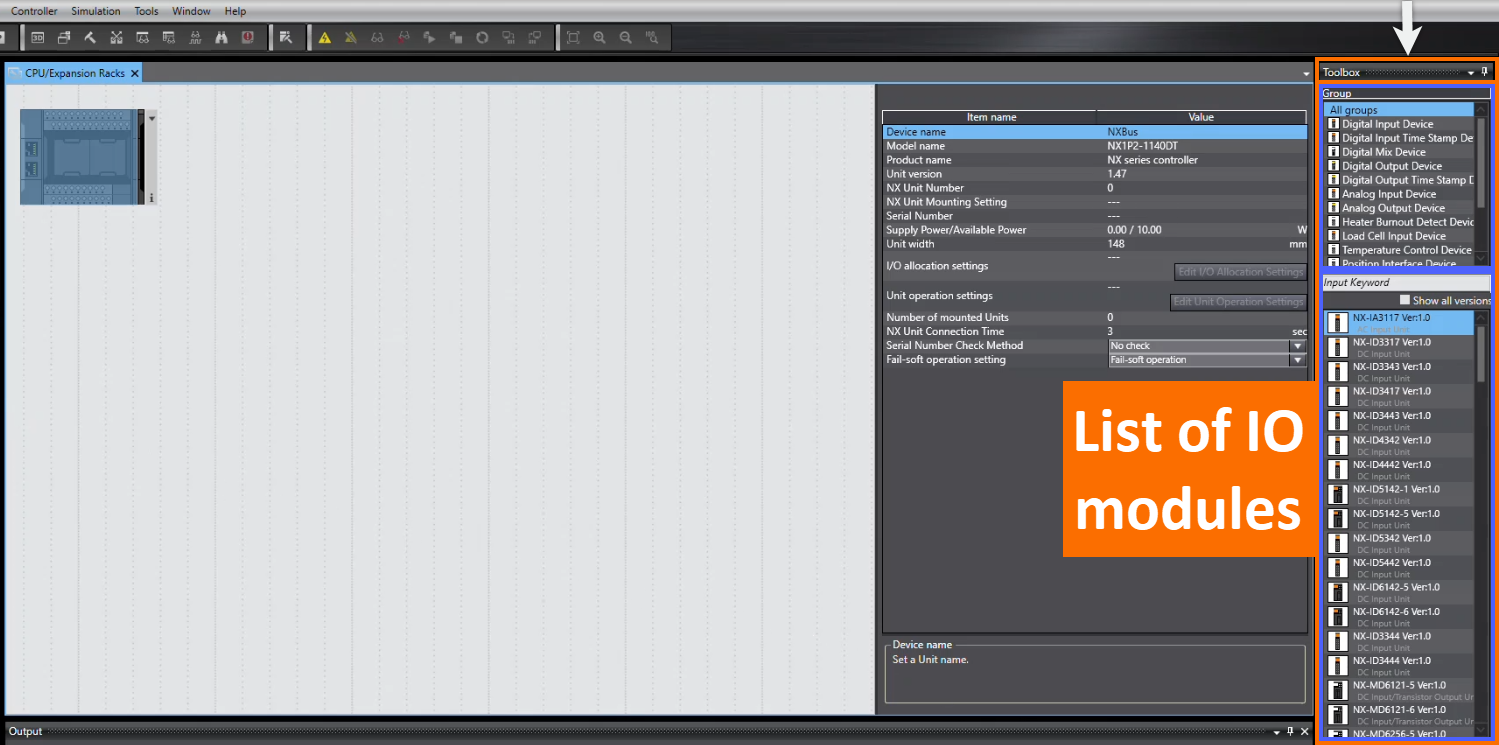
On the right side of the screen, a "Toolbox" will appear with a list of available input and output cards and other devices that may be attached to the controller.
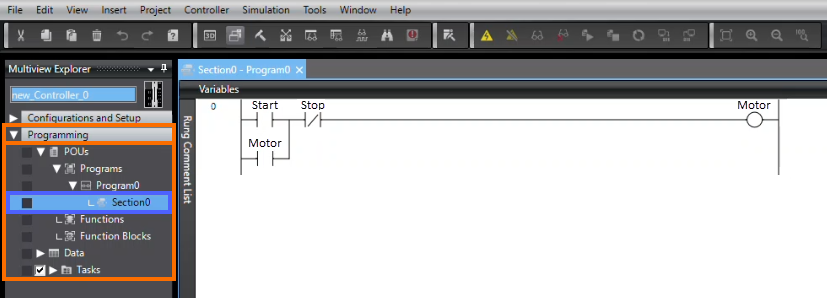
The "Programming" display is the other important screen you will examine. Once you click the arrow next to the "Programming" tab, a list of new items will appear. Expand the "Programs" item so that "Program0" can be visible, and then "Section0" can be found underneath the "Program0" item. After double-clicking "Section0", any ladder logic program that has been previously saved will display in the Edit Pane.
Conclusion
This tutorial discussed how to download Omron Sysmac Studio software. If you are a student in North America, you can download the "Student edition" of the software with a 6-month license key provided through an email by Omron. But, if you are not a student or live outside of North America, you can download the "Trial version" of the software and use it with unrestricted access for 30 days.
Also, you learned how to install Omron Sysmac Studio on your personal computer, and you understood the difference in installation procedures between the "Trial version" and "Student edition" is to enter the correct license number in the licensing field.
Finally, you learned how to launch Omron Sysmac Studio and got familiar with two main displays in this software: "Configurations and Setup" and "Programming." From the "Configurations and Setup" display, your controller hardware configuration can be done, and from the "Programming" display, you can write a program for your controller using standard PLC programming languages.
