Securing Communications in Siemens TIA Portal using TLS Encryption

Introduction
This tutorial concludes the TIA Portal cybersecurity series. Check out the previous tutorials: Securing your Projects and Programs in Siemens TIA Portal, Securing your PLC Hardware in Siemens TIA Portal, and Securing your HMI in Siemens TIA Portal.
In the previous tutorials, we studied the three first layers of security available within the TIA Portal environment. The first was about software protection, the second was about PLC securing, and the last was about the HMI securing. In this tutorial, you will learn the final layer of protection which is securing communications.
Many cyber attacks can take advantage of unsecured communications between a PLC and an external device (like a server for example). To ensure the integrity and authenticity of the data exchanged, we will use the TLS (Transport Layer Security) protocol, which is the most widely used security protocol. It consists of a key-based encryption algorithm (EC or RSA), each communication partner has its unique public and private key, and trusted devices share their relative keys using a certificate system. Each device generates a signed certificate that must be imported into all other partner devices. Certificates are used to identify upcoming communications and confirm their authenticity.
To illustrate how the configuration is done, we will use two different PLCs located in two different projects. Note that any of these two PLCs can be substituted with any other device supporting the TLS protocol. The principle of creating, exporting, and importing certificates will be the same.
Prerequisites:
To follow this tutorial, you will need an installation of TIA Portal. We will be using TIA Portal v17, but you can use any other version. No additional hardware or software is required.
Creating a secured project and generating TLS Certificates in TIA Portal
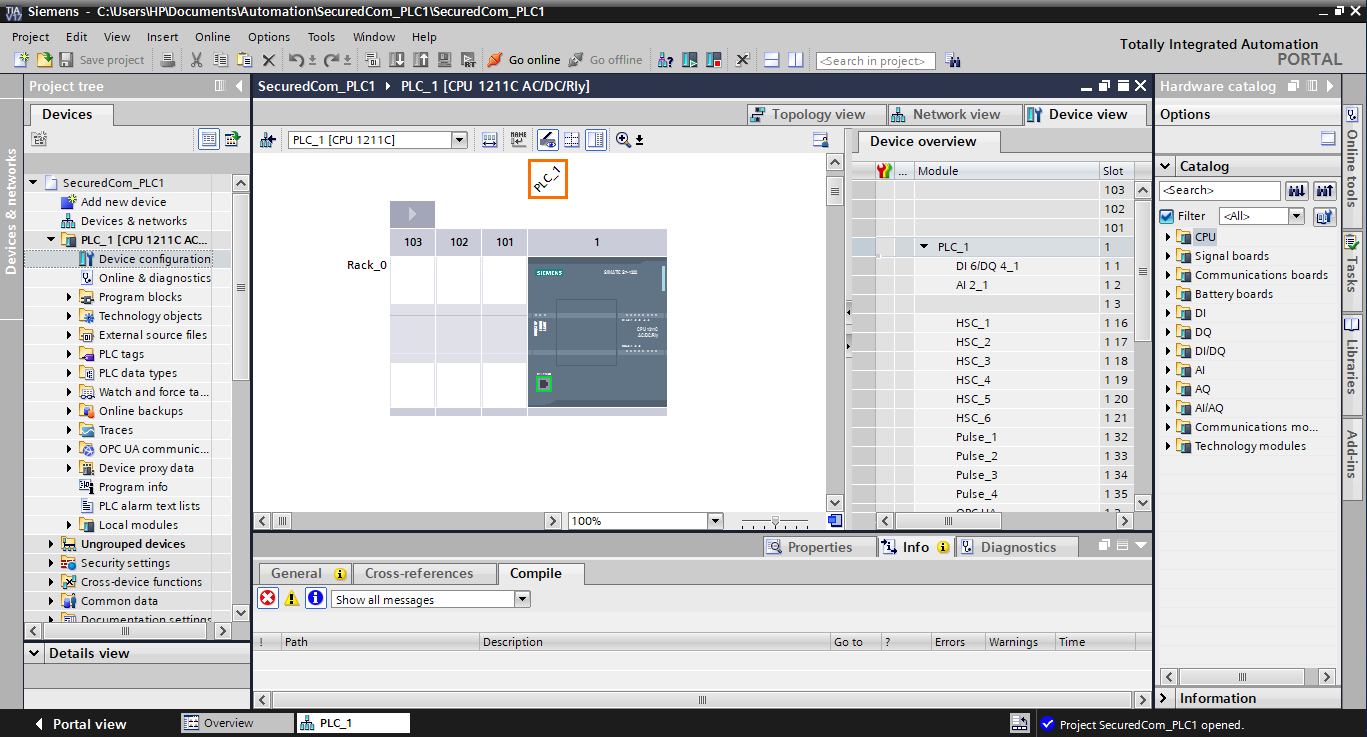
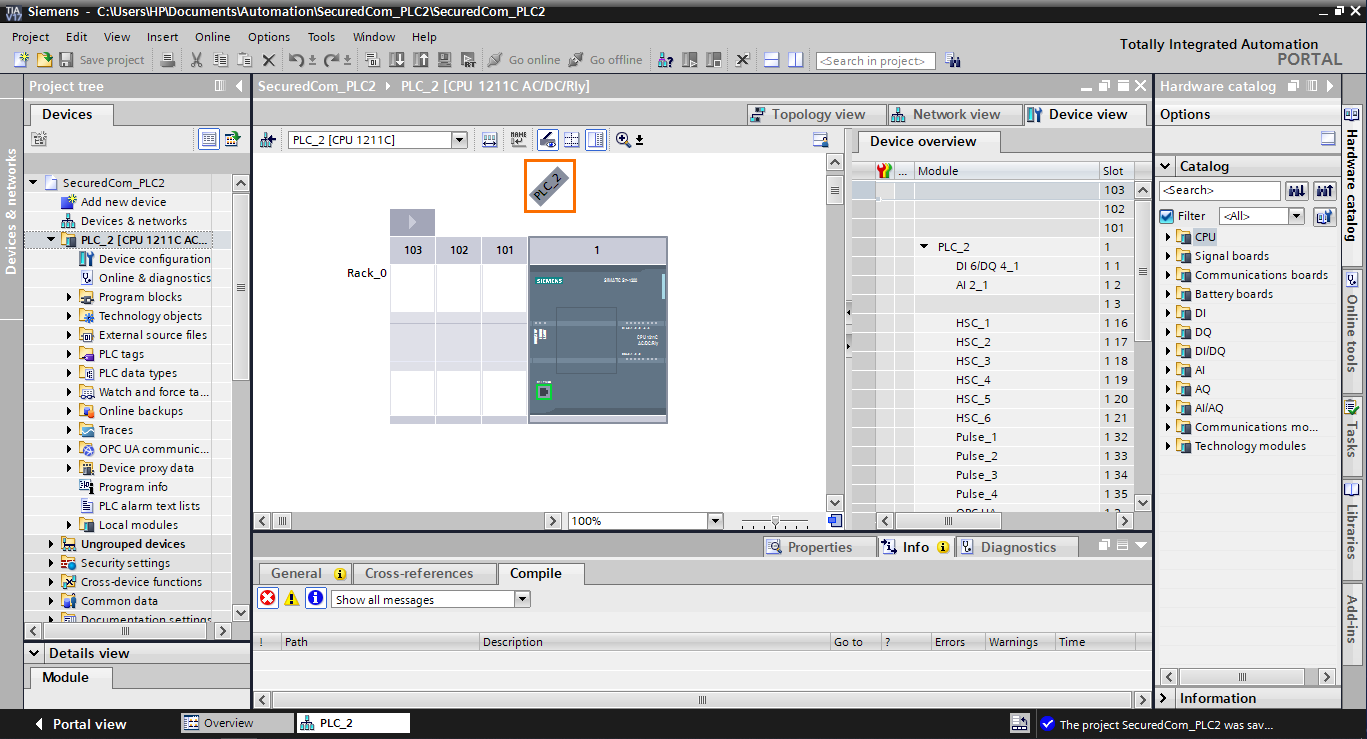
Let’s start by creating two different projects and adding the CPUs of your choice. I selected the simplest model of S7-1200.
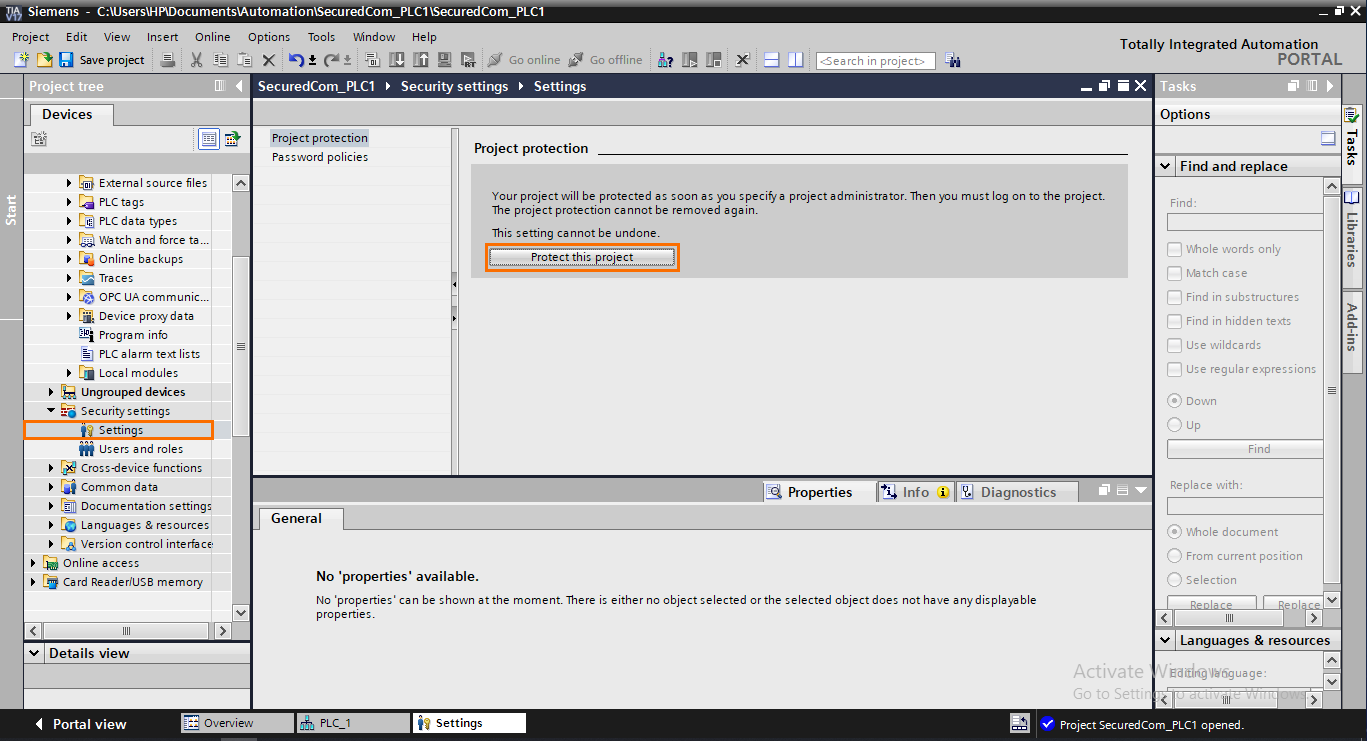
Next, protect both projects by opening the “Security features” tab in the project tree. Then, click on settings followed by “protect this project. You can learn about this step in the Securing your Projects and Programs in Siemens TIA Portal tutorial.
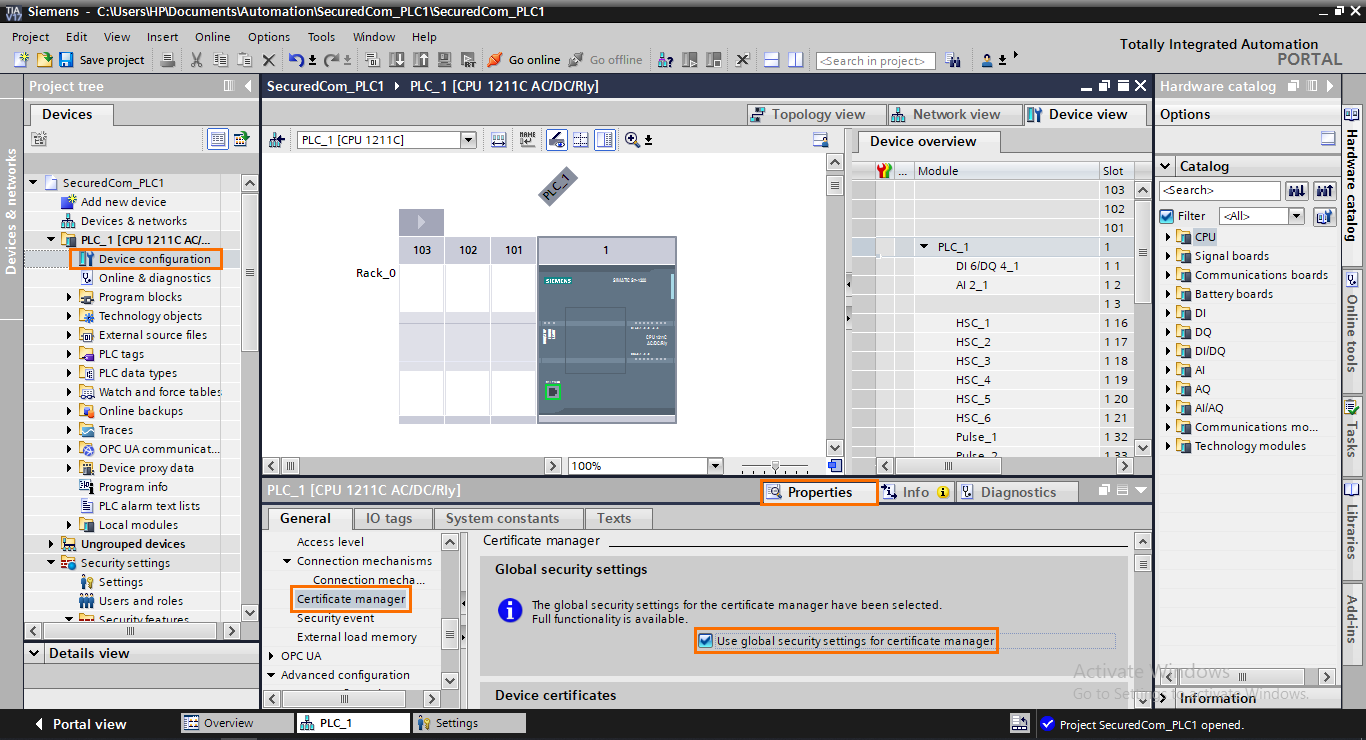
Once done, return to the first PLC project, and open the device configuration. In the properties tab, open the “Certificate manager” section and check “Use global security settings for certificate manager”. Using the global certificate manager is way more convenient and avoids mistakes when using local certificates.
Now open the “Certificate manager” under the “Security features” in the project tree.

Once in the certificate manager, bring your attention to the two certificate authorities (CA) available in your software. TIA Portal includes two certified CAs you can use to sign your certificates. Always use certified CAs in your projects to ensure your secured communications' reliability.

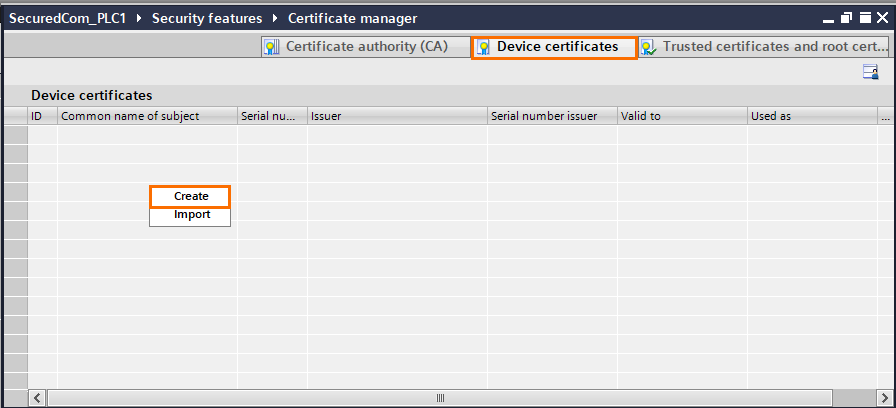
Now, let’s create a signed certificate. Open the “Device Certificates” tab, right-click anywhere and click on “Create”
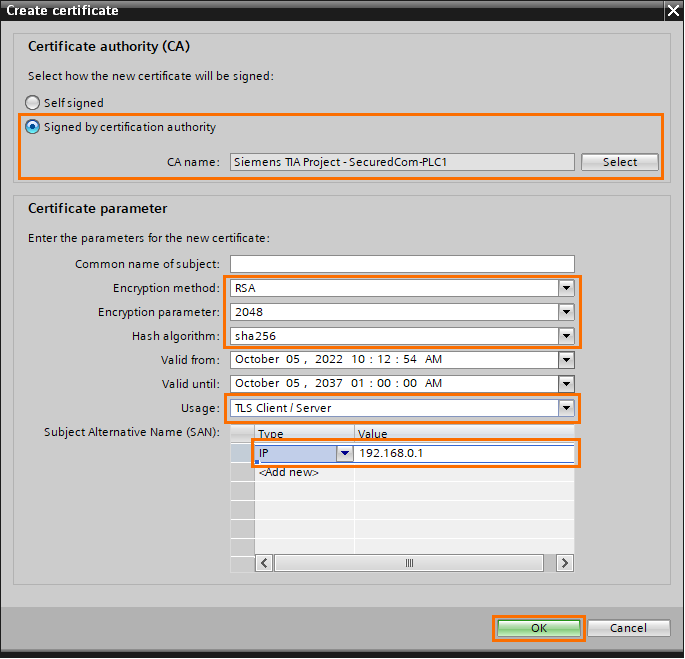
First, select the CA (from the CAs available in TIA or by importing a CA from a trusted source), then select the certificate parameters according to your application. There are 2 encryption types available; EC and RSA. You can define the type of encryption and hash algorithms in the “Encryption parameter” and “Hash algorithm” sections. You also have to specify the certificate's usage and the device's IP address.
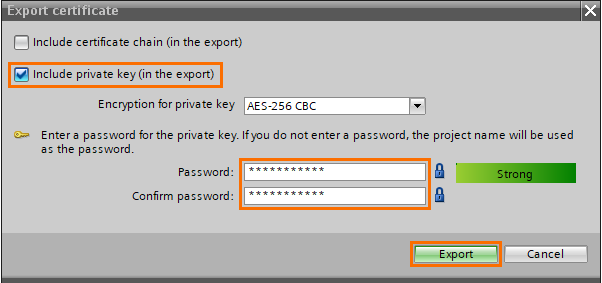
The certificate has been created and its ID number is 3. To use this certificate on another device, we must export it as a file. Right-click on the newly created certificate and click on “Export”.

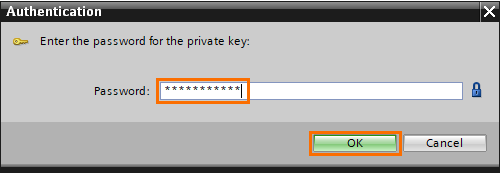
An “Export Certificate” window will appear. Check the “Include the private key (in the export)” box. You must define a password to protect the certificate, if you don’t edit the password, the one defined for your project protection will be used.
Then, select the folder where you want to save your certificate file and the type of file. There are three main formats of certificate files :
- PEM based (.pem): Mainly used in Apache and Unix/Linux environments.
- DER based (.der/.cer): Mainly used in Java environments.
- P12 based (.p12): Mainly used in windows environments.

Repeat all these last steps to create and export the signed certificate of the second PLC. Once done, you should have two certificate files, one for each PLC.

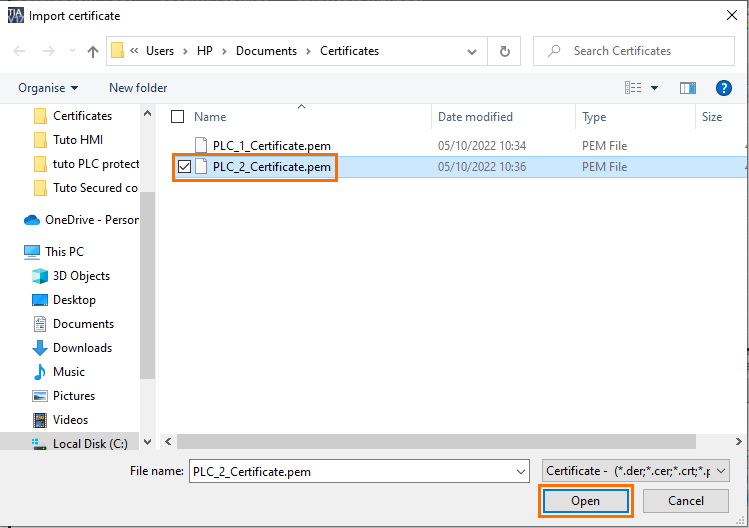
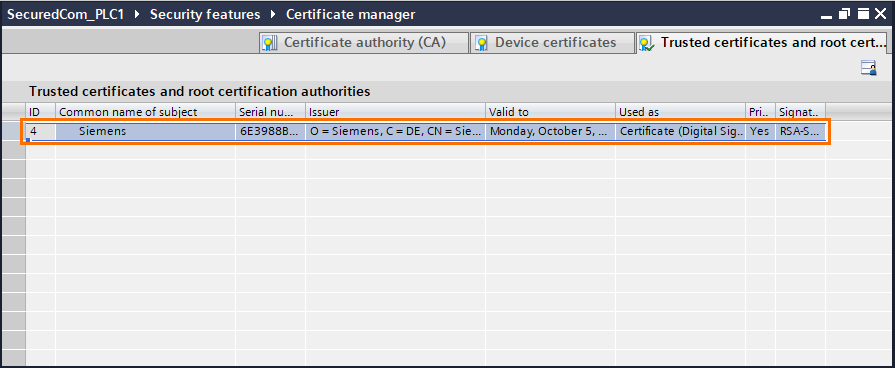
The last step is to import each certificate to the other PLC. Go back to the Certificate manager of the first PLC, open the “Trusted certificates and root certificates” tab, and right-click anywhere. Then, click on “Import”.

Select the certificate of the second PLC and click on “Open”.
Enter the certificate’s protection password (If you didn’t modify it, it should be the same as your project password).
The PLC2 certificate has been added to the PLC1 project and has ID number 4.
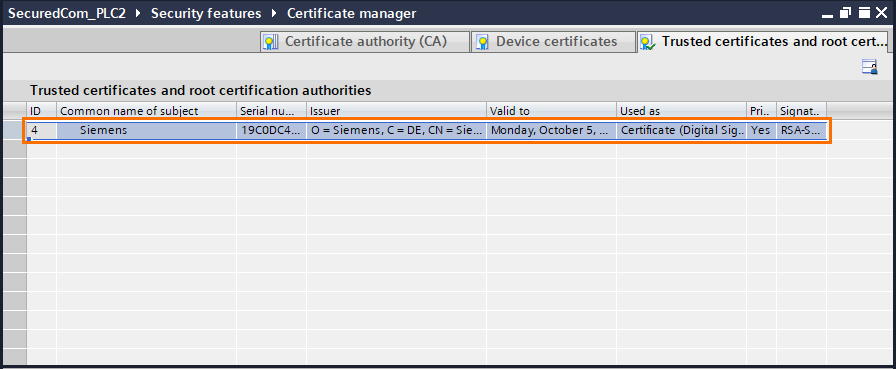
Repeat these last steps to import the PLC1 certificate to the PLC2 project.
Establishing secured ProfiNet communications using TCON_IP_V4_SEC
Now that we’re done with the certificates, let’s program the communications. We’re going to use the Open User Communications instructions. You can refer to Open User Communication in Siemens TIA Portal tutorial for more details.
Instead of configuring the communication block in the instruction parameters, we have to manually create a DB (Data Block) and insert a certain data type called “TCON_IP_V4_SEC”. This data type contains all the parameters required to establish secure communications over IPv4.
First, we need to create the data block. Click on “Add new block” in the Project tree.
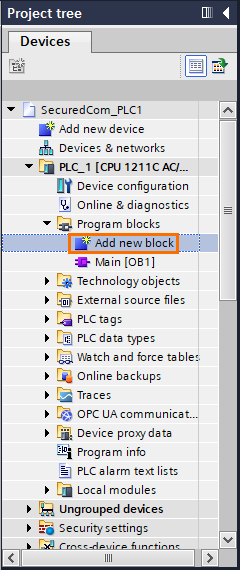
In the “Add new block” window, select “Data Block”, give it a name, and click on “OK”.

Now open in the newly created DB by double-clicking on it in the Project tree.

Inside the DB, create a new variable, give it a name, and type “TCON_IP_V4_SEC” in the Data type section. Then, press “Enter”.
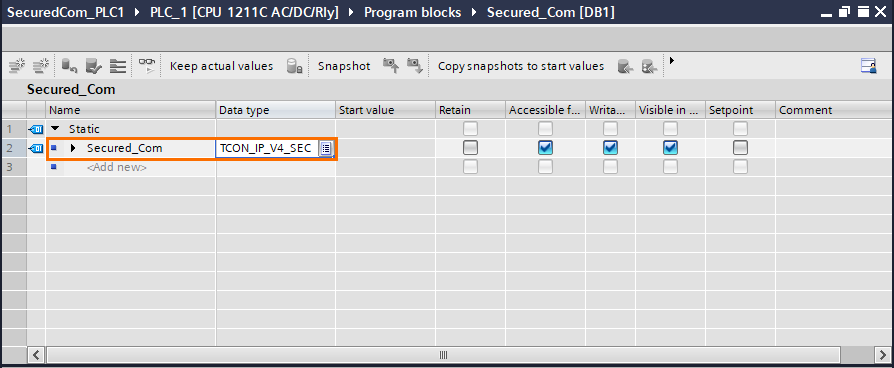
Open the content of the entire structure by clicking on the small black arrows. You will see all the parameters of the secured communication.
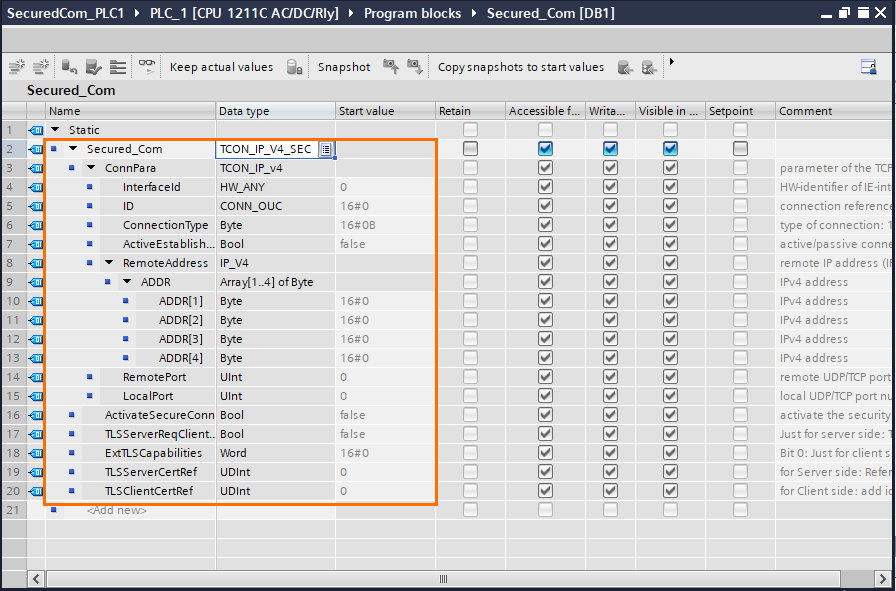
The parameters we need to edit are:
- ID: Defines the Profinet ID of the communication.
- ActiveEstablishment: Defines if the device is a client or a server (False = Server / True = Client).
- ADDR 1 to 4: IPv4 Address over four bytes of the partner device.
- RemotePort: Port of the partner device. In the Siemens S7 PLCs, ports start at 2000.
- LocalPort: Port of the current device. In the Siemens S7 PLCs, ports start at 2000.
- TLSServerCerRef: ID of the server certificate (PLC2).
- TLSClientCerRef: ID of the client certificate (PLC1).
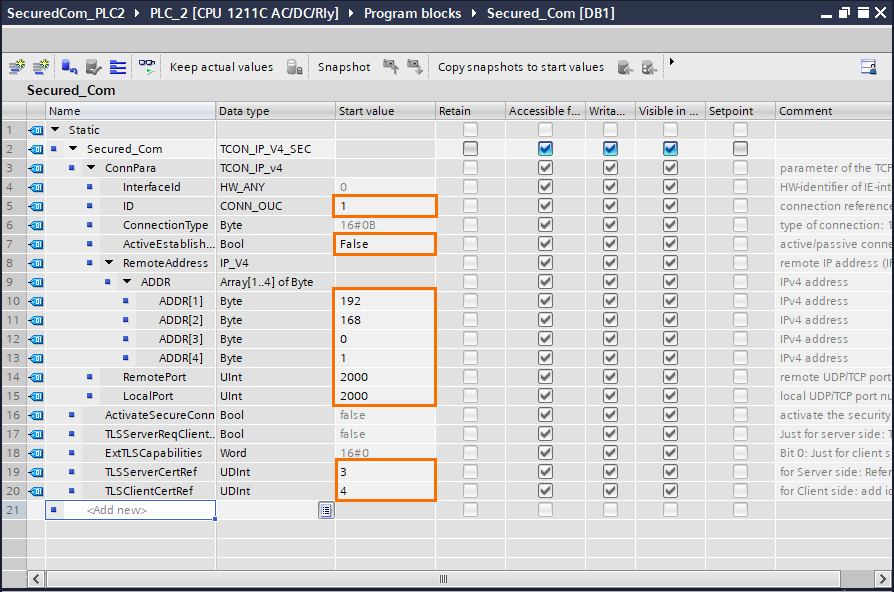
Edit the parameters (of PLC1) as follows.

Then, repeat these last steps for PLC2 and edit the parameters as follows.
The final step is to program the communication. To do this, we’re going to use the compact communication instructions “TSEND_C” and “TRCV_C”. The following step applies to both PLC1 and PLC2.
Open the main program (OB1) and drag-and-drop TSEND_C and TRCV_C instructions. You can find these instructions in the Communication/Open User Communication folder. Then, edit the parameters as follows.
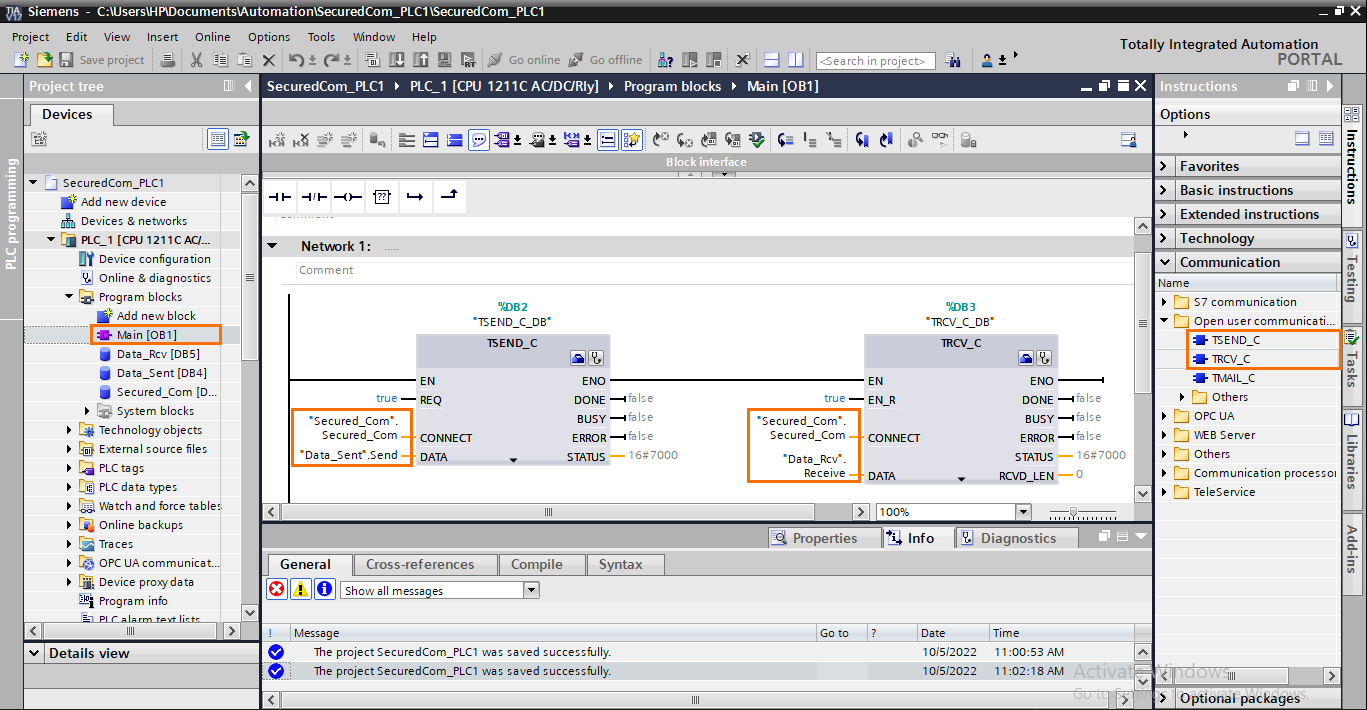
- The CONNECT parameter must contain the TCON_IP_V4_SEC created in the DB (following this syntax “DBName”.StructureName).
- The DATA parameter contains the memory location you want to send or receive in.
Conclusion
In this tutorial, you learned how to secure your communications using the TLS protocol within TIA Portal.
By protecting your communications using an encryption-based protocol, you close the door to the majority of cyber attacks from external sources. In addition to the other three layers of security, your system should be safe from the most common threats.
To protect against more specific and targeted attacks, several other security tools such as firewalls and VPNs exist. To obtain total and reliable protection, it is possible to rely on the IEC 62443 standard which governs industrial cyber security. You will find more details on all the practices to adopt to certify a system against cyber threats.
